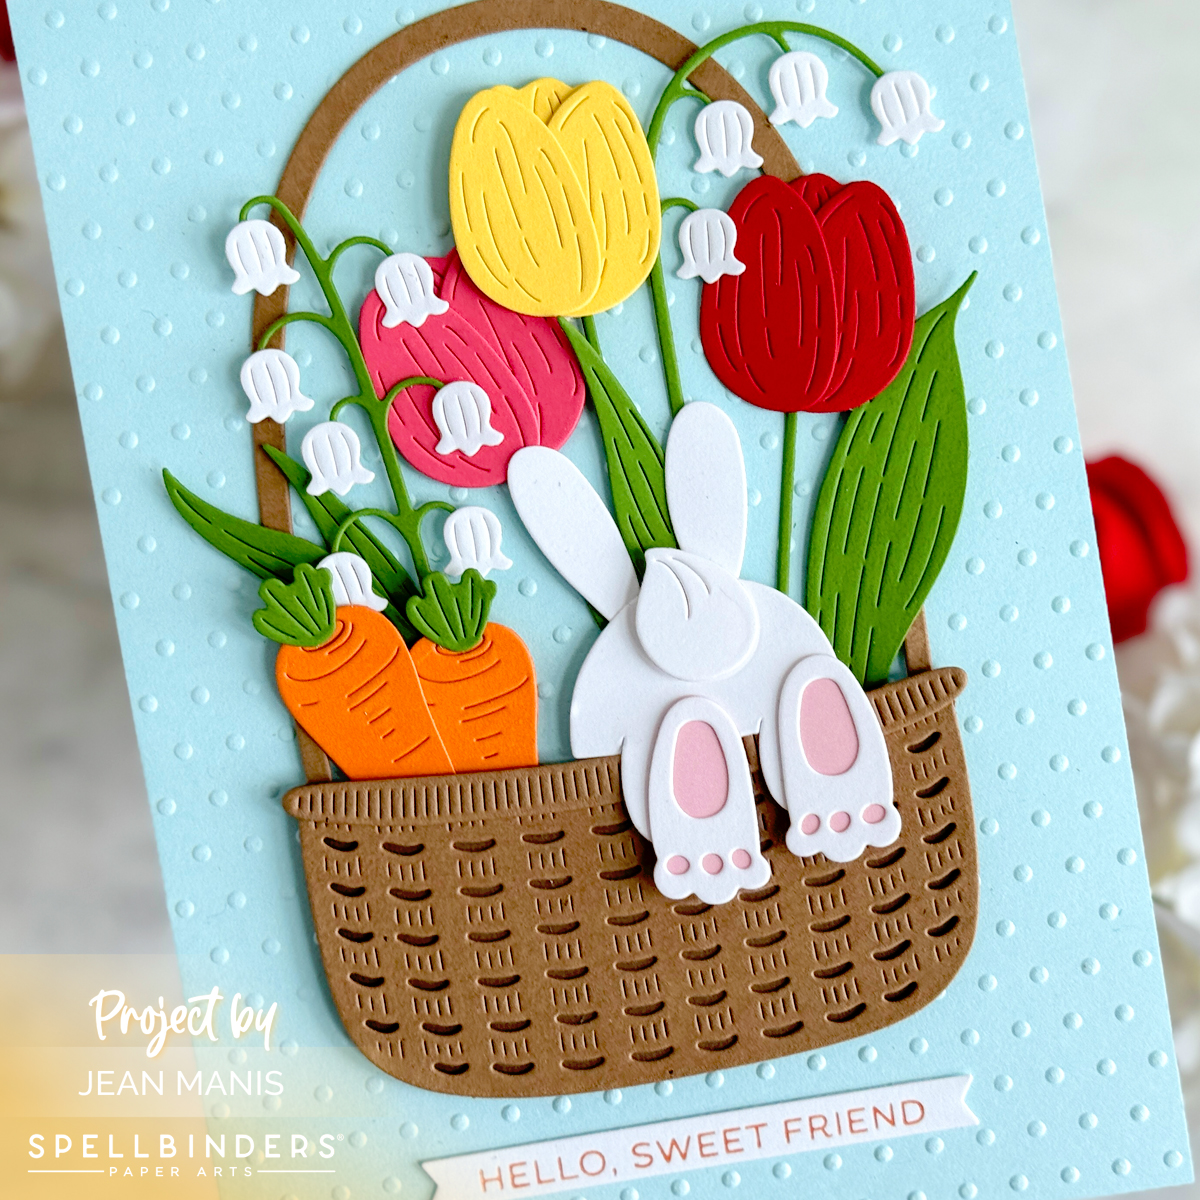
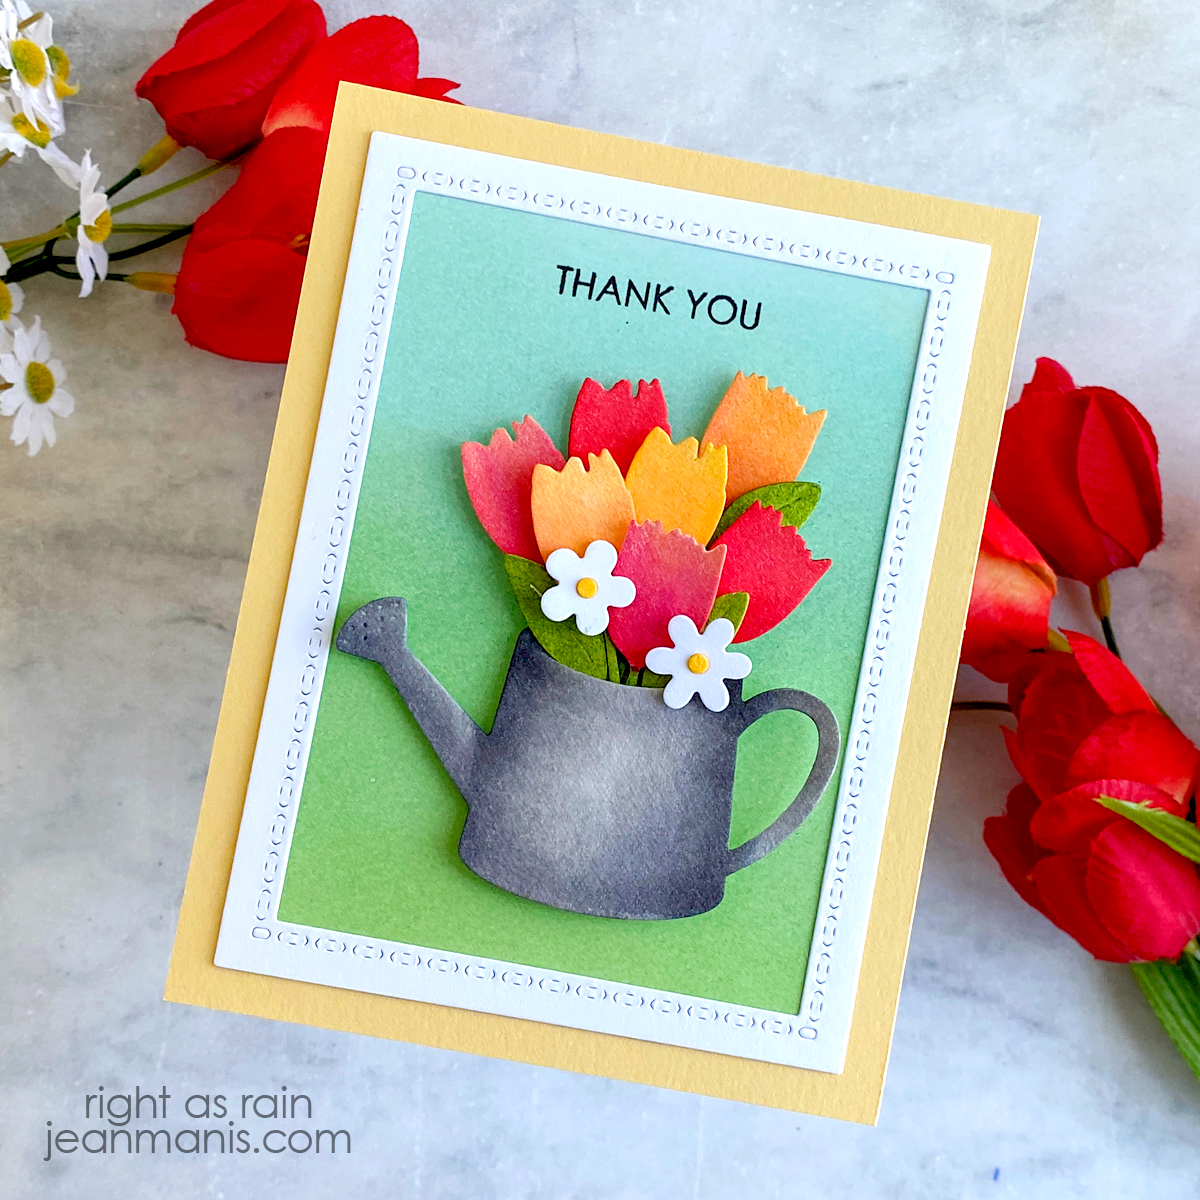
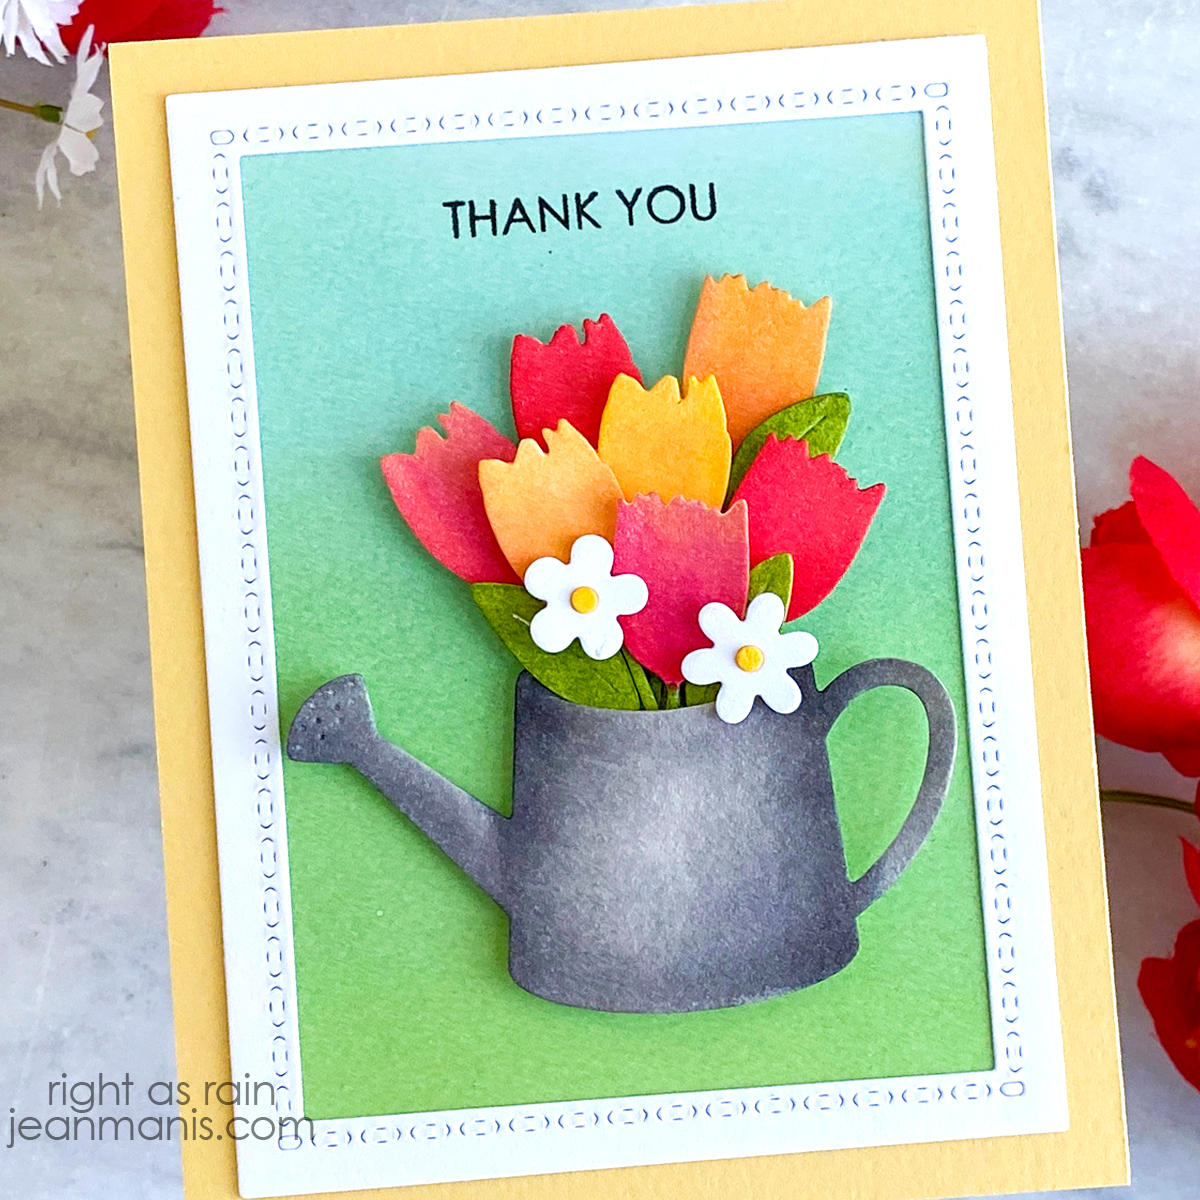
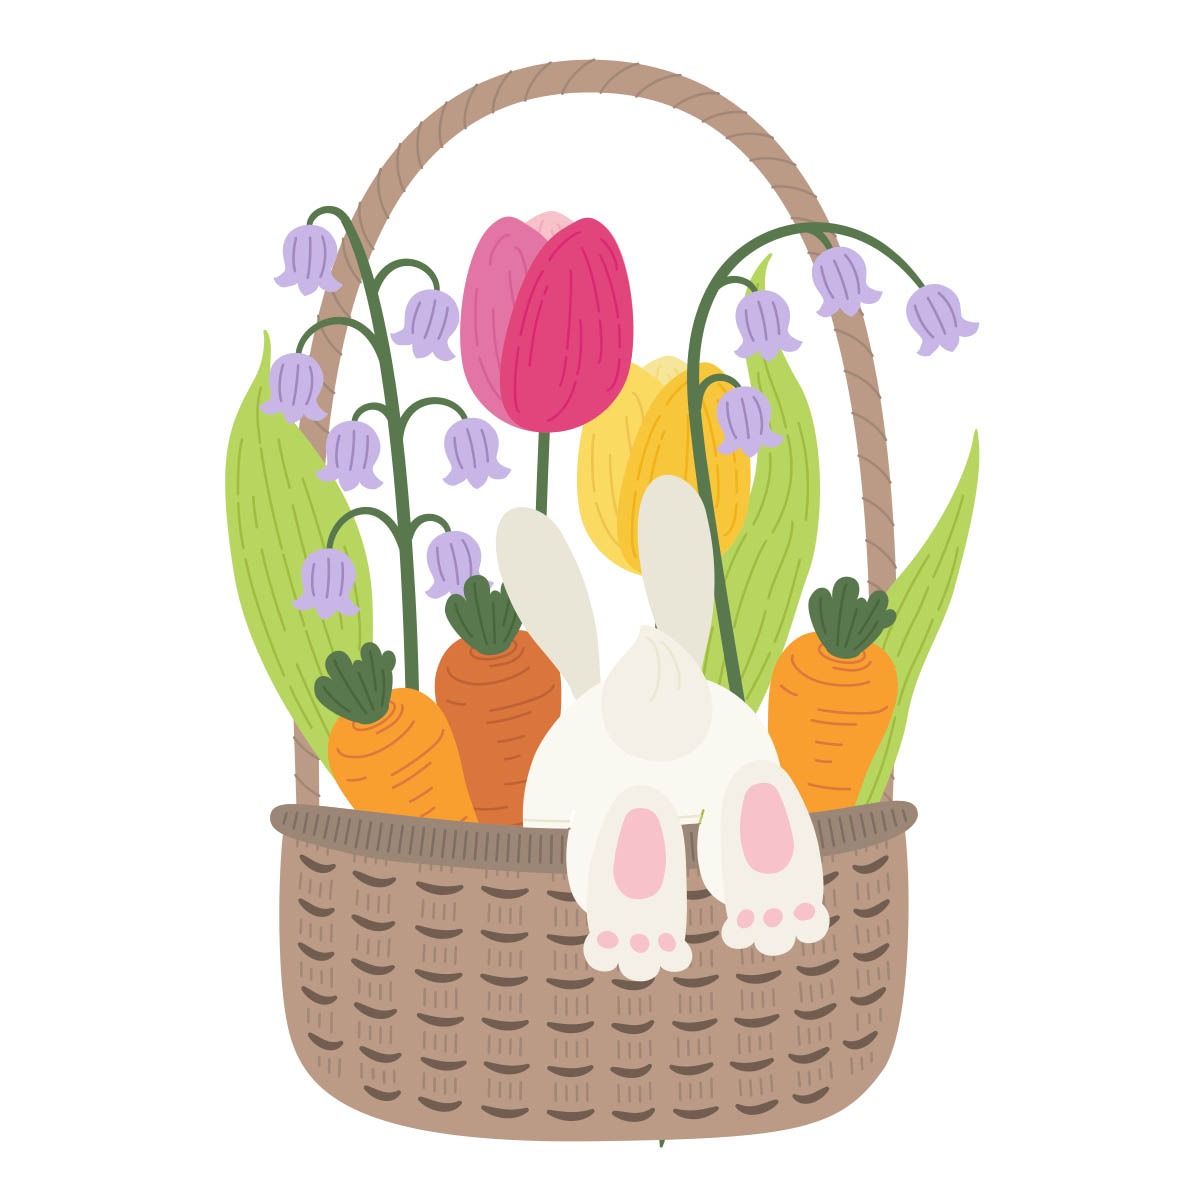
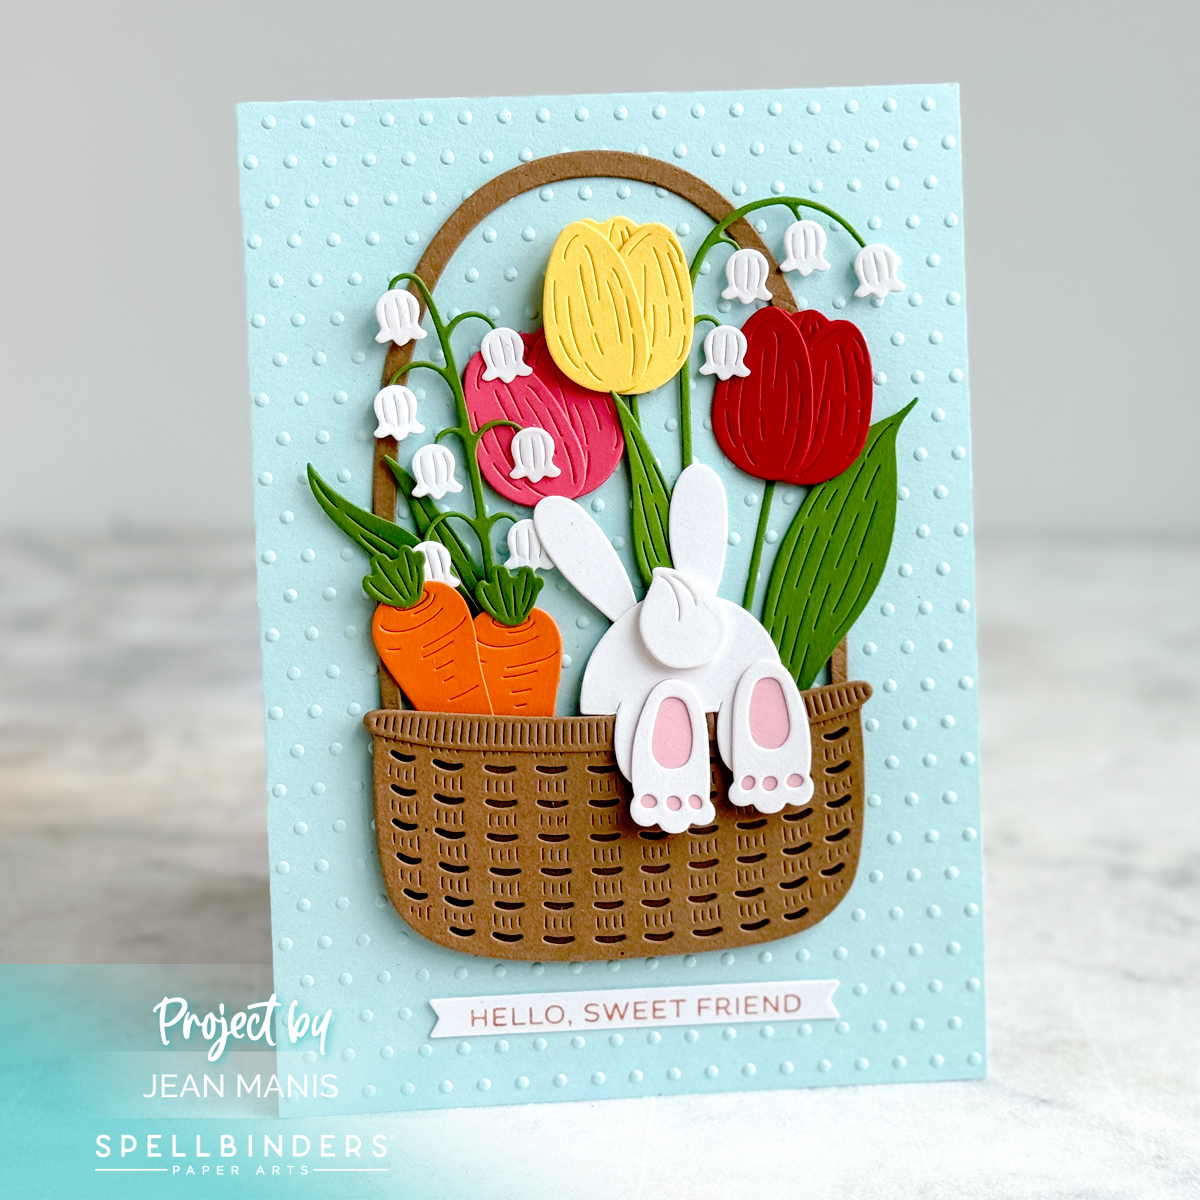
Penny Black | Thank You Bouquet

Hello! Today I am sharing a card created combining Penny Black supplies – dies, background stamp, and clear stamp set. I previously created similar cards that can you see here and here.

I primarily used Bazzill Card Shoppe cardstock on this card. The specific colors are listed below. I have found starlitstudio.net to be a great resource for Bazzill Card Shoppe.

Penny Black | Thank You Bouquet

  • Stamp Enlightened background on Citrus Slice card base with Memento Cantaloupe ink for a tone-on-tone look.
  • Cut Creative Curves from Robin’s Egg cardstock; back with Jawbreaker panel.
  • Cut Daisy Delight from white and Caramel Apple cardstock. Trim off blooms and add to stems. Color centers of flowers with Copic markers Y 32 and Y 38.
  • Cut Penny Black Mason Jar (available on the Penny Black website) from Sea Glass cardstock. Cut a slit in the jar for the stems; color with Distress Oxide ink for dimension. Slip assembled flowers through the slit and tape on back. Tie natural twine around the top.
  • Stamp Flower Teddy sentiment on white cardstock in black ink. Trim with banner die.
  • Add Creative Curves assembly to card base. Add assembled jar and flowers. Add sentiment strip. Embellish with butterfly cut with die in the Penny Black Flights of Fancy set (available on the Penny Black website).

Penny Black | Thank You Bouquet

Supplies: Penny Black Daisy Delight, Creative Curves, Flights of Fancy and Mason Jar die sets; Penny Black Flower Teddy and Enlightened stamp sets


Rubbernecker | April 2022 Release

Hello! I am delighted to share two CAS cards created with new dies in the April Rubbernecker release, which includes cover plates, garden dies, and stamp sets.

Rubbernecker | April 2022 Release

The Shed Bird House Add-On die works with the Shed die to create a large birdhouse.

I paired the birdhouse with birds created with the Spring Birds die.

Rubbernecker | April 2022 Release

On both cards, I used a sentiment from the Kittie Says Springtime set.

Rubbernecker | April 2022 Release

The Shed Bird House Add-On die set includes several options for the birdhouse opening and a smaller heart die. I sprinkled several hearts on the patterned-paper background to reinforce the theme.

Rubbernecker | April 2022 Release


Rubbernecker | Flower Cart Scene

Hello! Today, I am sharing a spring-themed card created with Rubbernecker supplies.

Rubbernecker | Flower Cart Scene

Create primary components
  • Cut dog with Set of Dogs from gray, black, and white cardstock; assemble.
  • Cut Cart from white, green, light gray, and black cardstock; assemble.
  • Cut trees with Spring Tree dies from green and brown woodgrain-textured cardstock; assemble.
Create background
  • Stamp Kittie Says Spring Time sentiment on white cardstock in VersaFine Onyx Black ink.
  • Place vellum strip 2 5/16 inches below sentiment. Apply blue ink upwards for sky. Reverse vellum strip and apply gray ink for the ground.
  • Place assembled trees, cart, and dog on sentiment panel to determine where to trim panel to A2-size.
  • Trim panel and attach to card base.
Accessorize and Assemble
  • Die-cut Cart Accessories #1 from cardstock; assemble.
  • Assemble the scene: adhere trees to scene; add cart, add accessories (popping up some with foam adhesive), and add dog with foam adhesive.

Rubbernecker | Flower Cart Scene


Rubbernecker | Flowering Rain Boots

Hello! Today, I am sharing a spring-themed card created with Rubbernecker supplies. I have combined die sets from their recent release with other Rubbernecker die sets.

Rubbernecker | Flowering Rain Boots

  • Cut frame with second largest die in the Inside Scallop Frame set from white cardstock.
  • Stamp Kittie Says Spring Time sentiment in VersaFine Onyx Black ink on blue cardstock.
  • Trim stamped panel and attach to frame. Attach assembly to light orange A2-size card base.
  • Cut Daffodils from cardstock colored with Distress Oxide inks; assemble.
  • Cut Rain Boots from cardstock colored with Distress Oxide inks and white cardstock; assemble. Add black gemstones.
  • Tape daffodils to the back of the boots and add assembly to card.

Rubbernecker | Flowering Rain Boots


Rubbernecker | Mini Slimline Birdhouse Scene

Hello! Today, I am sharing a spring-themed, mini-slimline card created with Rubbernecker supplies. I have combined die sets from their recent release with other Rubbernecker die sets. See my other cards featuring the Large Bird House die set in this post.

Rubbernecker | Mini Slimline Birdhouse Scene

  • Cut frame from white cardstock with the two largest dies in the Mini Slimline Nested with Stitch set.
  • Cut grass with the Slimline Grass die. Trim and adhere to the bottom of the frame on the back.
  • Cut fence from white cardstock with Peak Fence #4 die. Attach to the back of the frame above the grass, leaving room between the two for the daffodils.
  • Stamp Kittie Says Spring Time sentiment with VersaFine Onyx Black ink on light blue cardstock. Trim panel.
  • Attach frame, with grass and fence, to the stamped panel. Add assembly to a mini slimline card base.
  • Cut Large Bird House from cardstock and assemble.
  • Cut Daffodils from colored cardstock and assemble.
  • Tuck bird house behind fence and attach to card background. Slide daffodils between the grass and fence, trimming as necessary, and attach.
  • Cut cat with the Cats die set from black cardstock. Add to card with foam adhesive.
  • Cut two birds from blue cardstock with the Birds set. Add one with glue to the background and the other to the birdhouse with foam adhesive.

Rubbernecker | Mini Slimline Birdhouse Scene