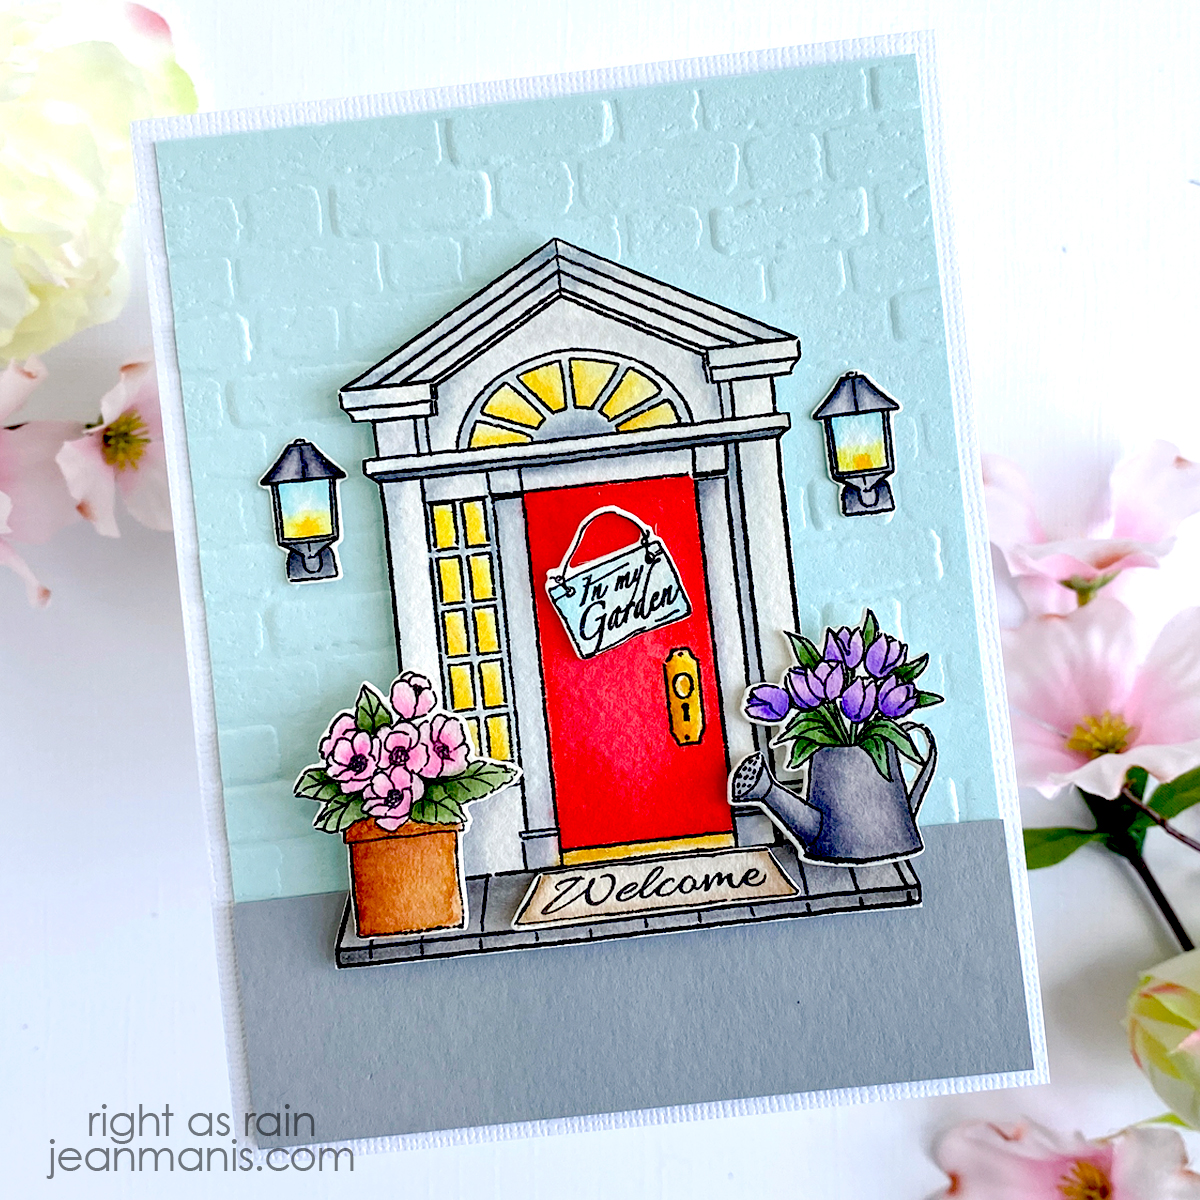
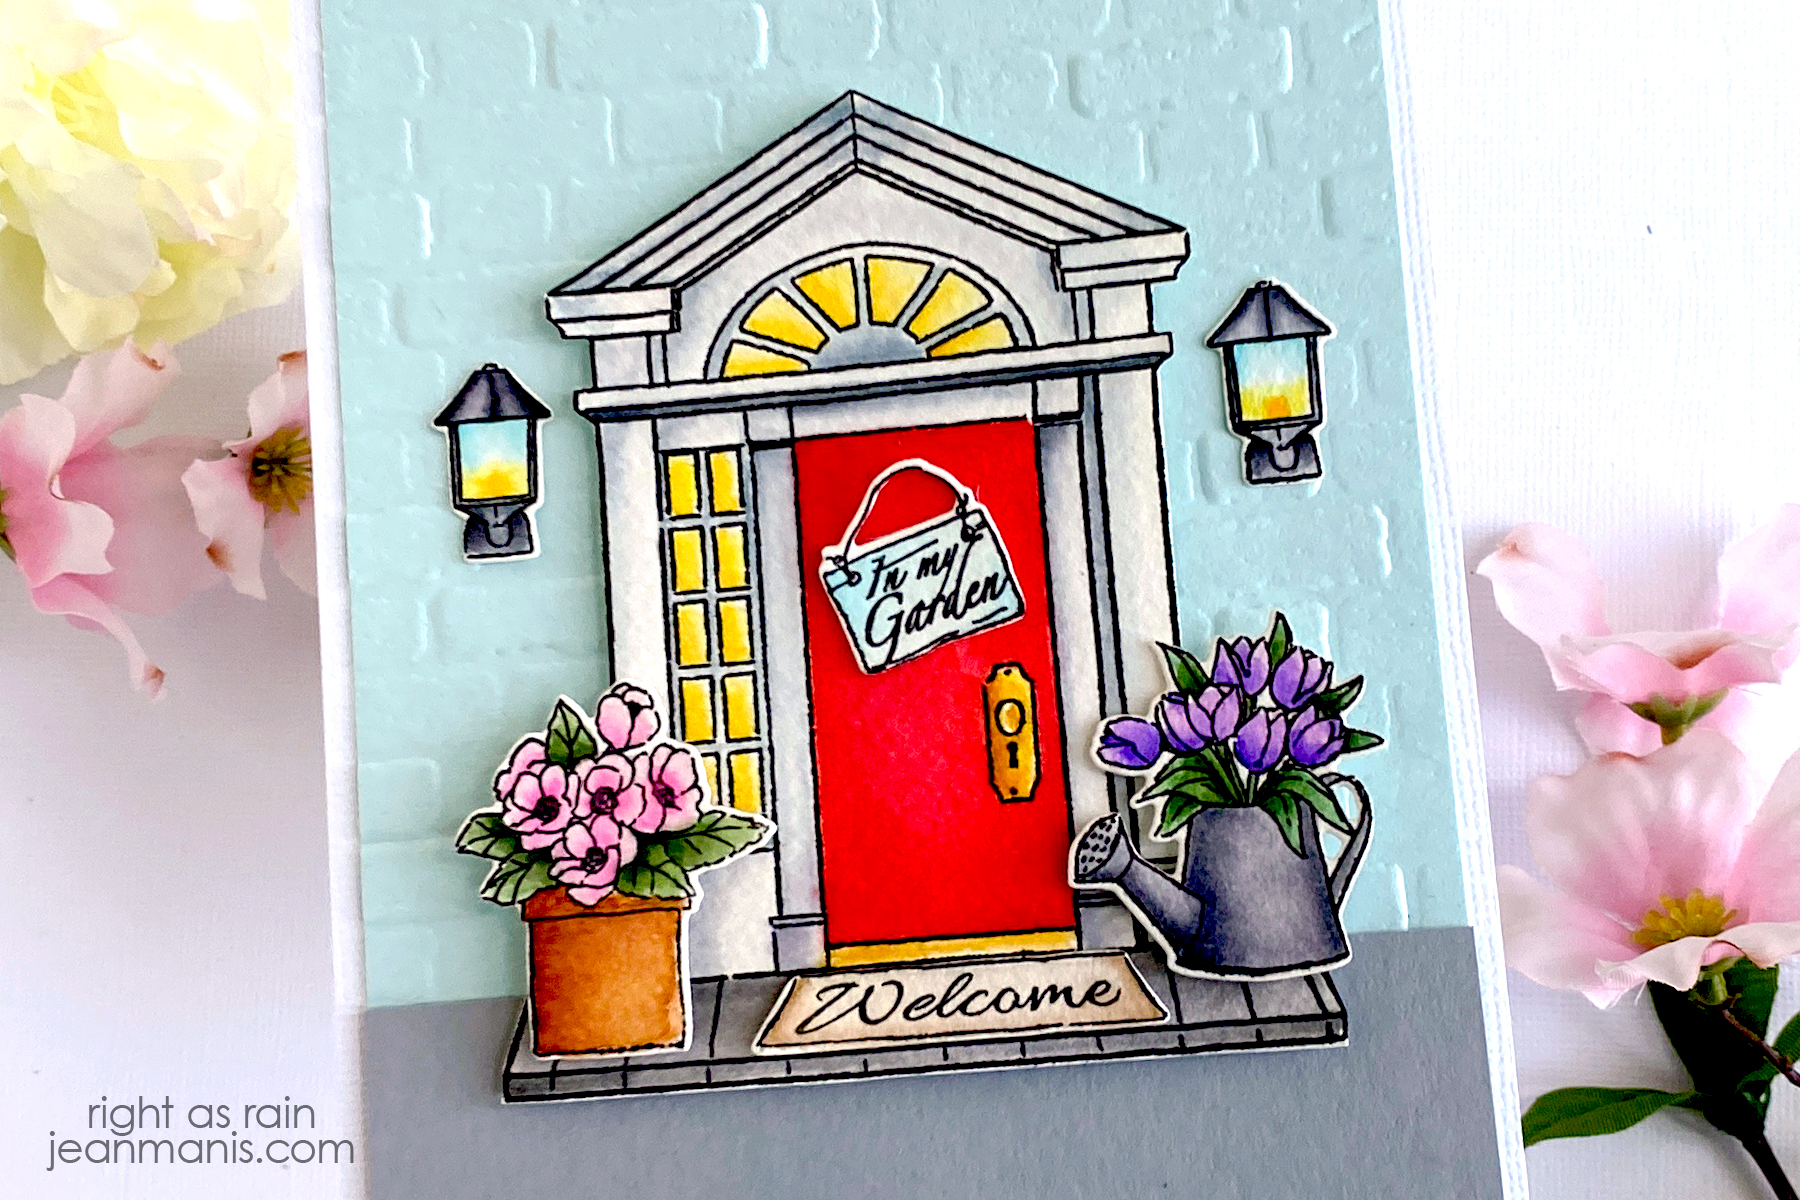
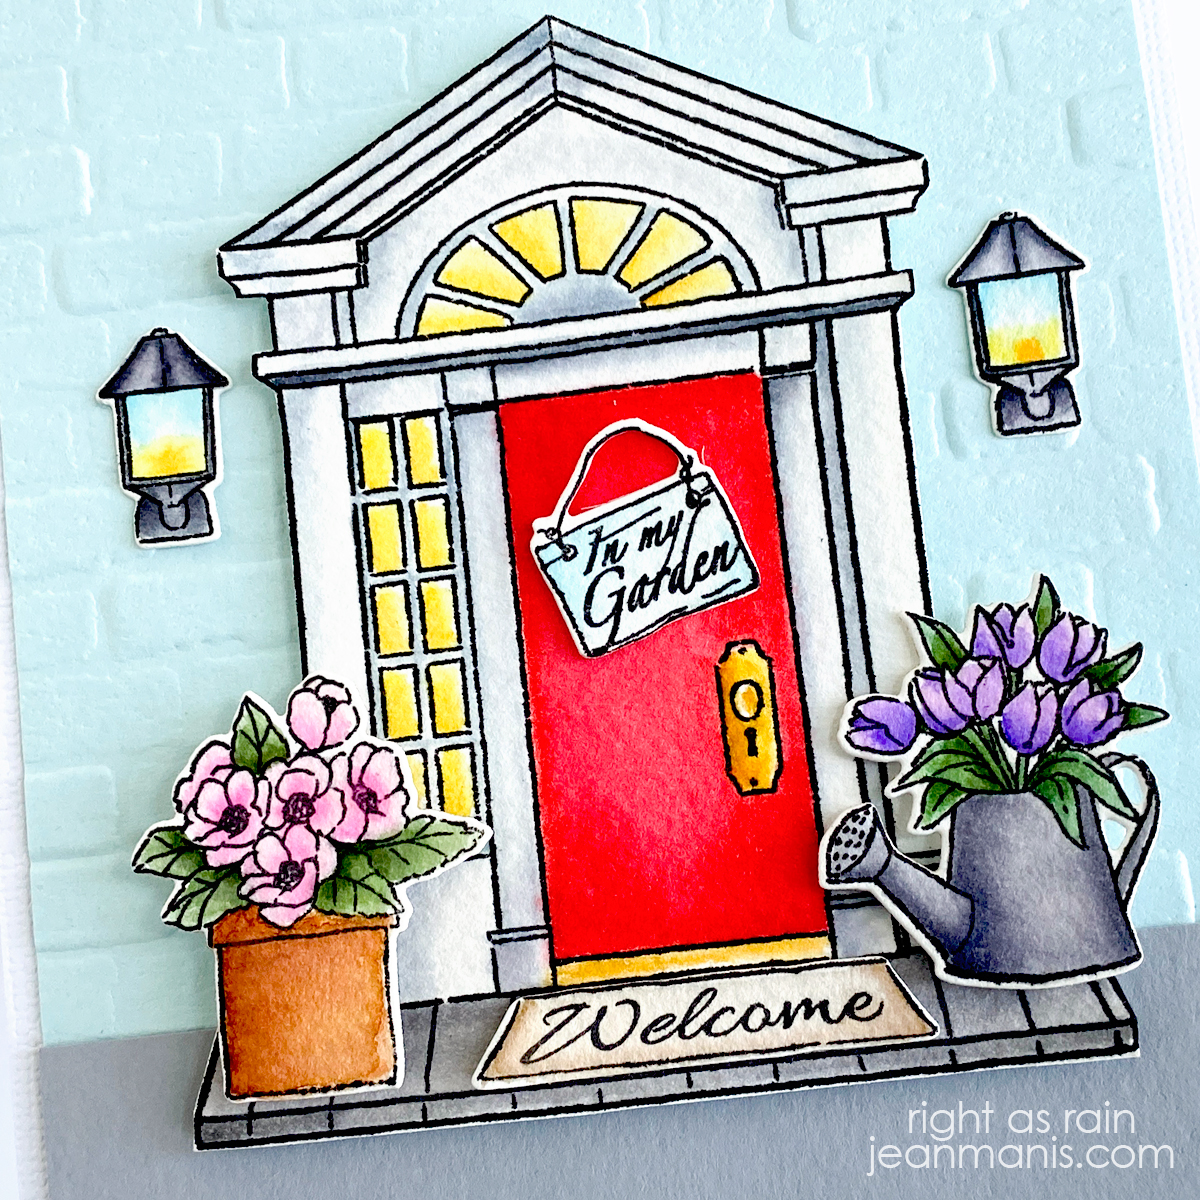
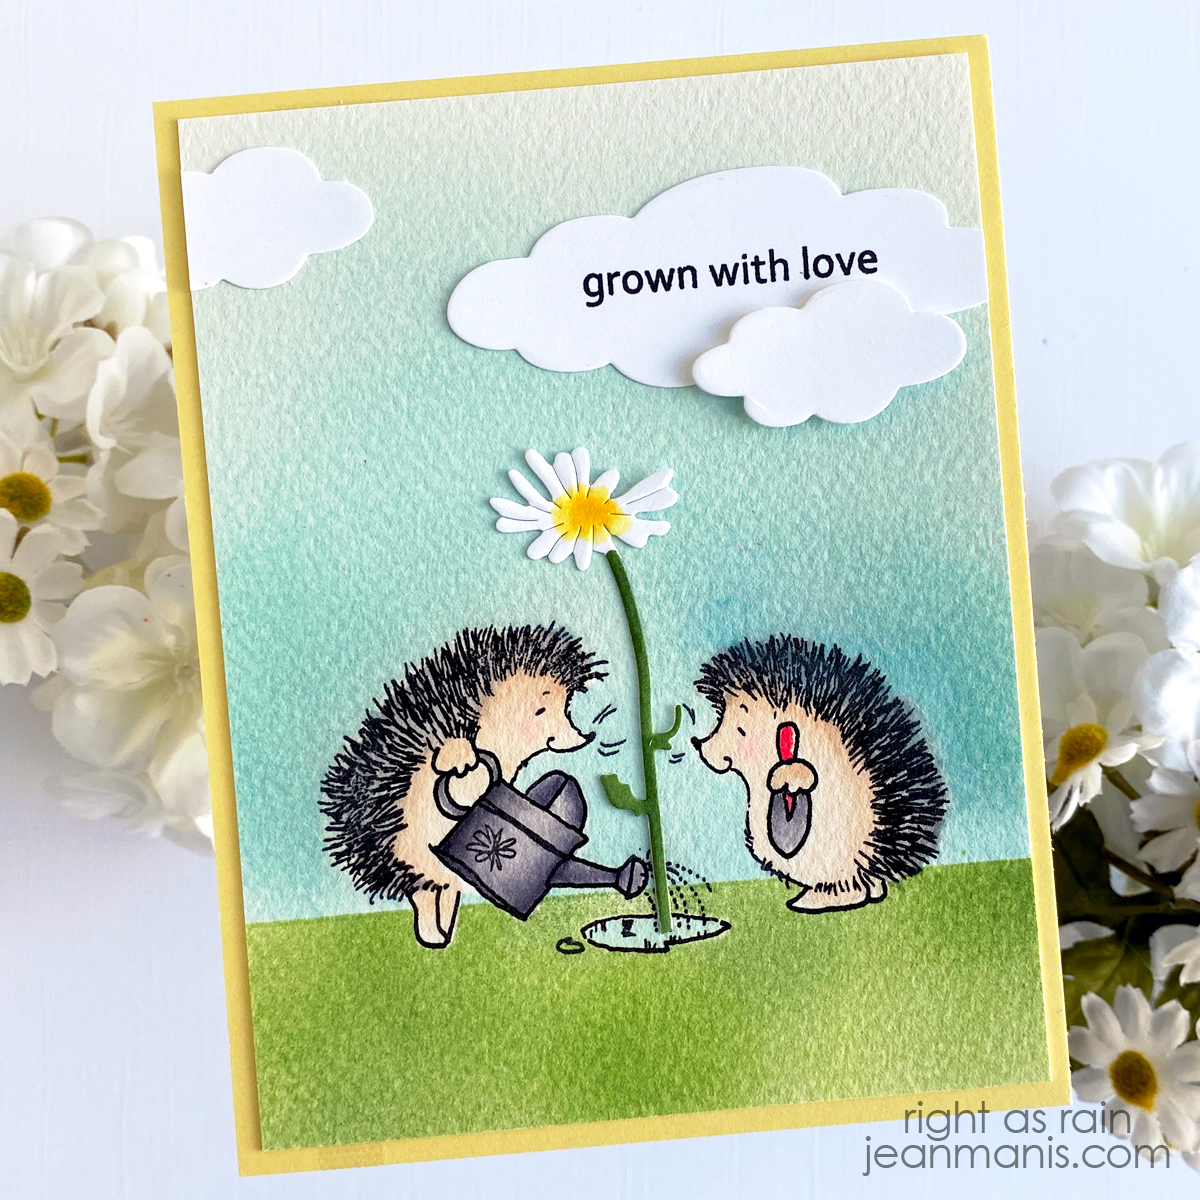
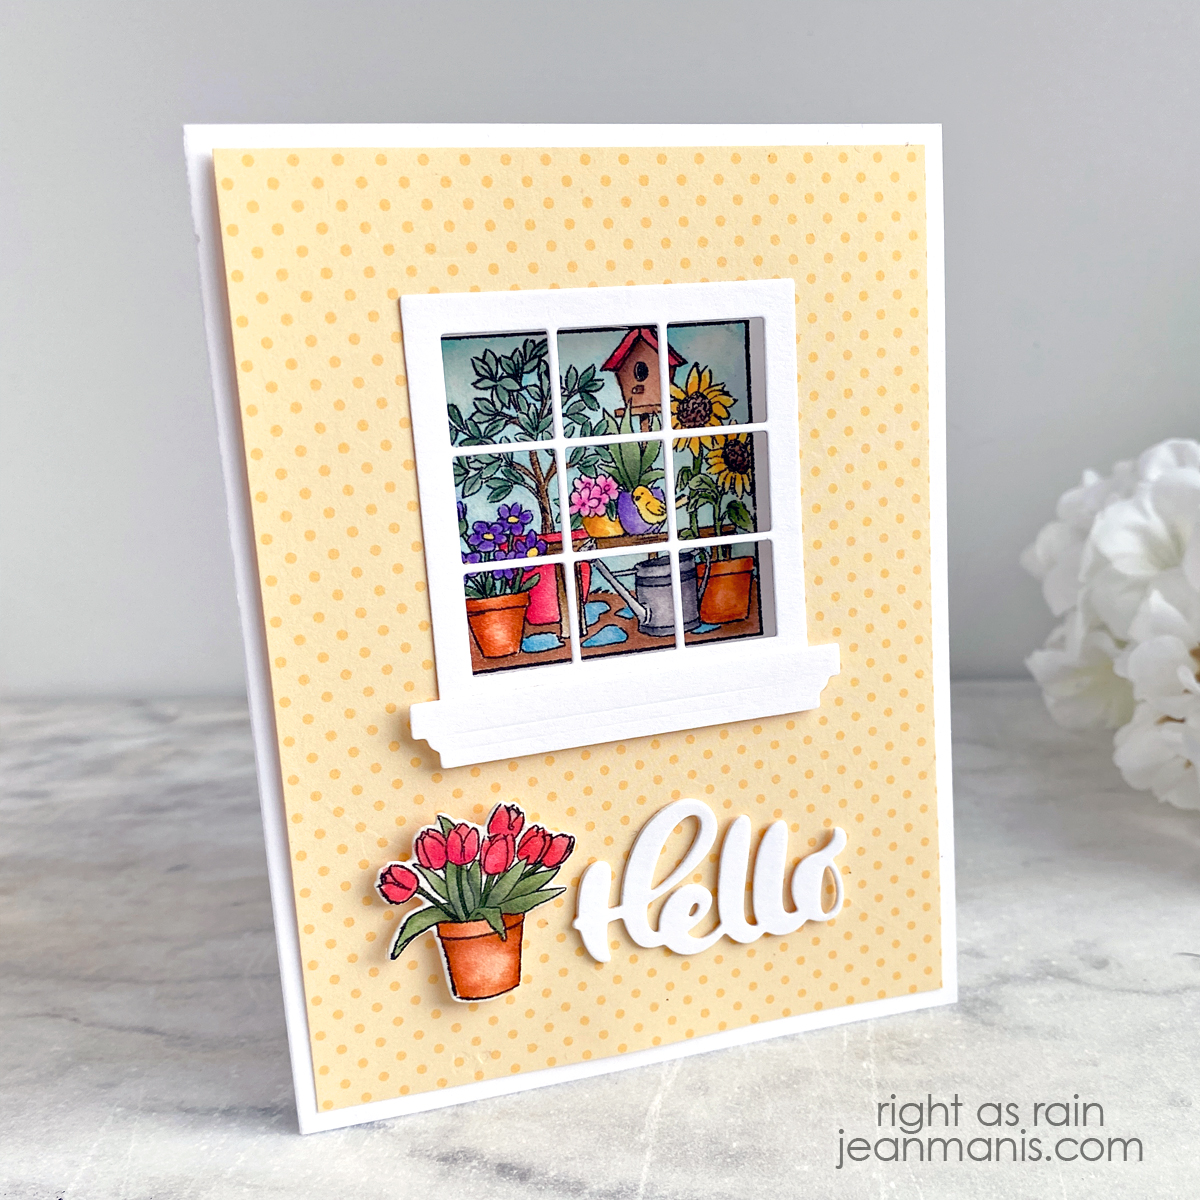
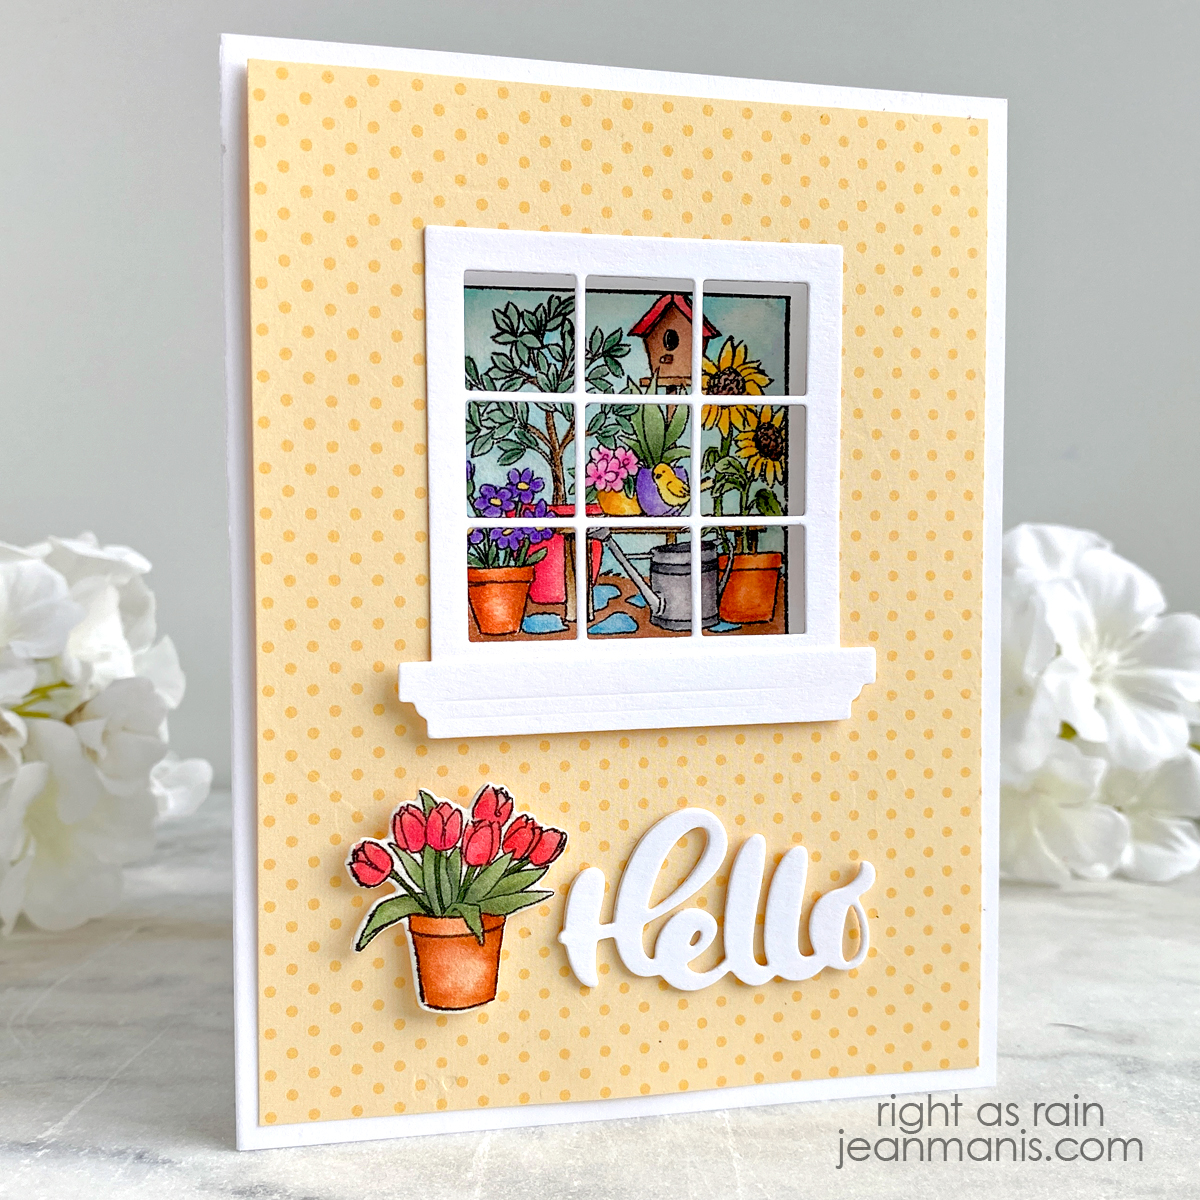
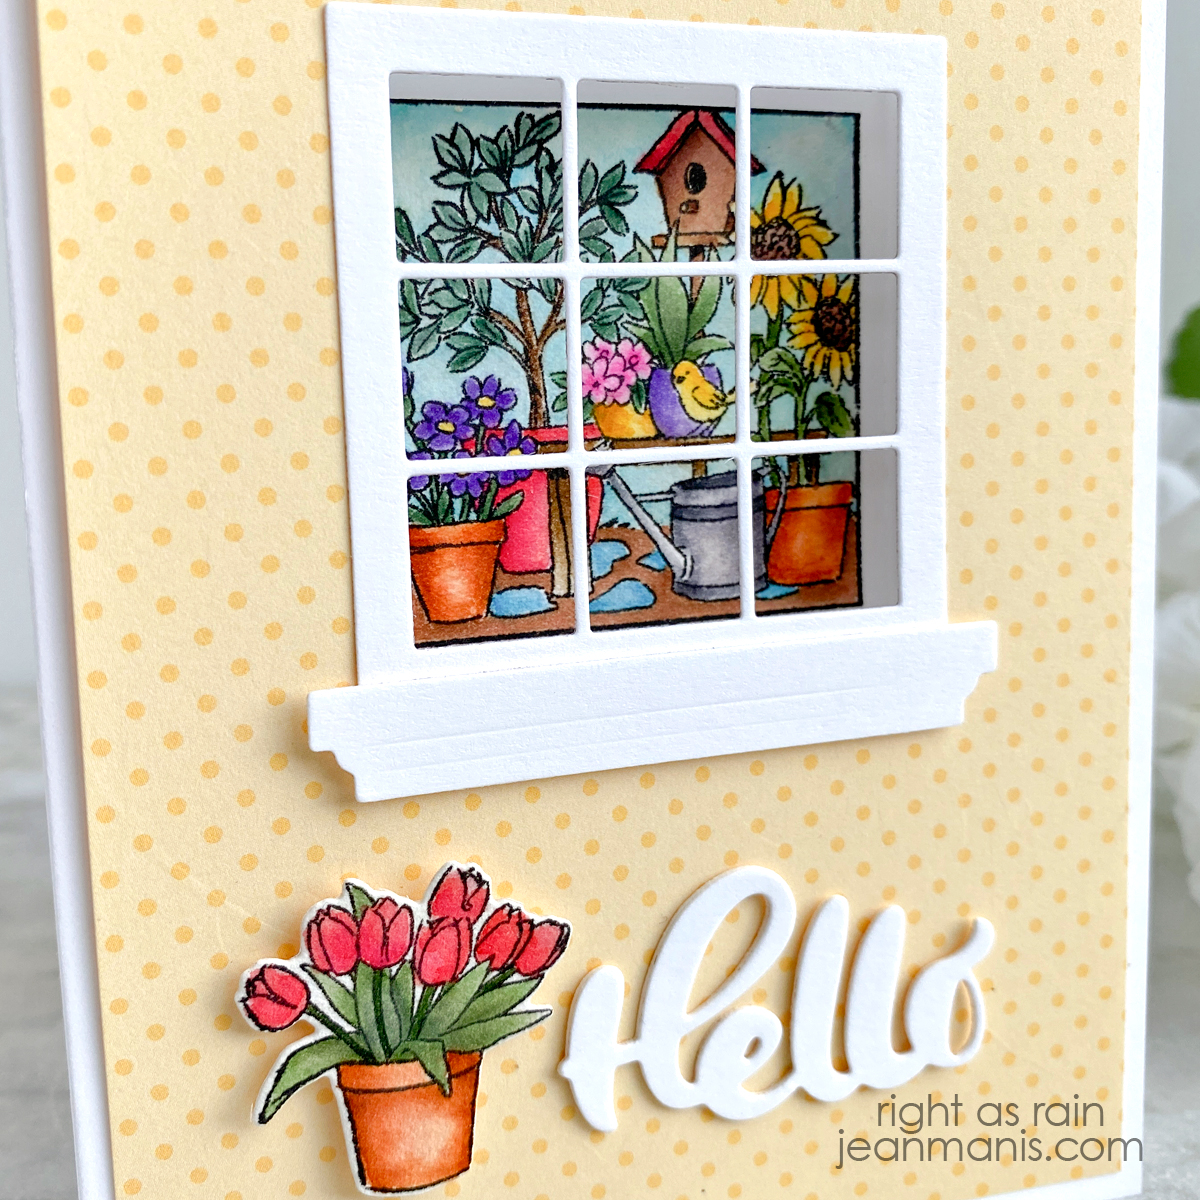
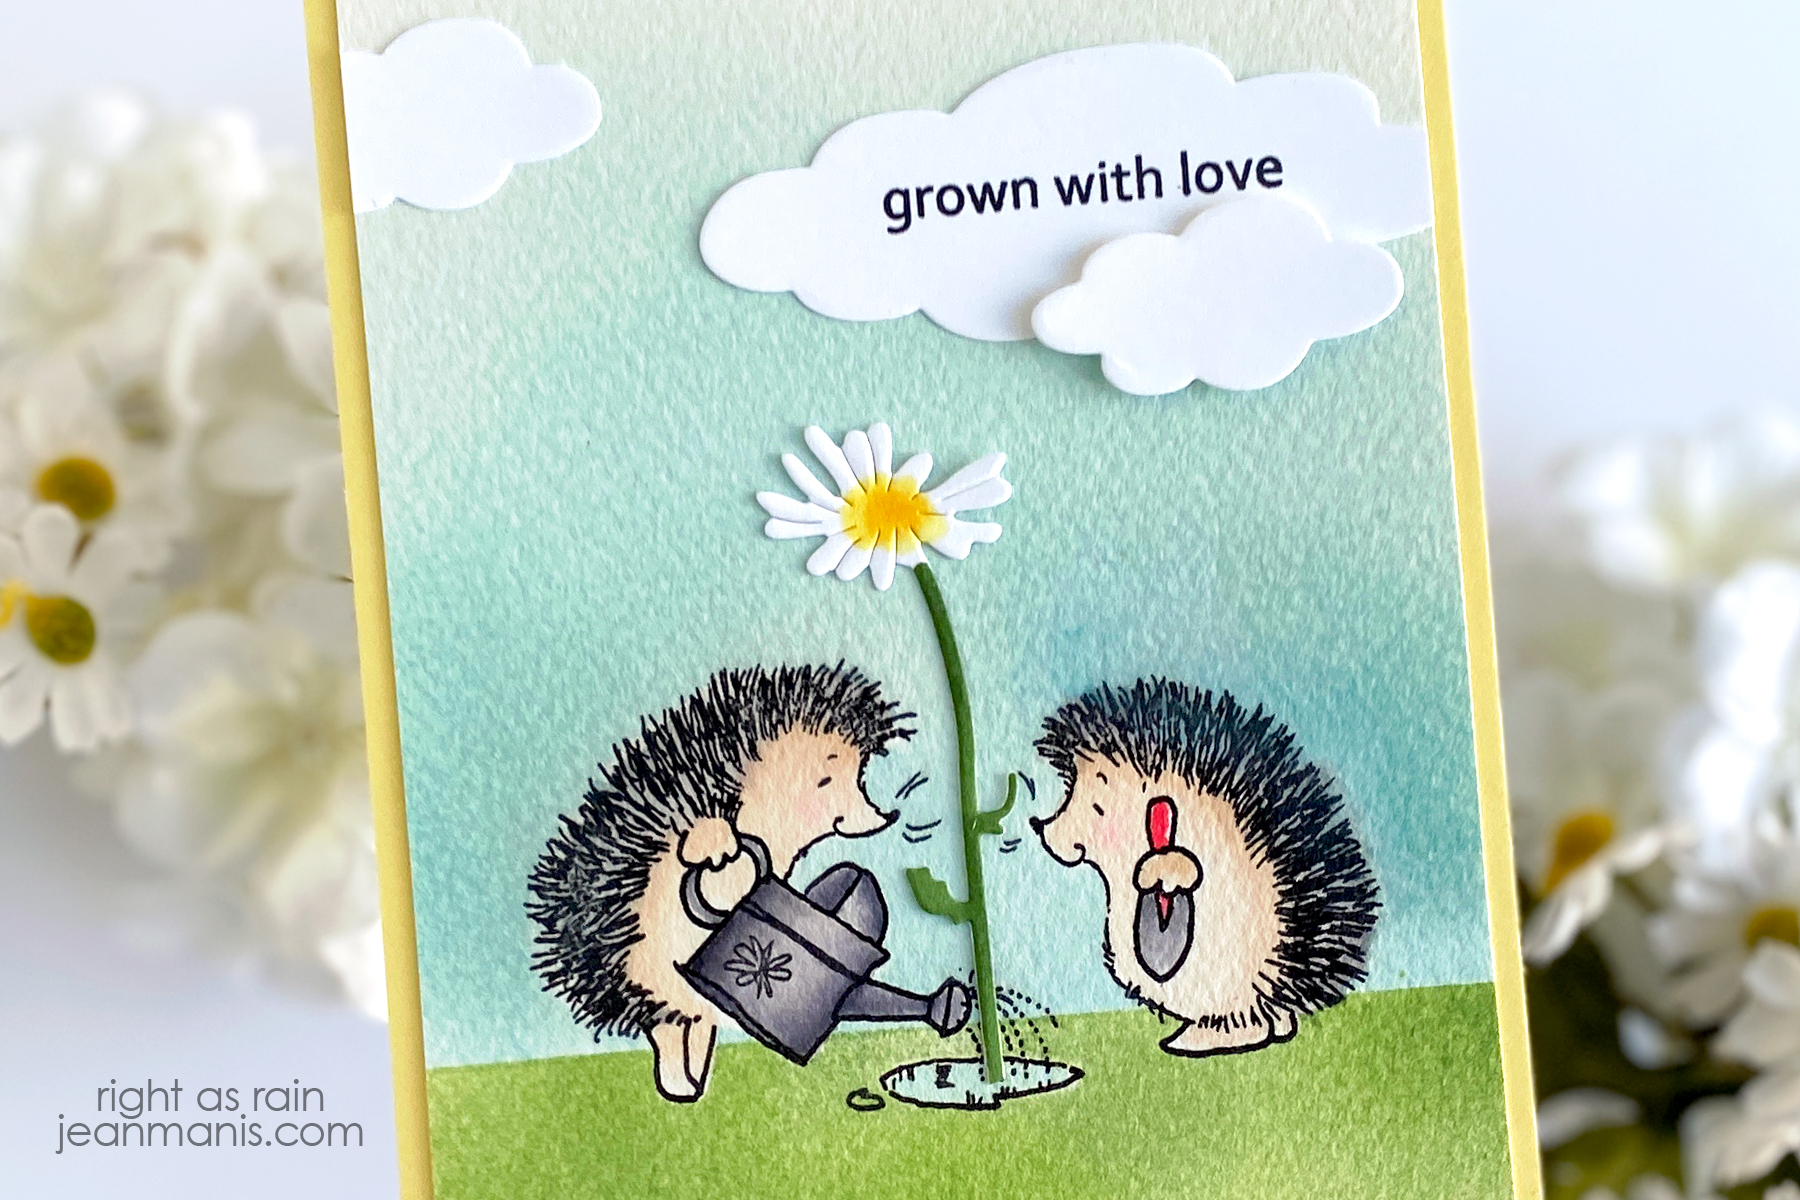
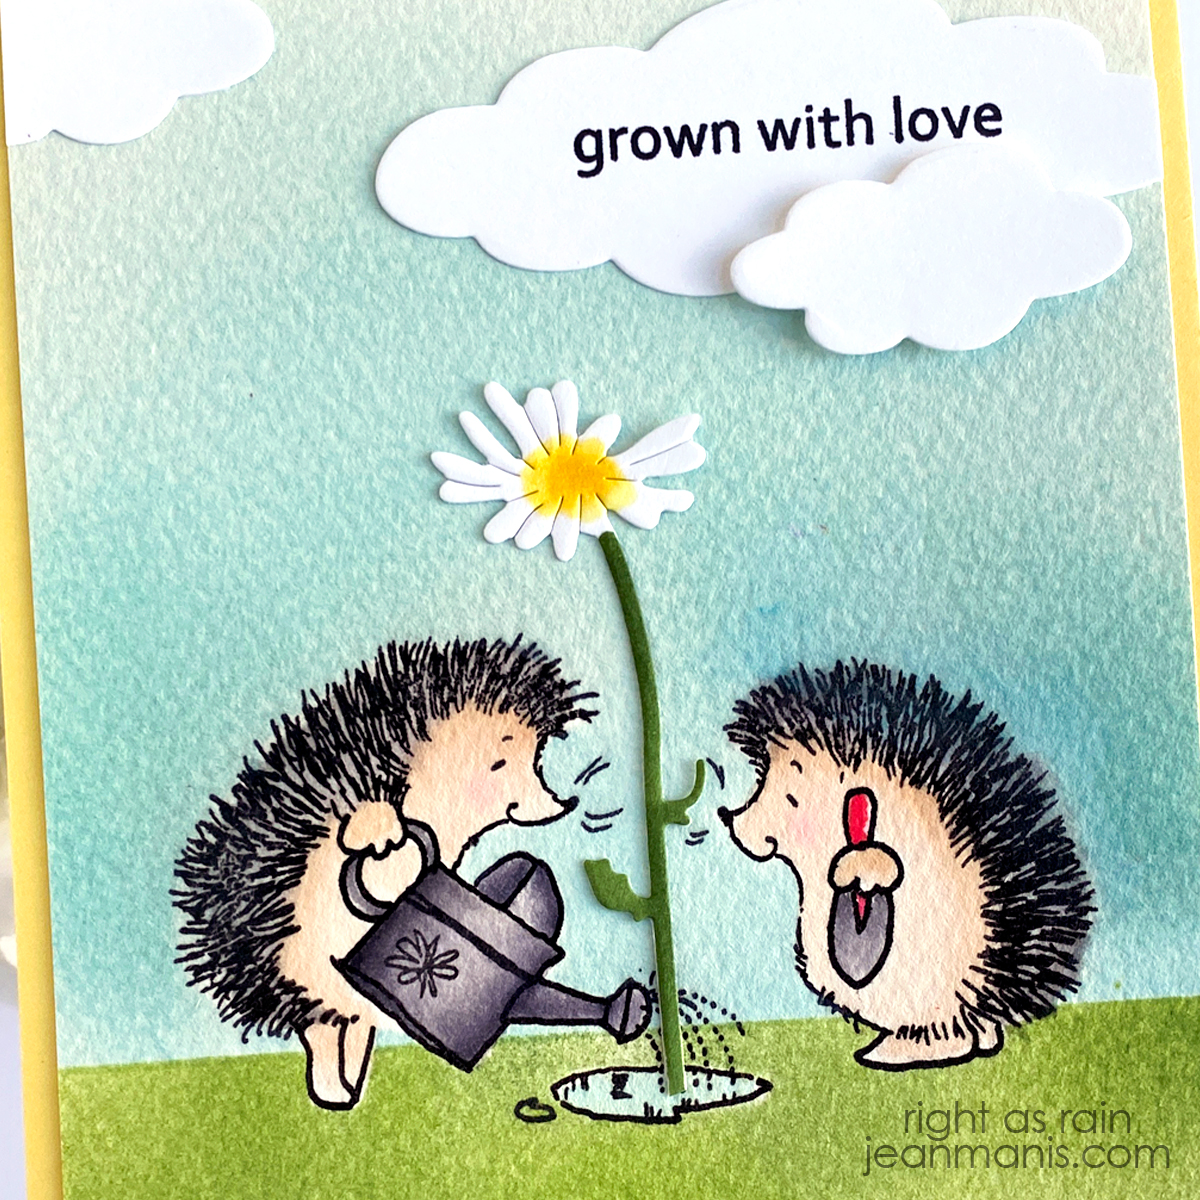
Rubbernecker | Flower Cart Scene

Hello! Today, I am sharing a spring-themed card created with Rubbernecker supplies.

Rubbernecker | Flower Cart Scene

Create primary components
  • Cut dog with Set of Dogs from gray, black, and white cardstock; assemble.
  • Cut Cart from white, green, light gray, and black cardstock; assemble.
  • Cut trees with Spring Tree dies from green and brown woodgrain-textured cardstock; assemble.
Create background
  • Stamp Kittie Says Spring Time sentiment on white cardstock in VersaFine Onyx Black ink.
  • Place vellum strip 2 5/16 inches below sentiment. Apply blue ink upwards for sky. Reverse vellum strip and apply gray ink for the ground.
  • Place assembled trees, cart, and dog on sentiment panel to determine where to trim panel to A2-size.
  • Trim panel and attach to card base.
Accessorize and Assemble
  • Die-cut Cart Accessories #1 from cardstock; assemble.
  • Assemble the scene: adhere trees to scene; add cart, add accessories (popping up some with foam adhesive), and add dog with foam adhesive.

Rubbernecker | Flower Cart Scene


Rubbernecker | Flowering Rain Boots

Hello! Today, I am sharing a spring-themed card created with Rubbernecker supplies. I have combined die sets from their recent release with other Rubbernecker die sets.

Rubbernecker | Flowering Rain Boots

  • Cut frame with second largest die in the Inside Scallop Frame set from white cardstock.
  • Stamp Kittie Says Spring Time sentiment in VersaFine Onyx Black ink on blue cardstock.
  • Trim stamped panel and attach to frame. Attach assembly to light orange A2-size card base.
  • Cut Daffodils from cardstock colored with Distress Oxide inks; assemble.
  • Cut Rain Boots from cardstock colored with Distress Oxide inks and white cardstock; assemble. Add black gemstones.
  • Tape daffodils to the back of the boots and add assembly to card.

Rubbernecker | Flowering Rain Boots


Rubbernecker | Mini Slimline Birdhouse Scene

Hello! Today, I am sharing a spring-themed, mini-slimline card created with Rubbernecker supplies. I have combined die sets from their recent release with other Rubbernecker die sets. See my other cards featuring the Large Bird House die set in this post.

Rubbernecker | Mini Slimline Birdhouse Scene

  • Cut frame from white cardstock with the two largest dies in the Mini Slimline Nested with Stitch set.
  • Cut grass with the Slimline Grass die. Trim and adhere to the bottom of the frame on the back.
  • Cut fence from white cardstock with Peak Fence #4 die. Attach to the back of the frame above the grass, leaving room between the two for the daffodils.
  • Stamp Kittie Says Spring Time sentiment with VersaFine Onyx Black ink on light blue cardstock. Trim panel.
  • Attach frame, with grass and fence, to the stamped panel. Add assembly to a mini slimline card base.
  • Cut Large Bird House from cardstock and assemble.
  • Cut Daffodils from colored cardstock and assemble.
  • Tuck bird house behind fence and attach to card background. Slide daffodils between the grass and fence, trimming as necessary, and attach.
  • Cut cat with the Cats die set from black cardstock. Add to card with foam adhesive.
  • Cut two birds from blue cardstock with the Birds set. Add one with glue to the background and the other to the birdhouse with foam adhesive.

Rubbernecker | Mini Slimline Birdhouse Scene


Rubbernecker | Spring-themed Gnome Card

Happy almost spring (in the Northern Hemisphere)! Today, I am sharing a whimsical, spring-themed card created with Rubbernecker supplies.

Rubbernecker | Spring-themed Gnome Card

Create the card base
  • Stamp Kittie Says Spring Time sentiment on a white cardstock panel in VersaFine Onyx Black ink.
  • Place vellum strip 2 1/4 inches below sentiment. Apply blue ink upwards for sky.
  • Place vellum strip above the horizon line and apply brown ink for the ground.
  • Trim inked panel to A2 size and add to card base.
Create the die-cut elements
  • Color white cardstock with a variety of inks from which to cut the pots, watering can, flowers, and gnomes.
  • Die-cut Tulips and Stems from inked cardstock.
  • Die-cut garden pots with the Large Garden Pots die set. Glue bases to bottoms of the pots. Apply darker ink to edges to create the illusion of volume.
  • Die-cut gnomes with Gnome Couple set from inked cardstock. Assemble with glue.
  • Die-cut spade with Cart Accessories #1 set from inked cardstock and metallic cardstock. Trim inked handle and glue onto metallic spade.

Rubbernecker | Spring-themed Gnome Card

Final Assembly
  • Add elements to card base, starting with the garden pots (tulips and girl gnome are taped to the back of the pots). Build depth by adding the male gnome and watering can with foam adhesive.


Spellbinders | March 2022 Clubs Blog Hop

Hello! I am delighted to be participating in a blog hop celebrating the Spellbinders March 2022 Club Subscriptions. You should have reached me from the blog of Jill Hilliard. (The entire list of participants is included at the end of my post.) For the hop, I created a spring-themed card with this month’s Large Die of the Month kit “Kaleidoscope Floral Slimline” and a tag with the Embossing Folder Kit Club “Garden Path.”

Spellbinders | March 2022 Clubs Blog Hop

To celebrate this release, Spellbinders is giving away a $25 gift certificate to three lucky blog readers – selected from the comments on the Spellbinders blog. Giveaway closes on Sunday, March 13, 11:59 pm MST. The winner will be announced in the blog hop post the following Wednesday. The winner is responsible for shipping cost, duties and taxes. Please note: store credit (gift certificate) cannot be applied to Club Subscriptions; store credit can be applied to shop past Club products, Club extras, and regular releases.

  • Spellbinders | March 2022 Clubs Blog HopI die-cut the flowers with both of the petal flower dies in the Large Die of the Month kit from five different colored cardstock colors.
  • To save time, I die-cut the floral centers from Snowdrift cardstock using the Kaleidoscope Argyle set, which has a die that cuts 15 circles at once.
  • I glimmer-foiled in Matte Gold on an A2-size Snowdrift card base a sentiment from the Sentiments for Everyday set.
  • I assembled the flowers and then glued them on to the card base.

Spellbinders | March 2022 Clubs Blog Hop

Spellbinders | March 2022 Clubs Blog Hop

I couldn’t resist using the sweet Open House Spring bunny on a tag dry-embossed with the Embossing Folder Die of the Month.

Spellbinders | March 2022 Clubs Blog Hop

Spellbinders | March 2022 Clubs Blog Hop

One of the great advantages to the blog hop is to see all the ways that the kit products can be used. I hope you are inspired! Head next to the blog of Becca Feeken. Scroll for the full blog hop list.


Spellbinders Blog
Tina Smith
Bibi Cameron
Annie Williams
Jill Hilliard
Jean Manis <--You are here
Becca Feeken
Yasmin Diaz
Linda Parker
Virginia Lu
Sandra Nagel
Ilina Crouse
Laurie Willison
Jennifer Snyder
Marie Heiderscheit
Jennifer Kotas
Deborah Jenkins
Hussena Calcuttawala
Linh Van
Joy Baldwin
Erin Thompson
Rosemary Dennis
Karen Yagel
Jenny Colacicco
Jeanne Jachna
Jessica Vasher
Melody Rupple
Alanna Moses
Lisa Tilson
Jen Krey
Emily Leiphart
Kathy W. Clement
Rebecca Keppel