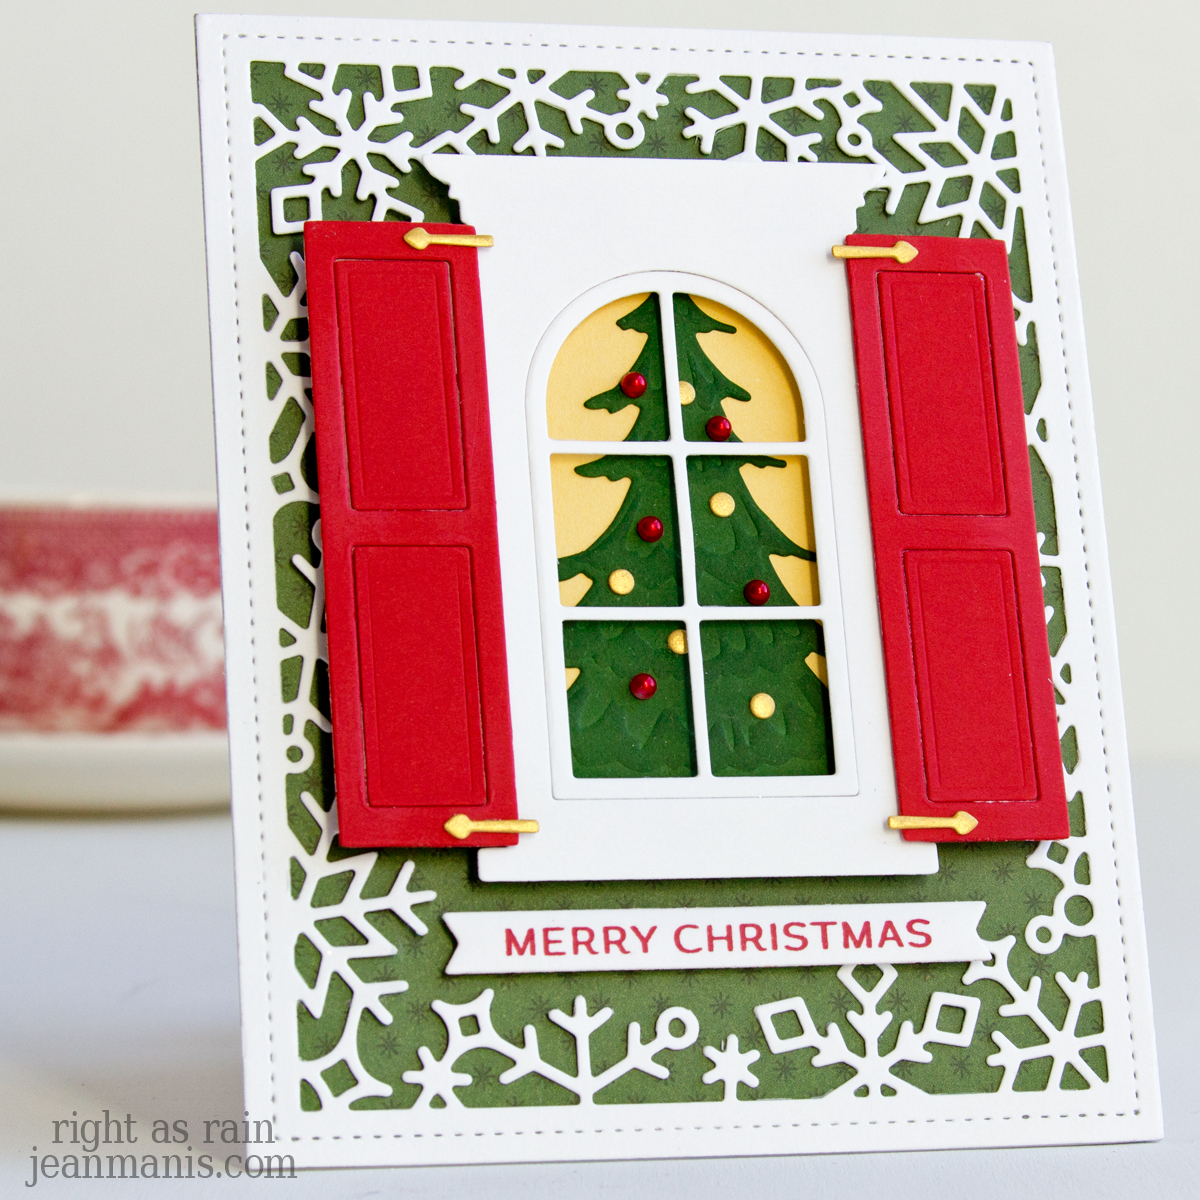
Hello! This week’s 52 Christmas Card Throwdown Challenge provided the perfect opportunity to create a festive holiday card using the August Sketch Challenge graphic as inspiration.


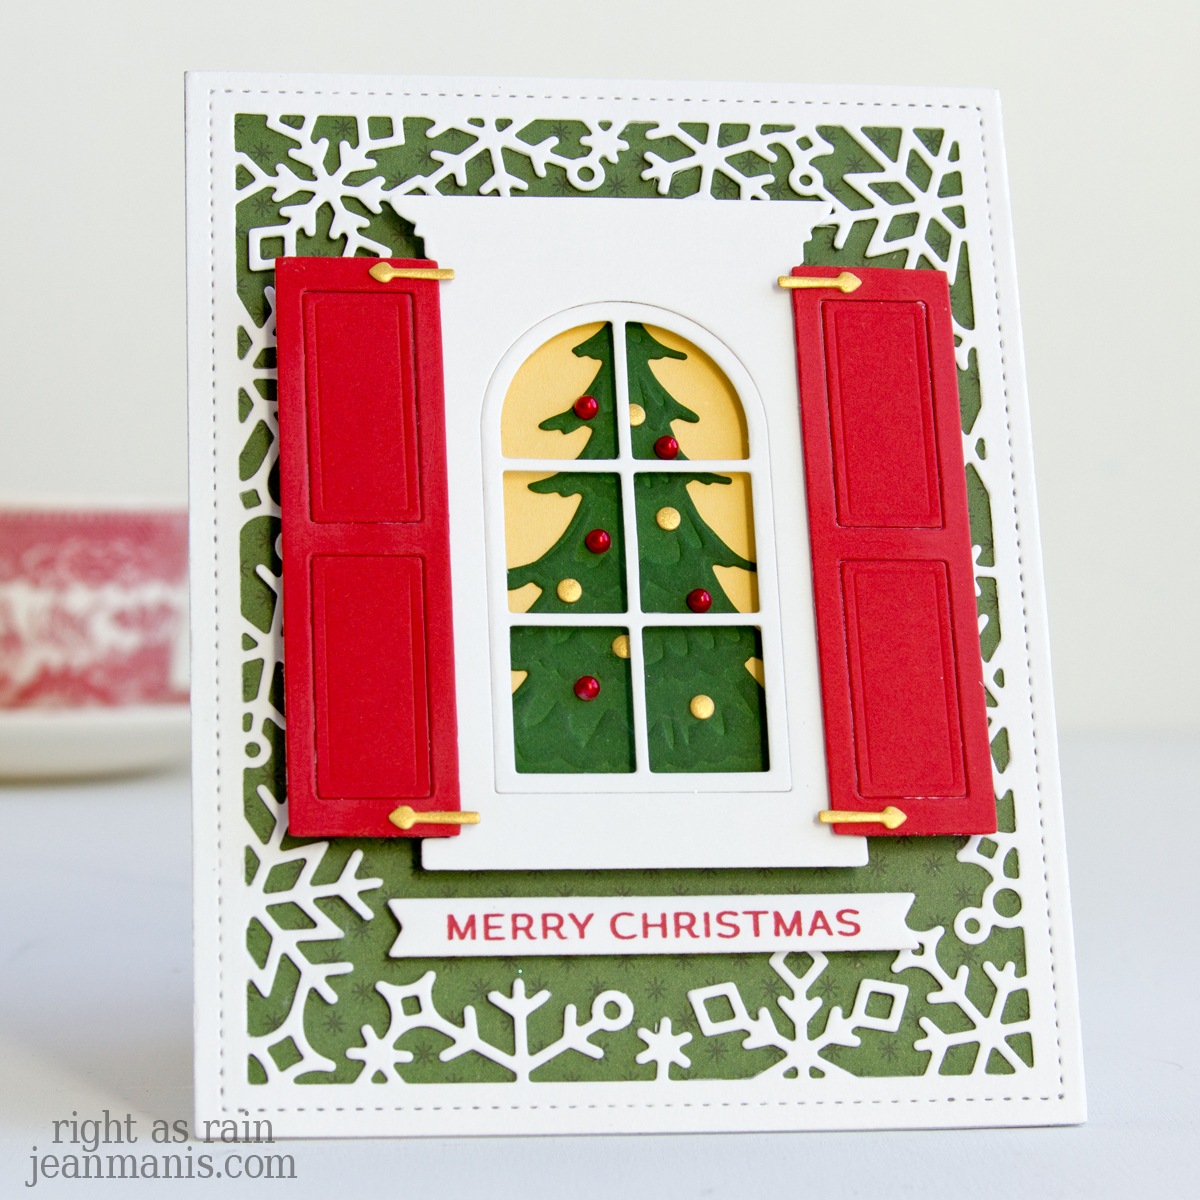
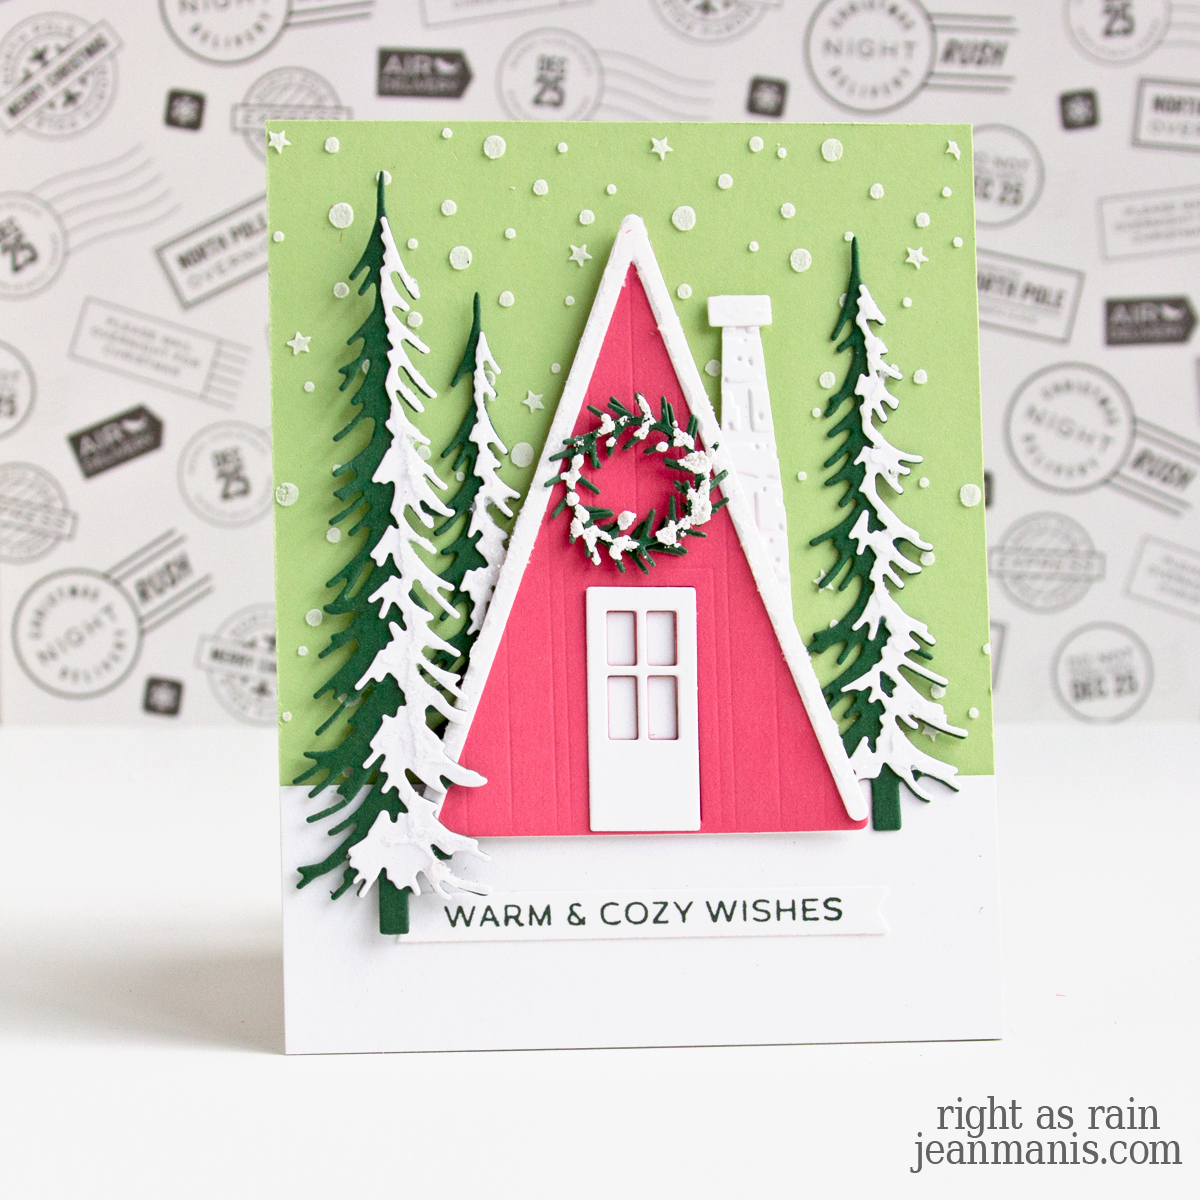
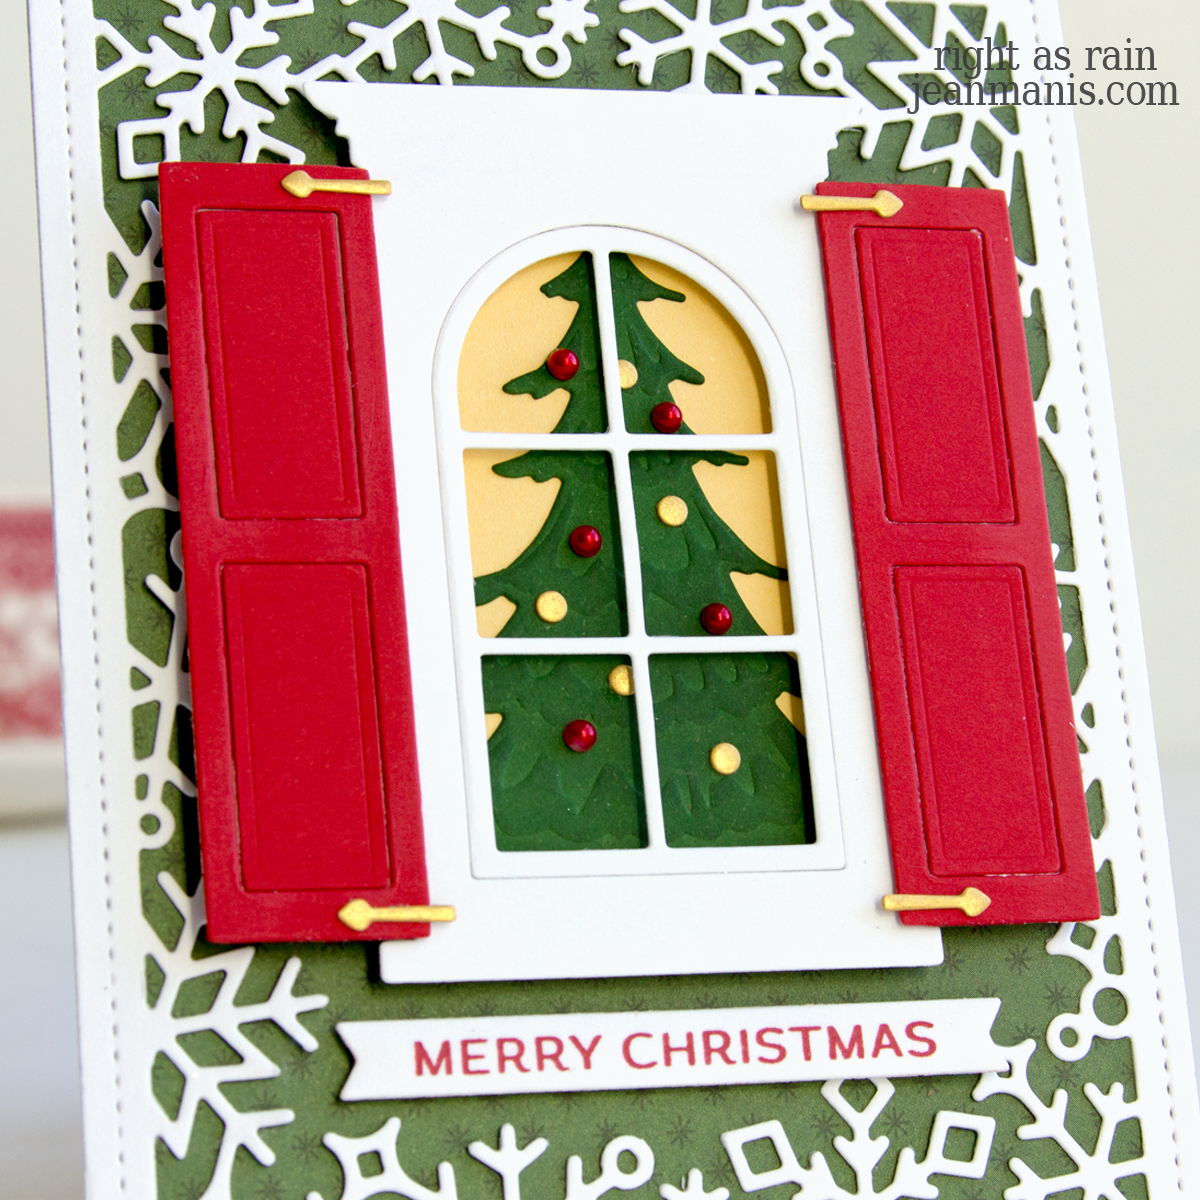
My design showcases a cozy window scene with die-cut shutters framing a decorated Christmas tree. A patterned paper background and intricate snowflake borders add seasonal charm, while the “Merry Christmas” sentiment completes the look. Let’s dive into the details of this cheerful creation!
-
- Cover A-2 card base with patterned paper.
- Cut the Snow Flurries Backdrop from Snowdrift cardstock and add to card front.
- With the Wonderful Windows die, cut the window and shutters from a variety of cardstock colors.
- Cut the Christmas tree from green cardstock. I used a now-retired Memory Box die (Frosted Christmas tree) and inked with Rustic Wilderness ink to create more contrast.
- Trim the bottom of the tree, add to a yellow cardstock panel (SU So Saffron), and attach the assembly to the back of the window with foam adhesive. Attach the assembled shutters and add gold latches. Decorate the tree with adhesive pearls and gold circles (I used a die in the Wonderful Windows set). Attach the window and shutters to the card front with dot adhesive.
- Press the Merry & Bright sentiment in Geranium ink on Snowdrift cardstock and cut with the coordinating die in the set. Add to the card with foam adhesive.
If you’re feeling inspired, head over to the 52 Christmas Card Throwdown Challenge site and join in—create your own card and share it with the community!