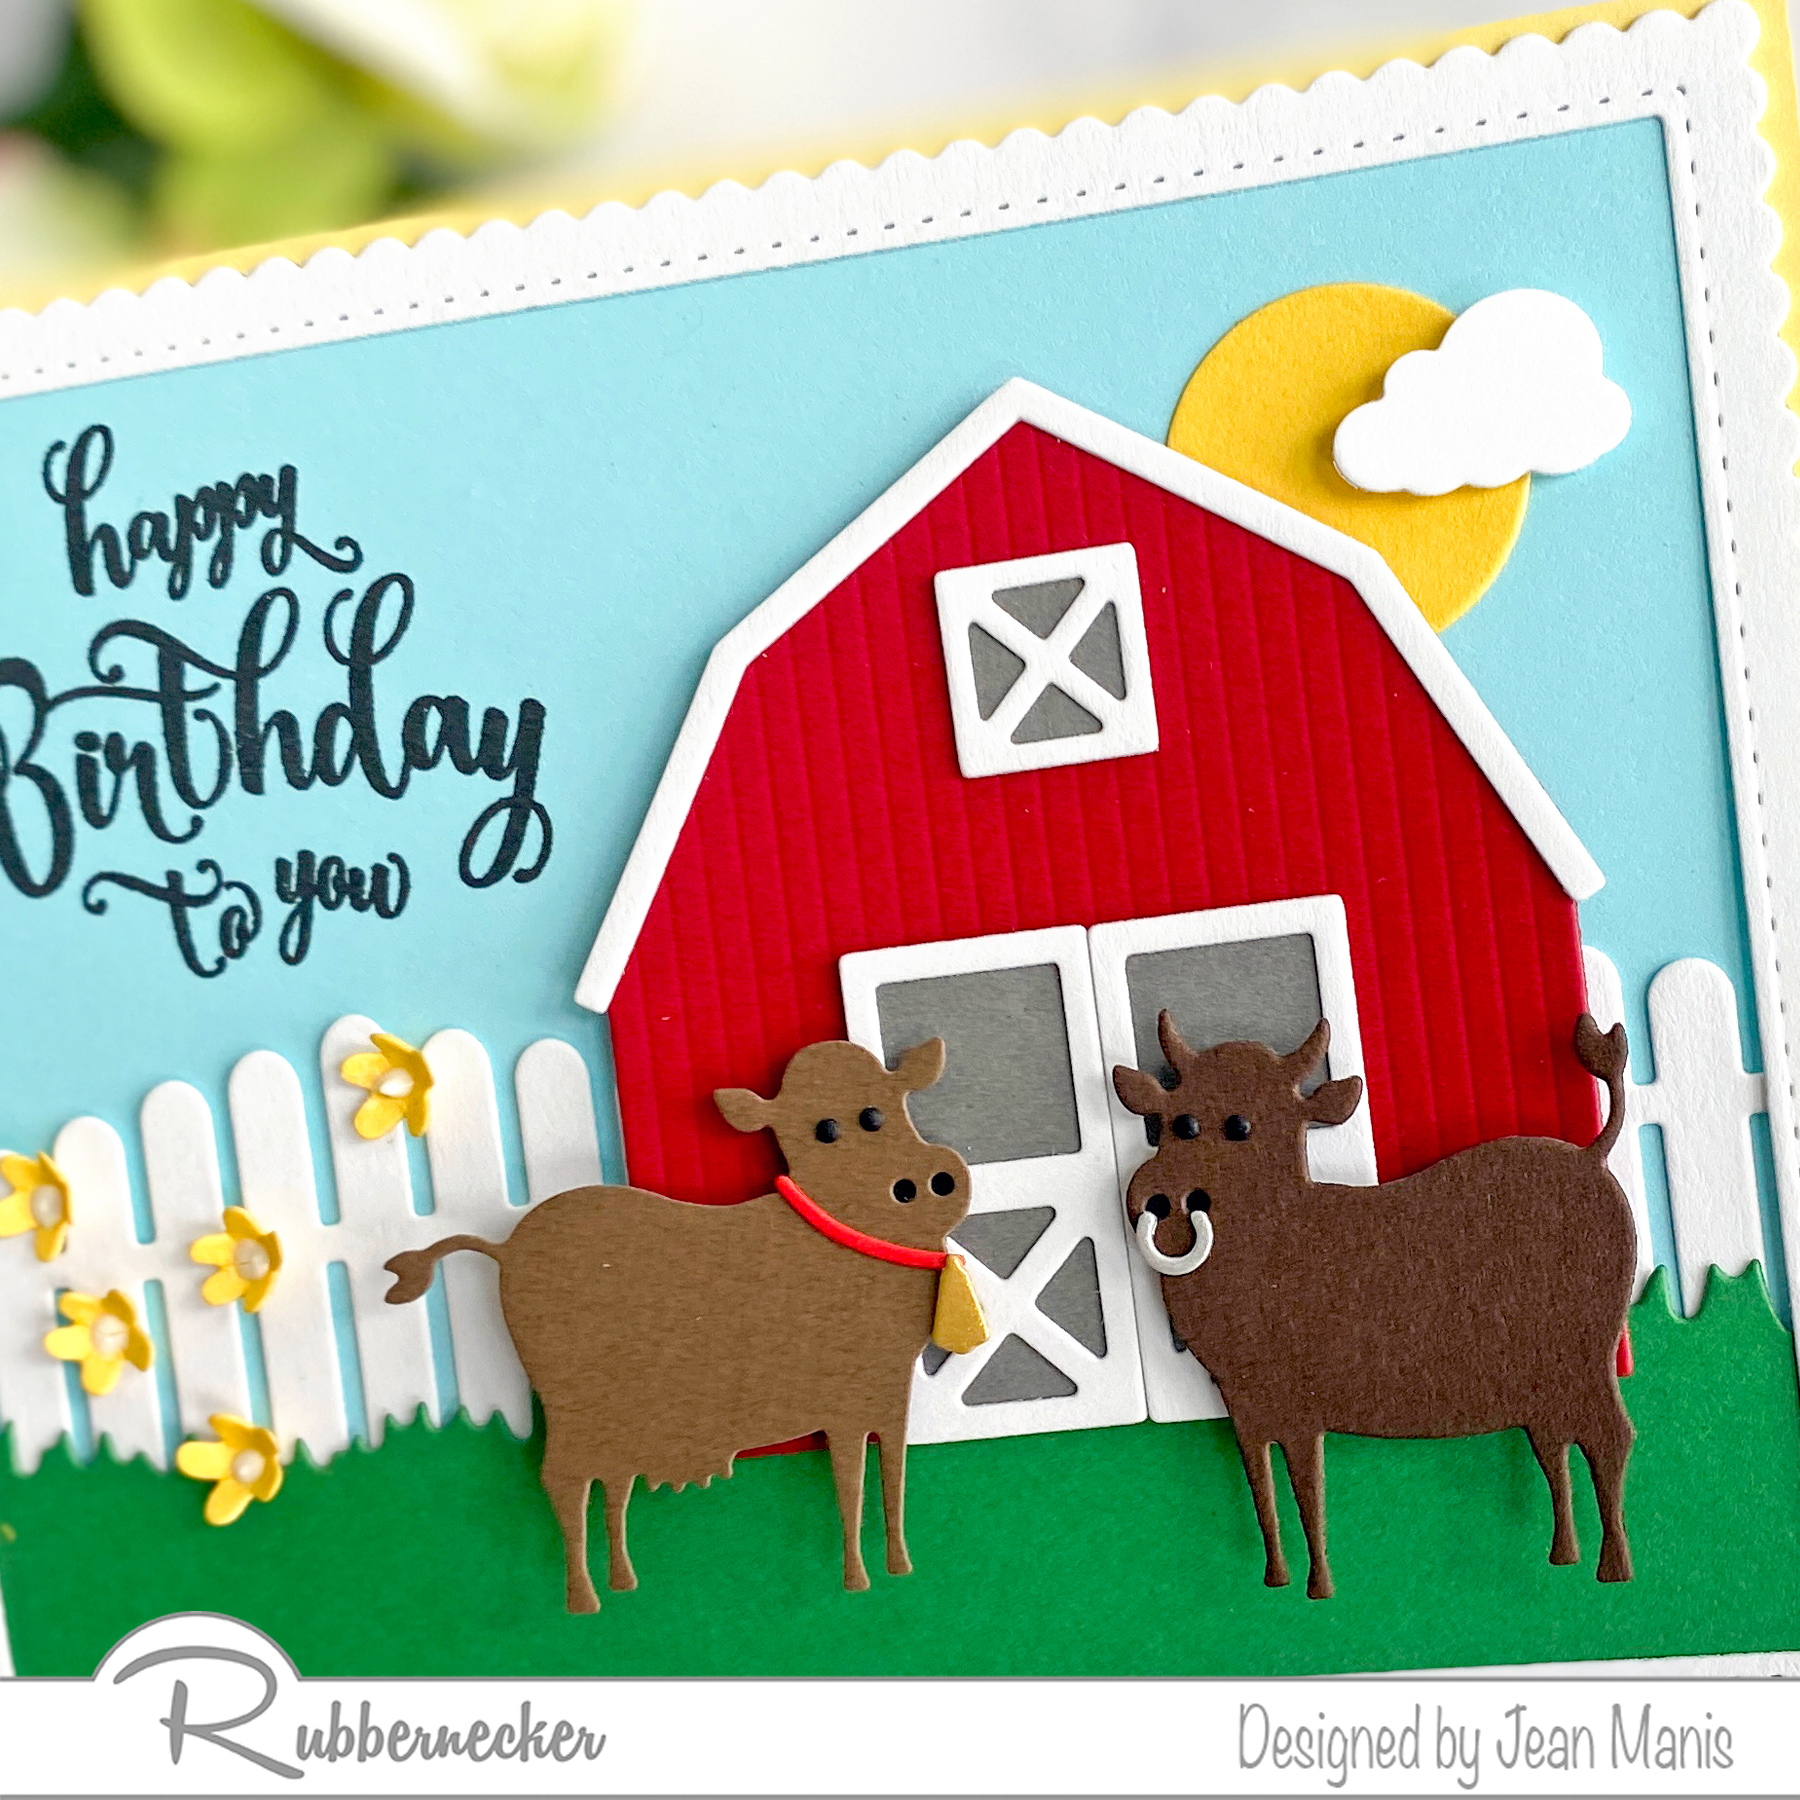
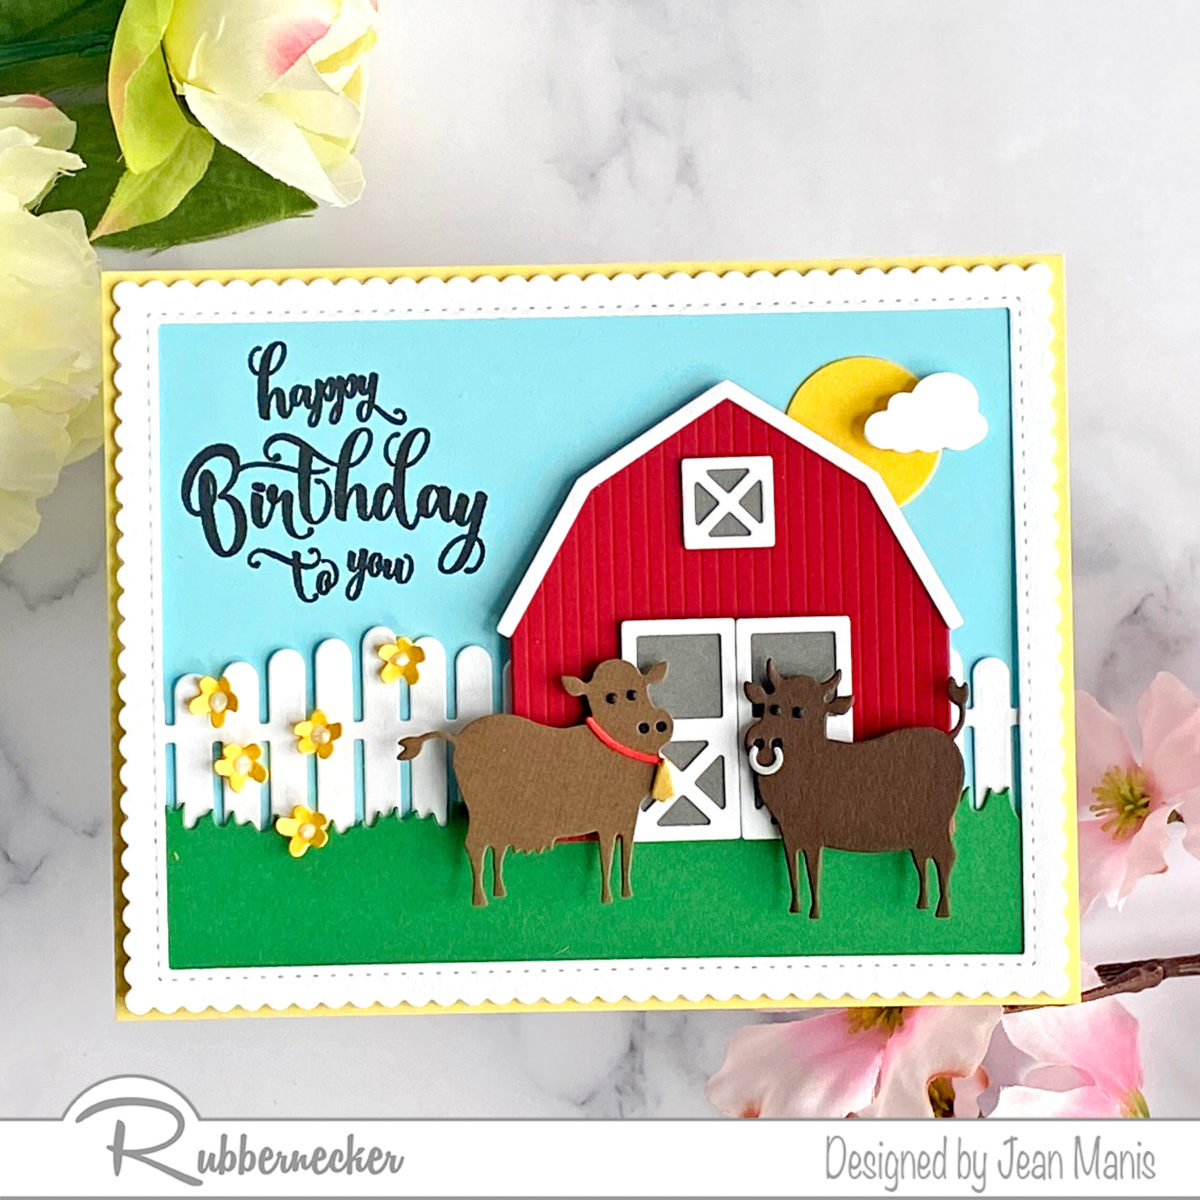
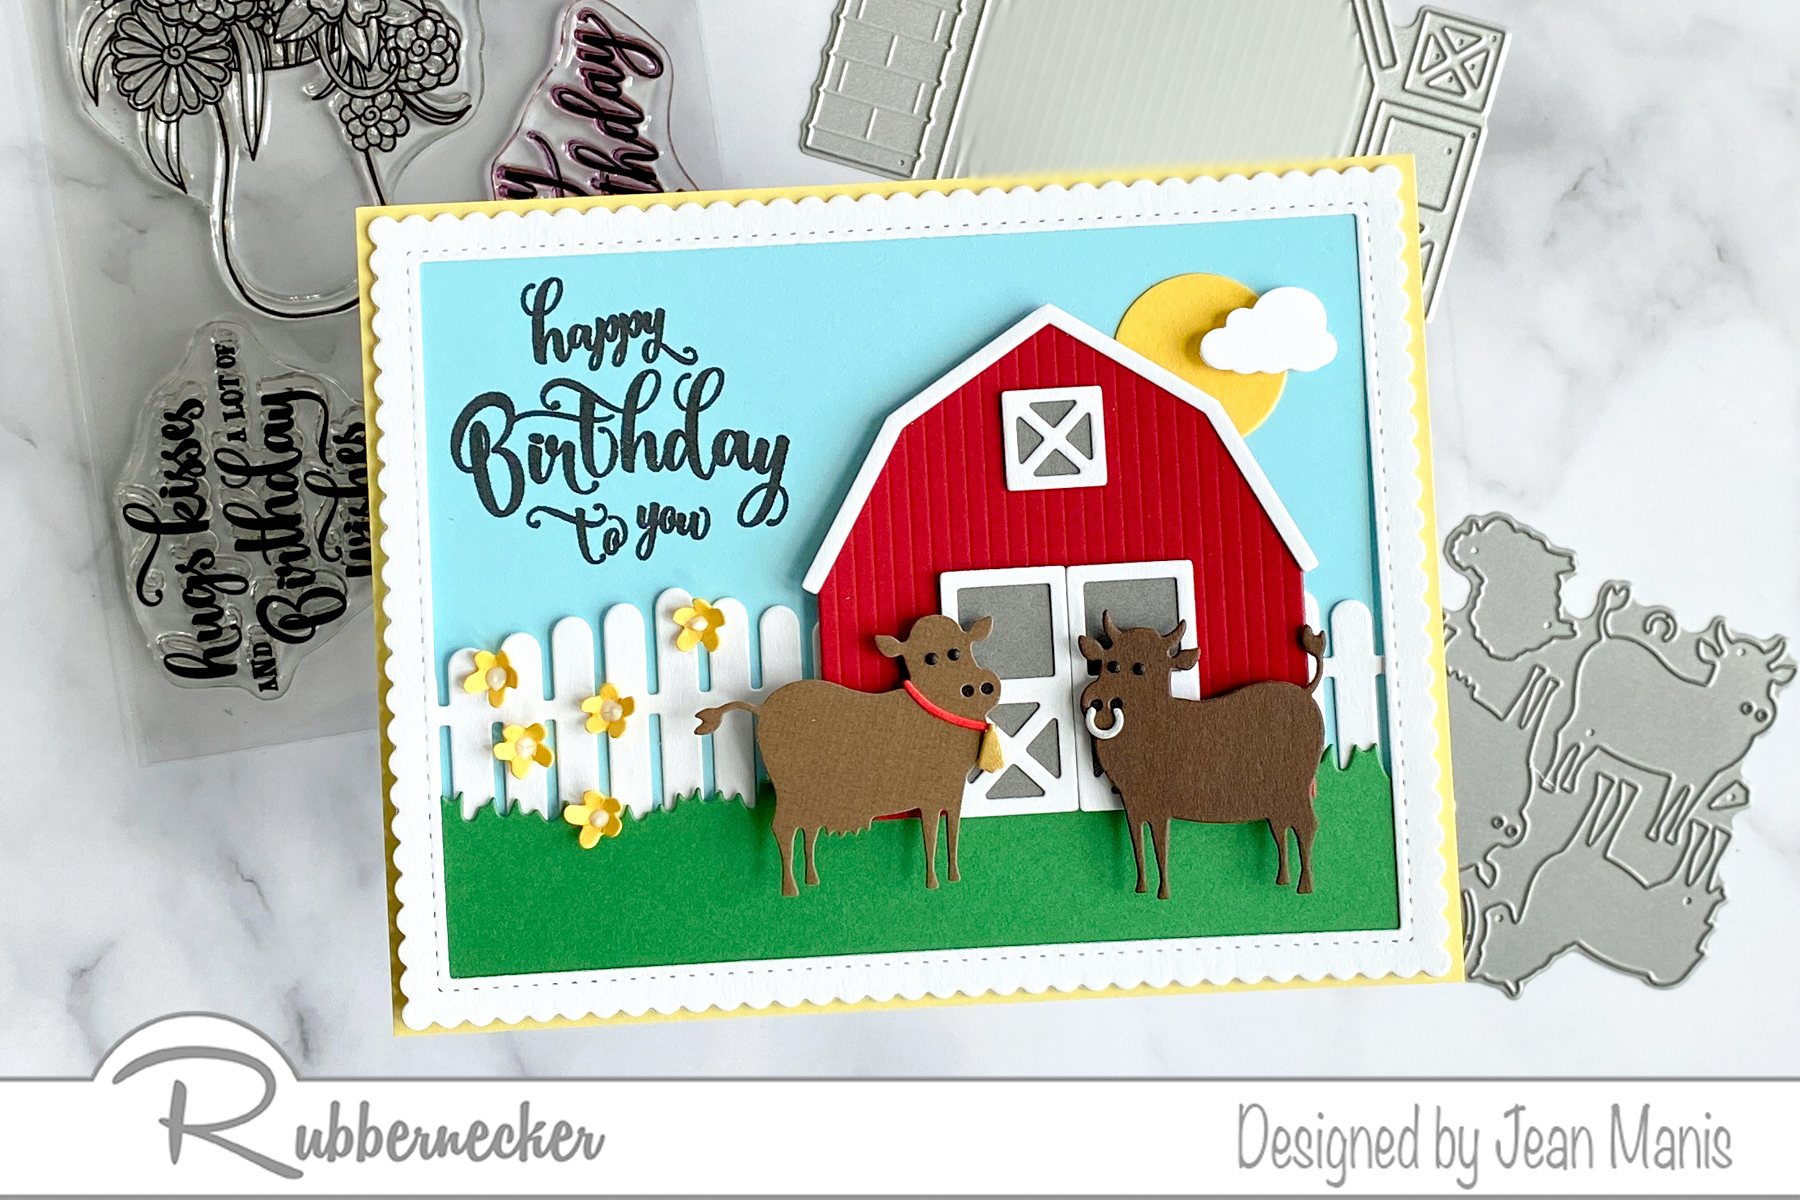
Feb 2022 Spellbinders Embossing Folder of the Month

Looking for the Rubbernecker Blog Hop post? Head here.

Hello crafty friends! I’m sharing CAS mini-slimline cards created with the Spellbinders February 2022 Embossing Folder Kit Club “Sketched Floral.”  I used die-cutting, glimmer-foiling, and dry-embossing on these cards – three of my favorite techniques!

Feb 2022 Spellbinders Embossing Folder of the Month

Feb 2022 Spellbinders Embossing Folder of the Month

  • Color white cardstock with Distress Oxide inks. I created versions with both warm and cool tones.
  • Die-cut inked the panel to mini-slimline size using the largest die in the Precision Layering Mini Slimline A set.
  • Dry-emboss the panel with the February 2022 Embossing Folder Kit Club. Remove the top texture with a sanding block to reveal the pattern in white.
  • Using a die in the Fluted Classics Circles set, die cut a circle from the panel slightly above the middle.

Feb 2022 Spellbinders Embossing Folder of the Month

Feb 2022 Spellbinders Embossing Folder of the Month

Read more about the embossing folder on the Spellbinders blog here. The embossing folder, measuring 5.5 x 8.5 inches, can be used to make cards in a variety of sizes including slimline, mini-slimline, 5 x 7, and A2.

Currently, Spellbinders is running several promotions; check them all out here.

spellbinders Cardmaking Essentials Sale


Rubbernecker Birthday Celebration Blog Hop

Hello! Welcome to the Rubbernecker Blog Hop celebrating their 29th birthday with a new release and prizes!

Rubbernecker Birthday Release

Comment on each post in the blog hop for a chance to win the four sets shown below, worth over $60. One winner will be chosen on 2/6.

Rubbernecker Blog Hop Prize

For the celebratory blog hop, I am sharing two mini-slimline, birthday-themed cards created with just-released Rubbernecker stamp sets. A full list of blog hop participants appears at the end of my post.

Rubbernecker Birthday Celebration Blog Hop

My first card features bright, die-cut balloons and a fun script sentiment.

Rubbernecker Birthday Celebration Blog Hop

  • I stamped the pattern image in the Happy Birthday #1 stamp set on to colored paper with coordinating inks for a tone-on-tone look.
  • I die-cut the stamped paper with the Balloons Die. I die-cut the strings from white cardstock and assembled the balloons.
  • I stamped the sentiment in the Birthday Vase set in VersaFine ink on a mini-slimline sized light-blue cardstock panel.

Rubbernecker Birthday Celebration Blog Hop

  • I created a mini-slimline frame by cutting patterned paper using the two largest dies in the Mini Slimline Nested with Stich set.
  • I attached the sentiment panel to a card base and adhered the frame.
  • After assembly everything, I embellished the card with circles cut from glitter cardstock using dies in the Lifeguard Tower and Fishing Boat die sets.

Rubbernecker Birthday Celebration Blog Hop

My second card showcases the fun-to-color Birthday Vase stamp set.

Rubbernecker Birthday Celebration Blog Hop

  • I created a mini-slimline frame by cutting patterned paper using the two largest dies in the Mini Slimline Nested with Stich set.
  • I stamped the sentiment in the Birthday Vase set in VersaFine ink on a mini-slimline sized white cardstock panel.
  • Using vellum as a mask, I applied Distress Oxide inks above and below the horizon line.
  • I attached the sentiment panel to a card base and adhered the frame.
  • I stamped the vase and flowers in Memento black ink on white cardstock, colored the image with Copic markers and colored pencils, and fussy-cut it.
  • I assembled the card, adding the flowers and vase with foam adhesive.
  • I embellished with Silver Mix Gems.

Rubbernecker Birthday Celebration Blog Hop

Scroll past the supplies for the full blog hop list.


Blog Hop List

Rubbernecker Blog
Colleen
Lisa
Annie
Jamie
Kittie
Jean <–You are here
Natasha
Carol
Preeti
Allison
Julie

Rubbernecker Die-cut Snowmen Card

Hello! Today, I am sharing a winter-themed, friendship card featuring Rubbernecker die-cut snowmen. Just because the holidays are over, it doesn’t mean that winter-themed craft dies and stamps have to be stored away with the decorations. Use them to brighten up someone’s day! Of course, you can use these same supplies to create a Christmas card with a red-and-green color scheme.

Rubbernecker Die-cut Snowmen Card

  • Create card background from patterned paper cut with the largest die in the Mini Slimline Nested with Stitch set, measuring 6 by 3 ½ inches.
  • Create a 6 by 3 inches rectangle from colored paper or cardstock. Cut with the Circles Stitch die in the center, using washi tape to secure the die to the paper. Trim ¼ inch from both sides (the larger original size provides more wiggle room).
  • Die-cut snowmen from various colors of paper and cardstock with the Winter Snowmen set and assemble.

Rubbernecker Die-cut Snowmen Card

  • •With white powder, heat-emboss the Snowmen with Presents sentiment on dark blue paper. Trim heat-embossed panel to a size slightly larger than the die-cut circles.
  • From the back of the paper rectangle with the die-cut circles, attach the sentiment to show in the center circle.
  • Create a 6 inch by 2 ½ inches strip from pink paper and attach to the back of the die-cut circle strip.
  • To highlight the circle frame, attach white cardstock strip measuring 6 by 2 3/4 inches to the back of the die-cut circle assembly. Adhere to card background ¼ inch from the left edge. The asymmetry creates visual interest.
  • Position the die-cut Winter Snowmen in the top and bottom circles and adhere. (Photo below shows the die-cut pieces before final assembly.)

Rubbernecker Die-cut Snowmen Card


Spellbinders Be Bold – Color Block Love Take 2

Hello! I am sharing another CAS Valentine’s Day card created with the Be Bold Color Block Love You die set at Spellbinders. You can see my first card using the set here.

Spellbinders Be Bold - Color Block Love

On this card, I die-cut the “LOVE” letters from white glitter paper and inlaid die-cut pieces of red and shades of pink.

Spellbinders Be Bold - Color Block Love

I die-cut the “you” letters from white cardstock that I had heat-embossed with Gold Tinsel powder.