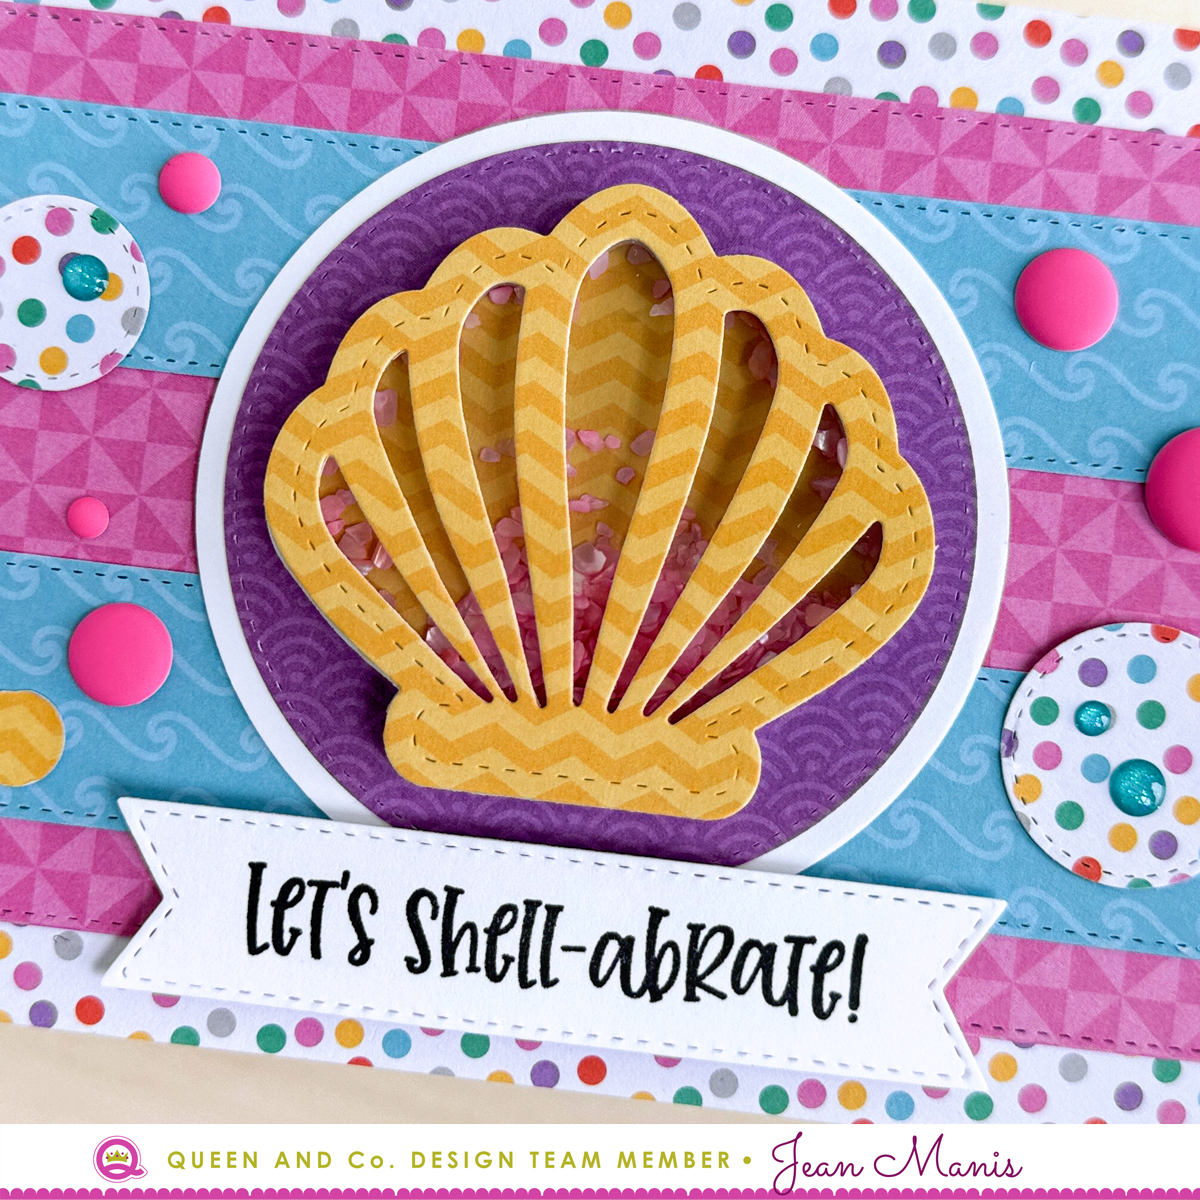
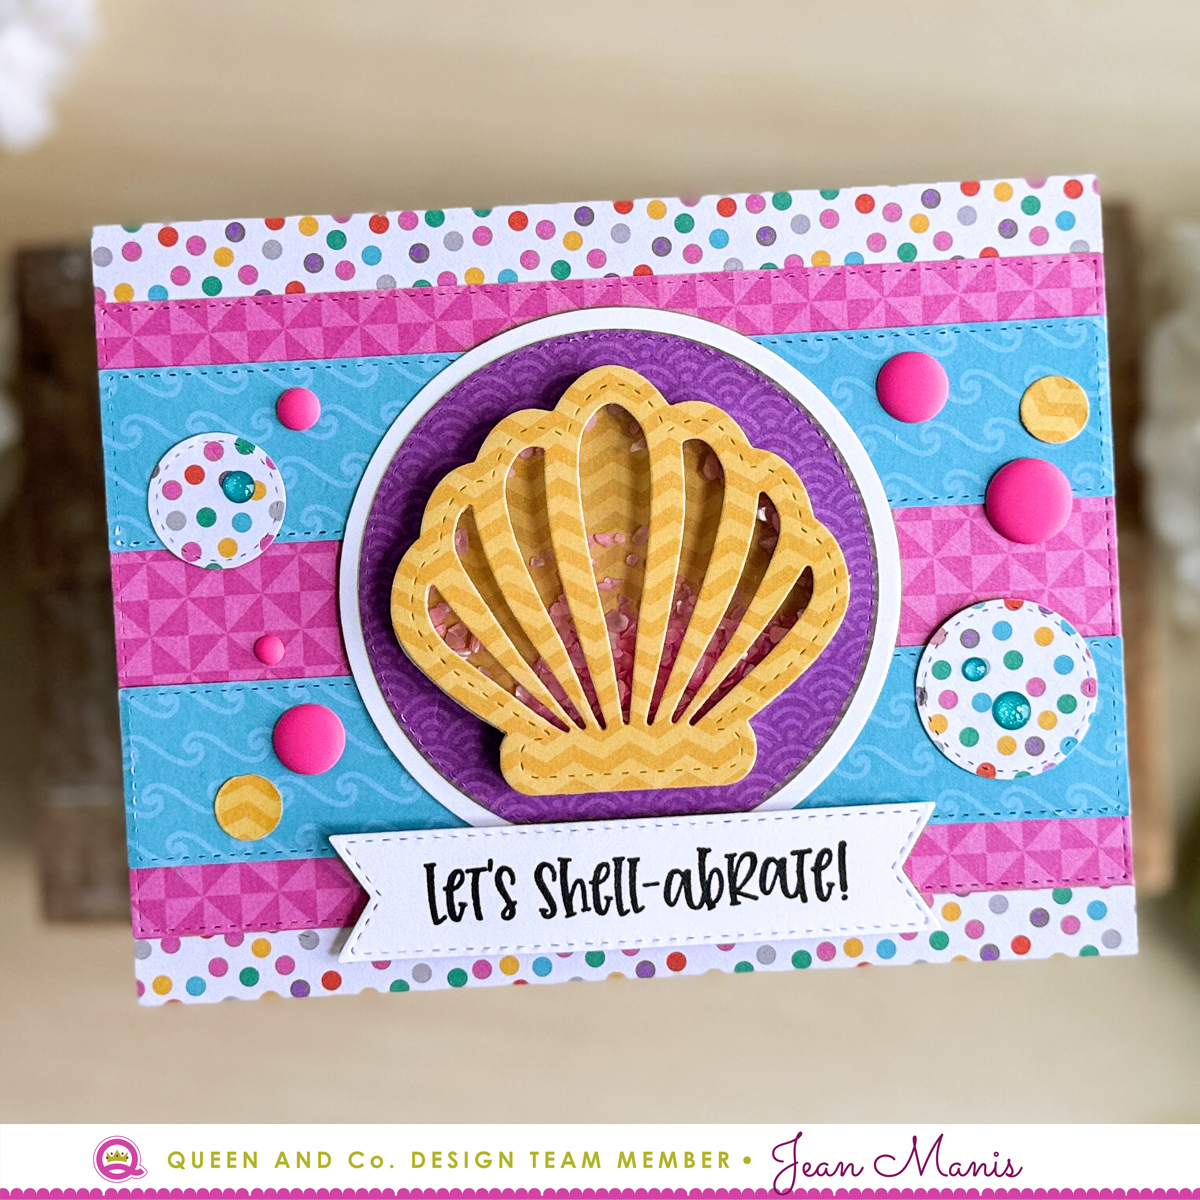
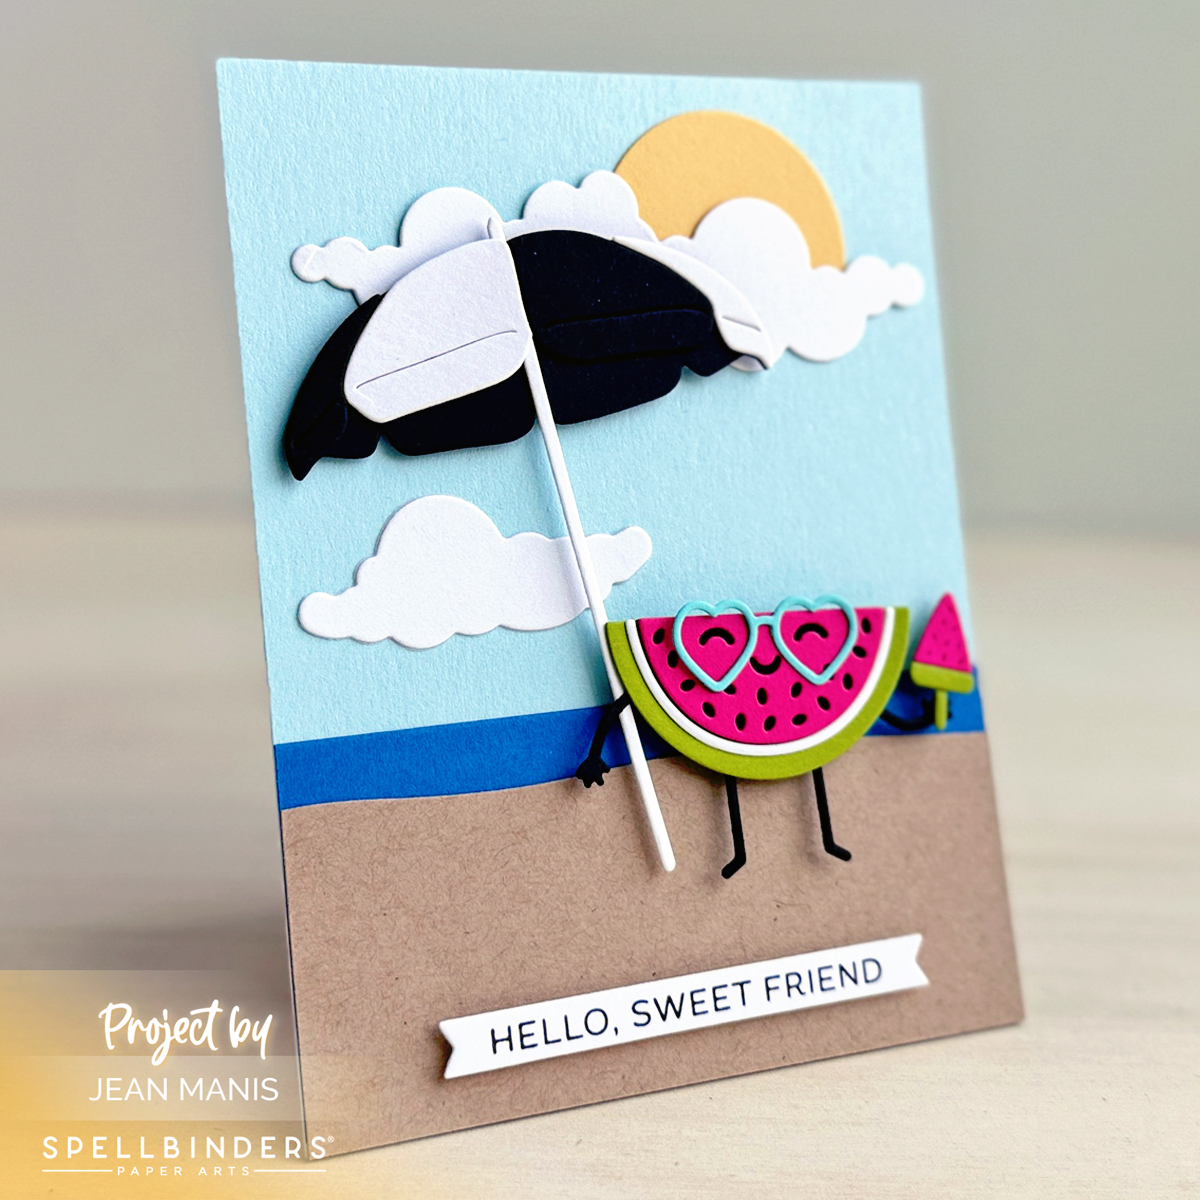
Hello! I’m excited to share a beach-themed, shaker card featuring a scallop shell design with shaker elements contained within the shell. The sentiment, “Let’s Shell-abrate!,” adds a playful touch perfect for a variety of celebratory occasions. I used products from the Queen & Co’s Under the Sea kit, which beautifully complements the theme with its vibrant patterned paper and embellishments.
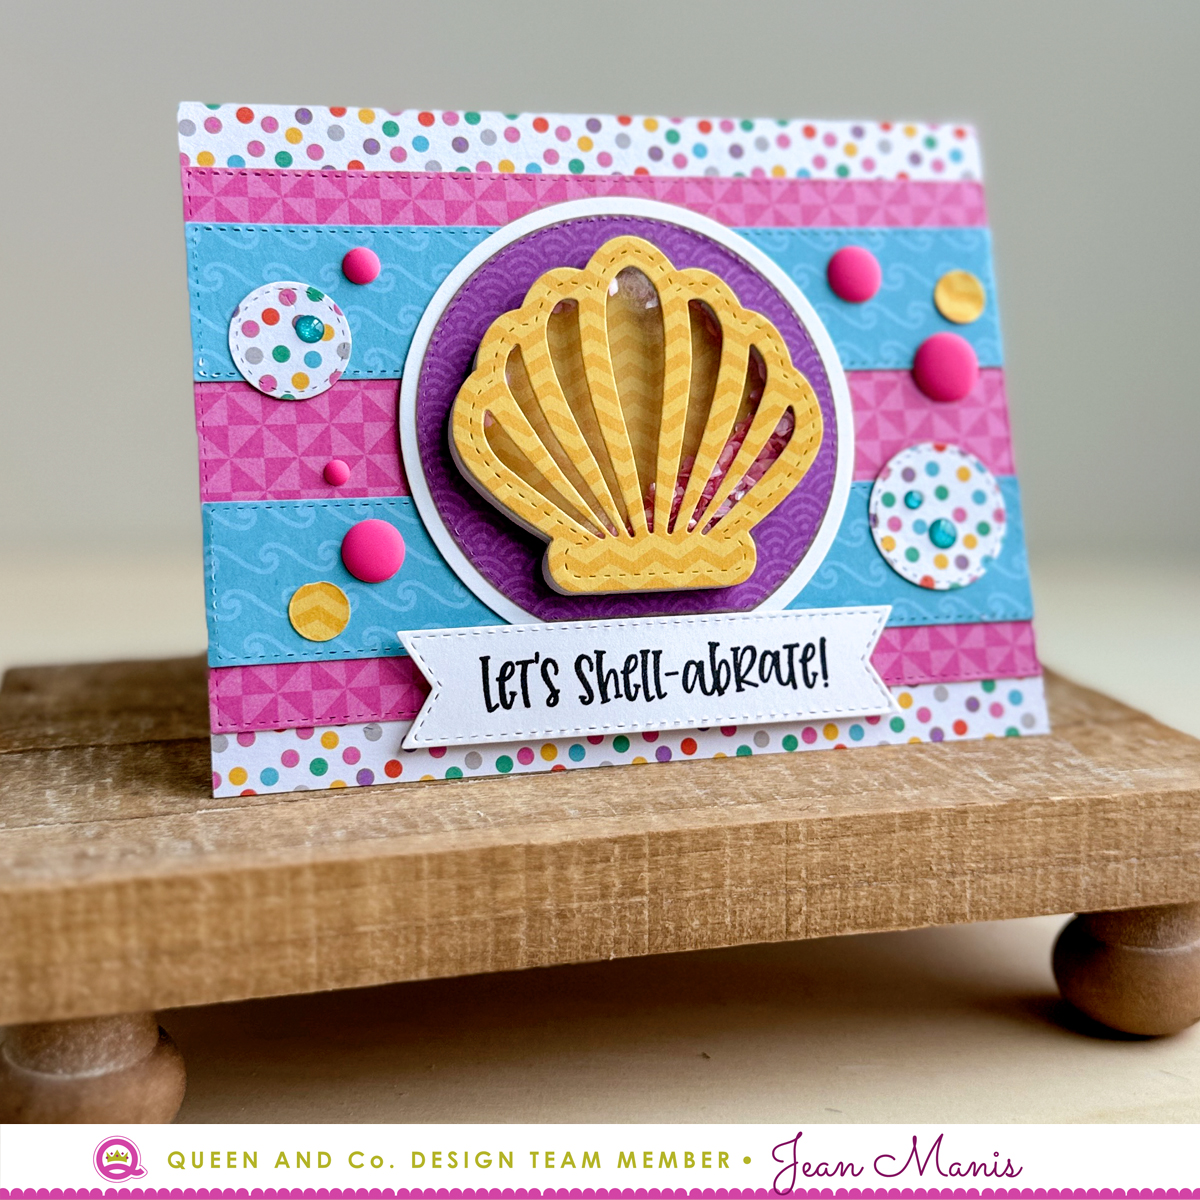
The Under the Sea kit includes dies (nine different focal elements), die-cut foam pieces, shaker elements, patterned paper, and a sentiment stamp set (featuring some fun fonts). I used Foundation die sets – 3, 14, 19 – to create the paper layers and to cut my sentiment.
Looking for more inspiration with the kit? I shared a mermaid card HERE.