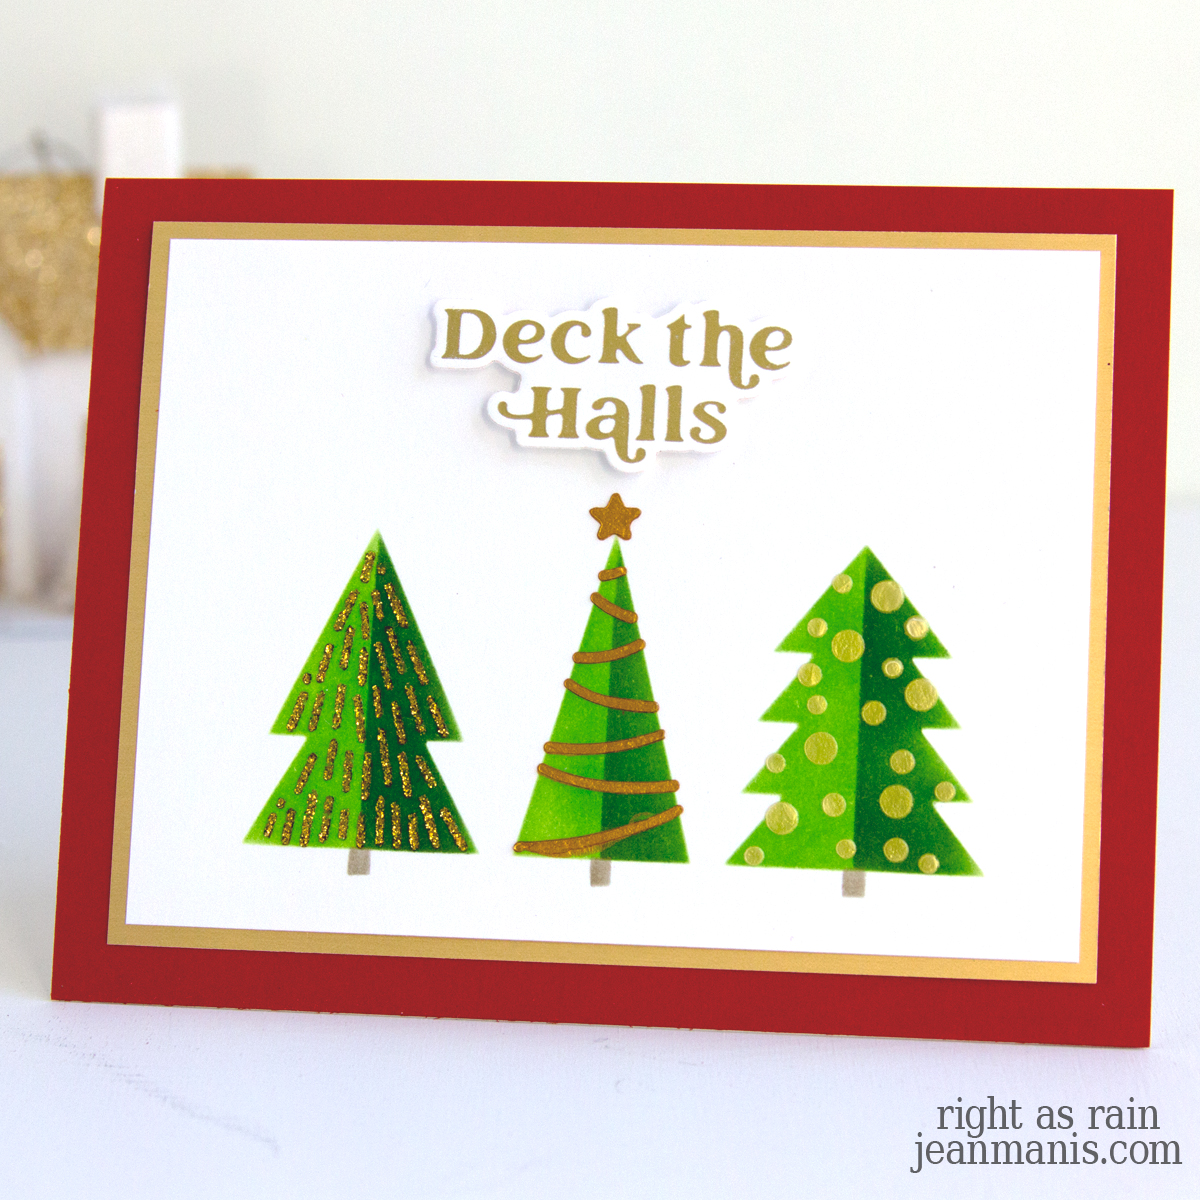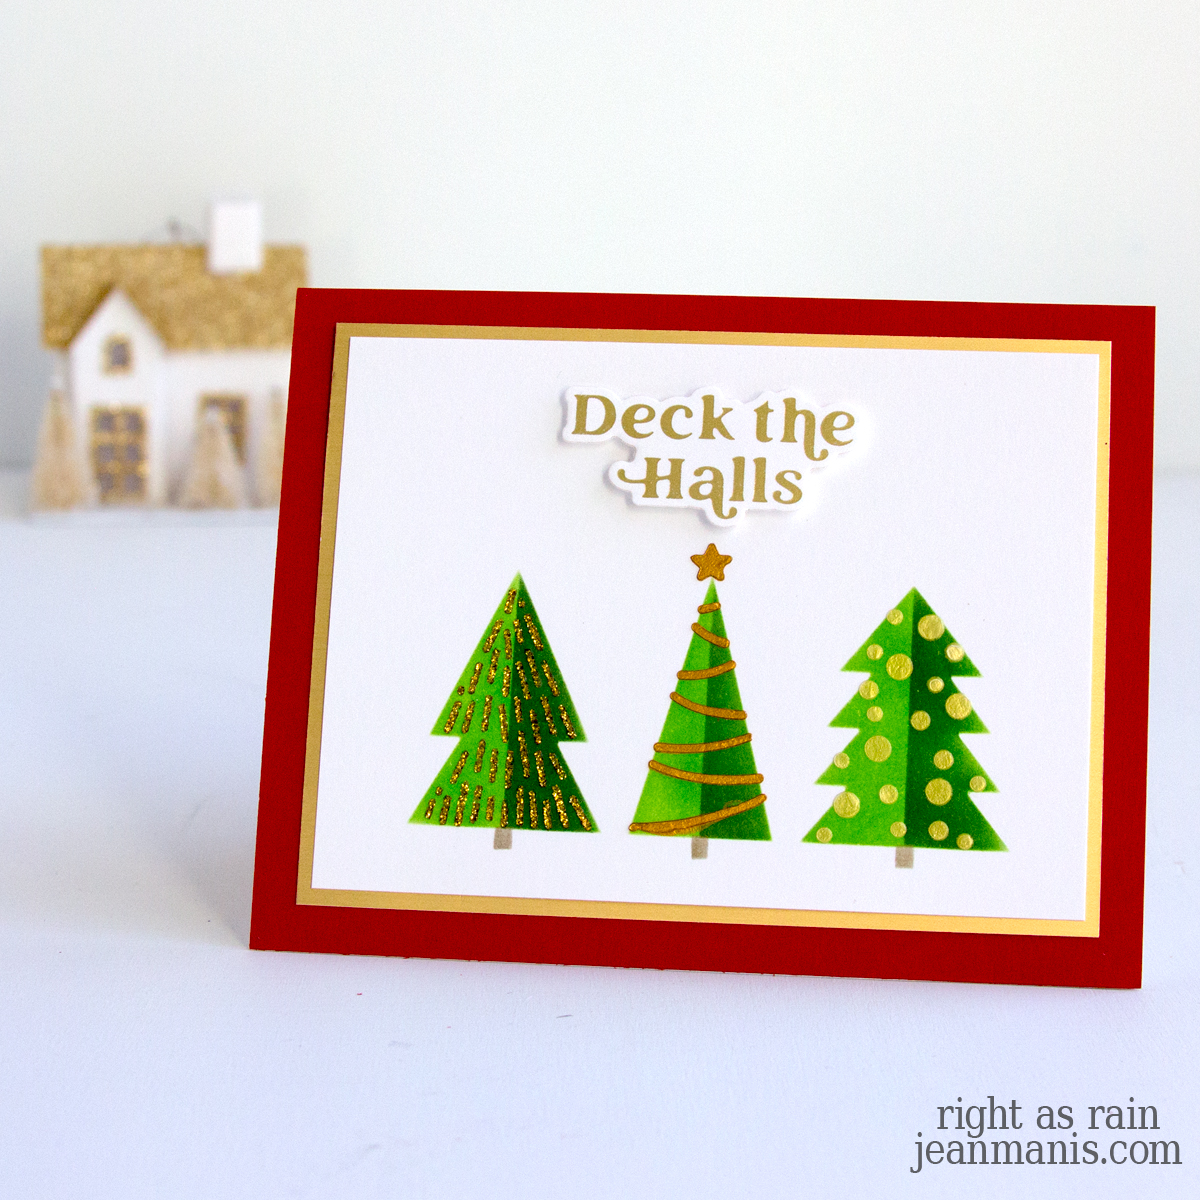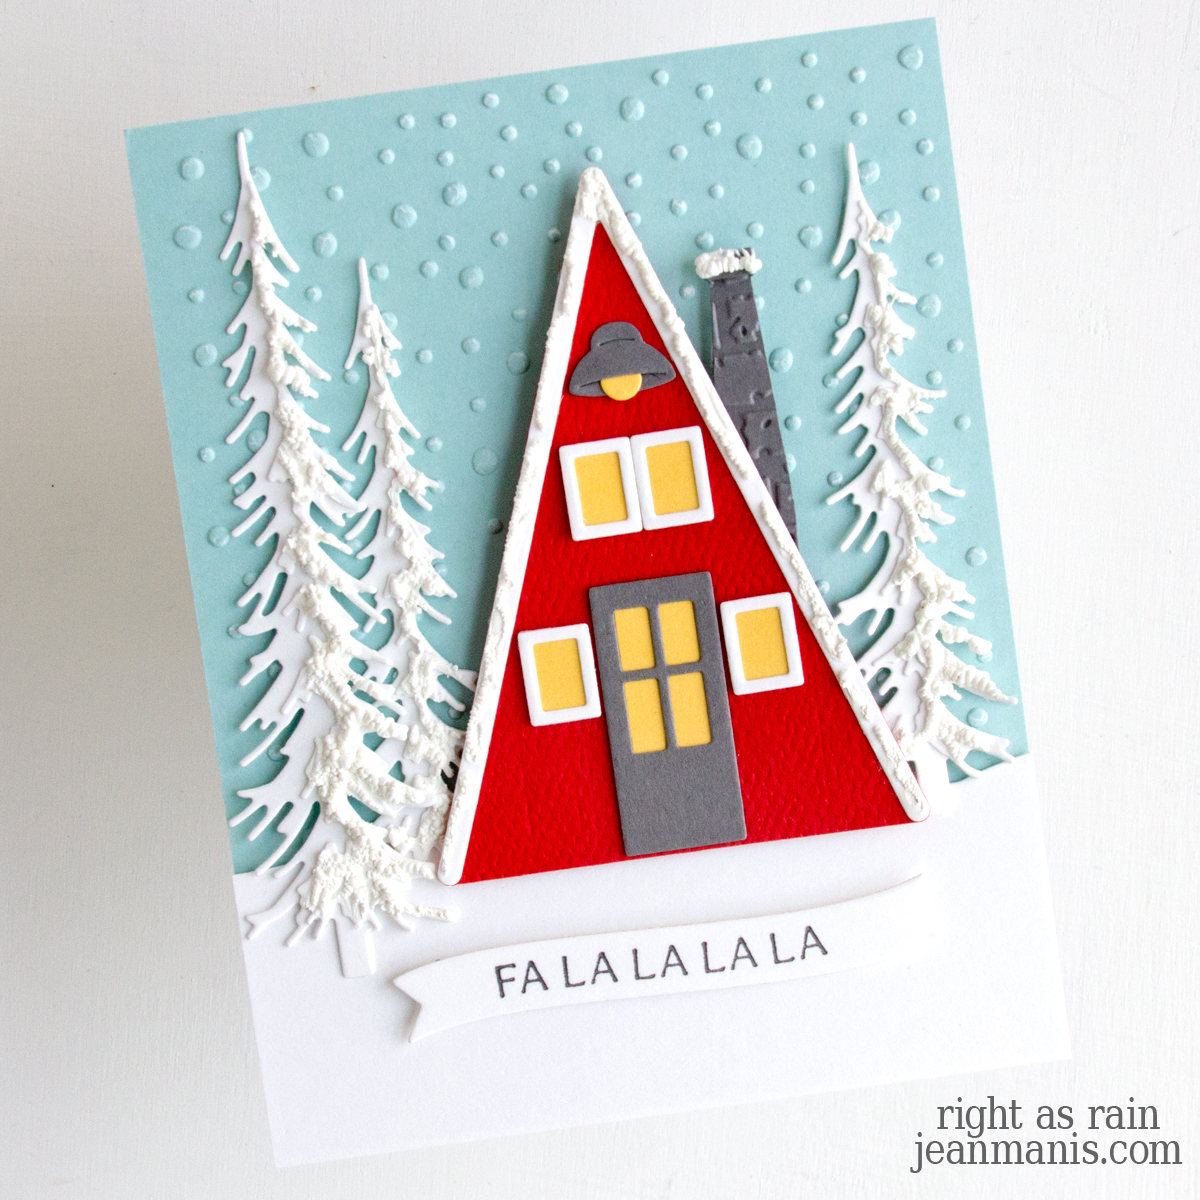
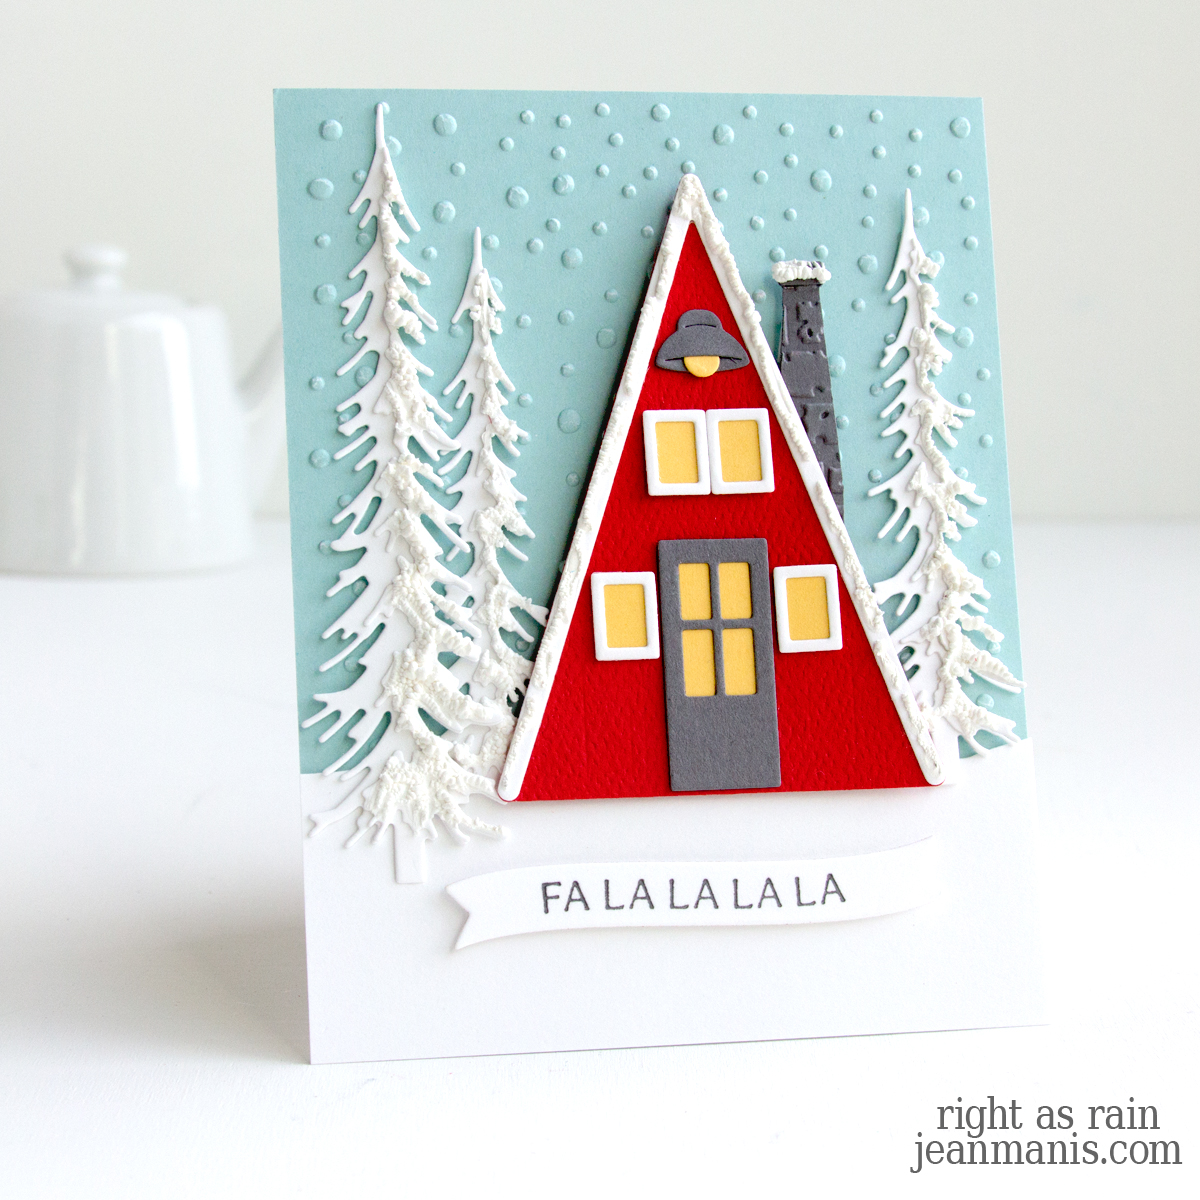
Hello! Are you embracing the magic of the winter season? This winter-themed card showcases an A-frame house set in a serene, snowy forest. The festive sentiment “Fa La La La” adds holiday cheer.
I revisited a previous design but gave it a fresh twist by using different colors and changing how I added snow to the scene. I explored a variety of techniques for adding snowy details to cards HERE.
-
- Dry-emboss light-teal cardstock with a snow folder. I used an embossing folder made by Sizzix, now retired. Add panel to A2-size card base.
- Cut a snowbank from Snowdrift cardstock and add to the background. I used a die in the now-retired Spellbinder Camper Life set.
- Cut the Layered Narrow Pines from Snowdrift cardstock. Each tree has two parts. To create a snow effect, apply Cosmic Shimmer – Fluffy Stuff – White to the overlay pieces and heat set. Assemble.
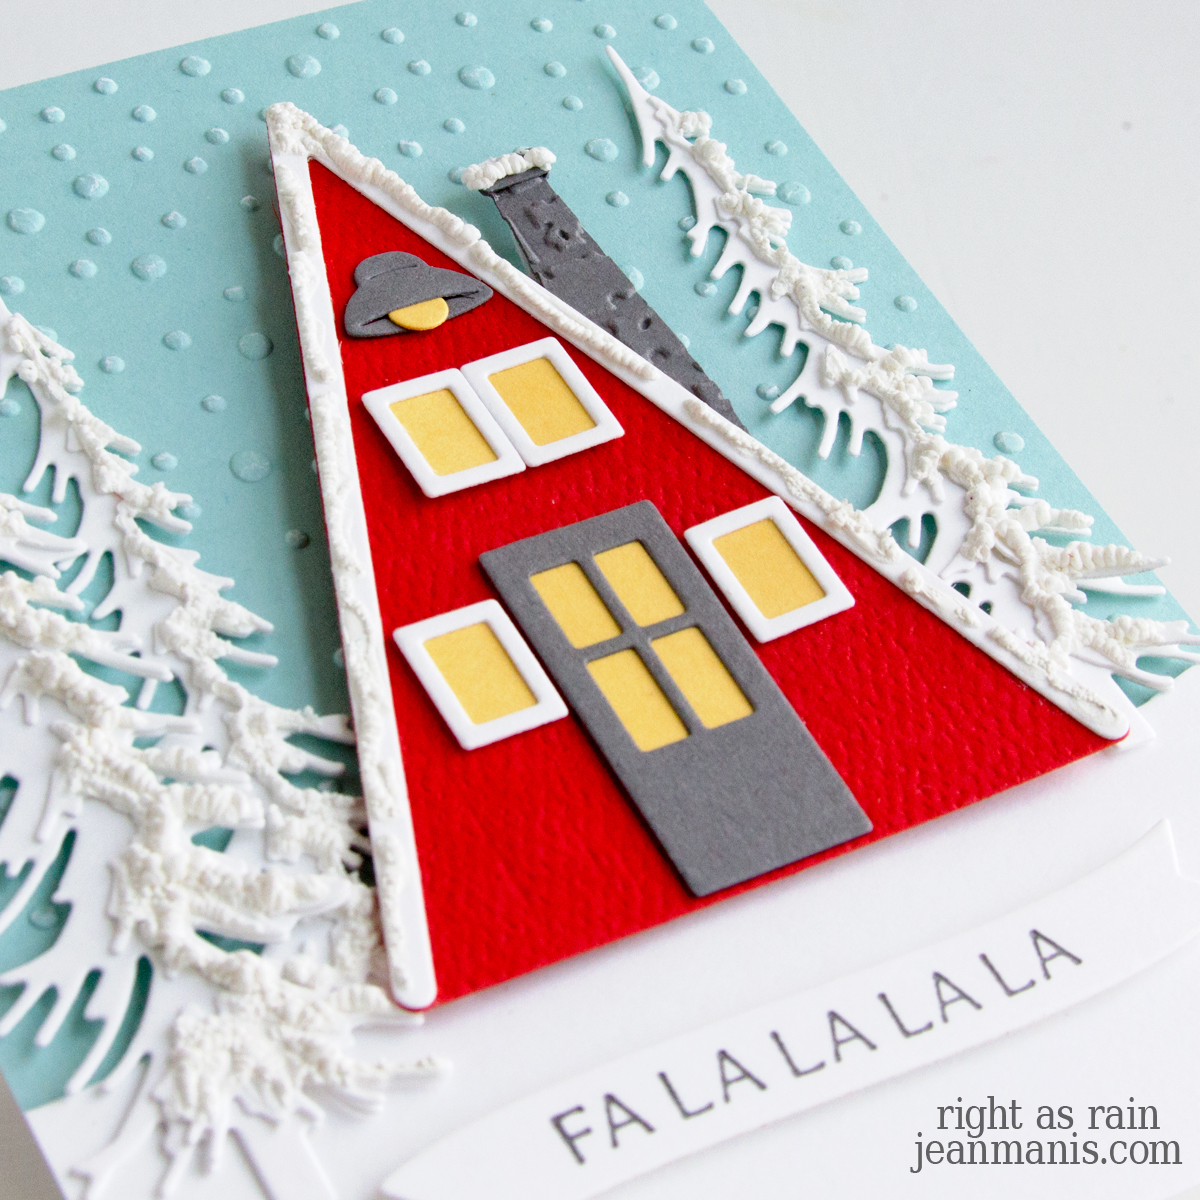
- Cut the A Frame House from a variety of cardstock colors. I used a Taylored Expression brick embossing folder to add texture to the chimney. Add Cosmic Shimmer – Fluffy Stuff – White to the top of the chimney and the roof and heat set.
- With dies in the Lawn Fawn Build-A-House Beach Add-On and Build-A-Cabin sets, cut windows and a light. Assemble and add to the house.
- Press the sentiment in Thunder ink (Jet Set ink set) with the Mistletoe Greetings plate and cut with the coordinating plate.
I am entering this card into the Simon Says Stamp Challenge with a theme of Cold & Frosty.