Rubbernecker | Die-cut Encouragement Card

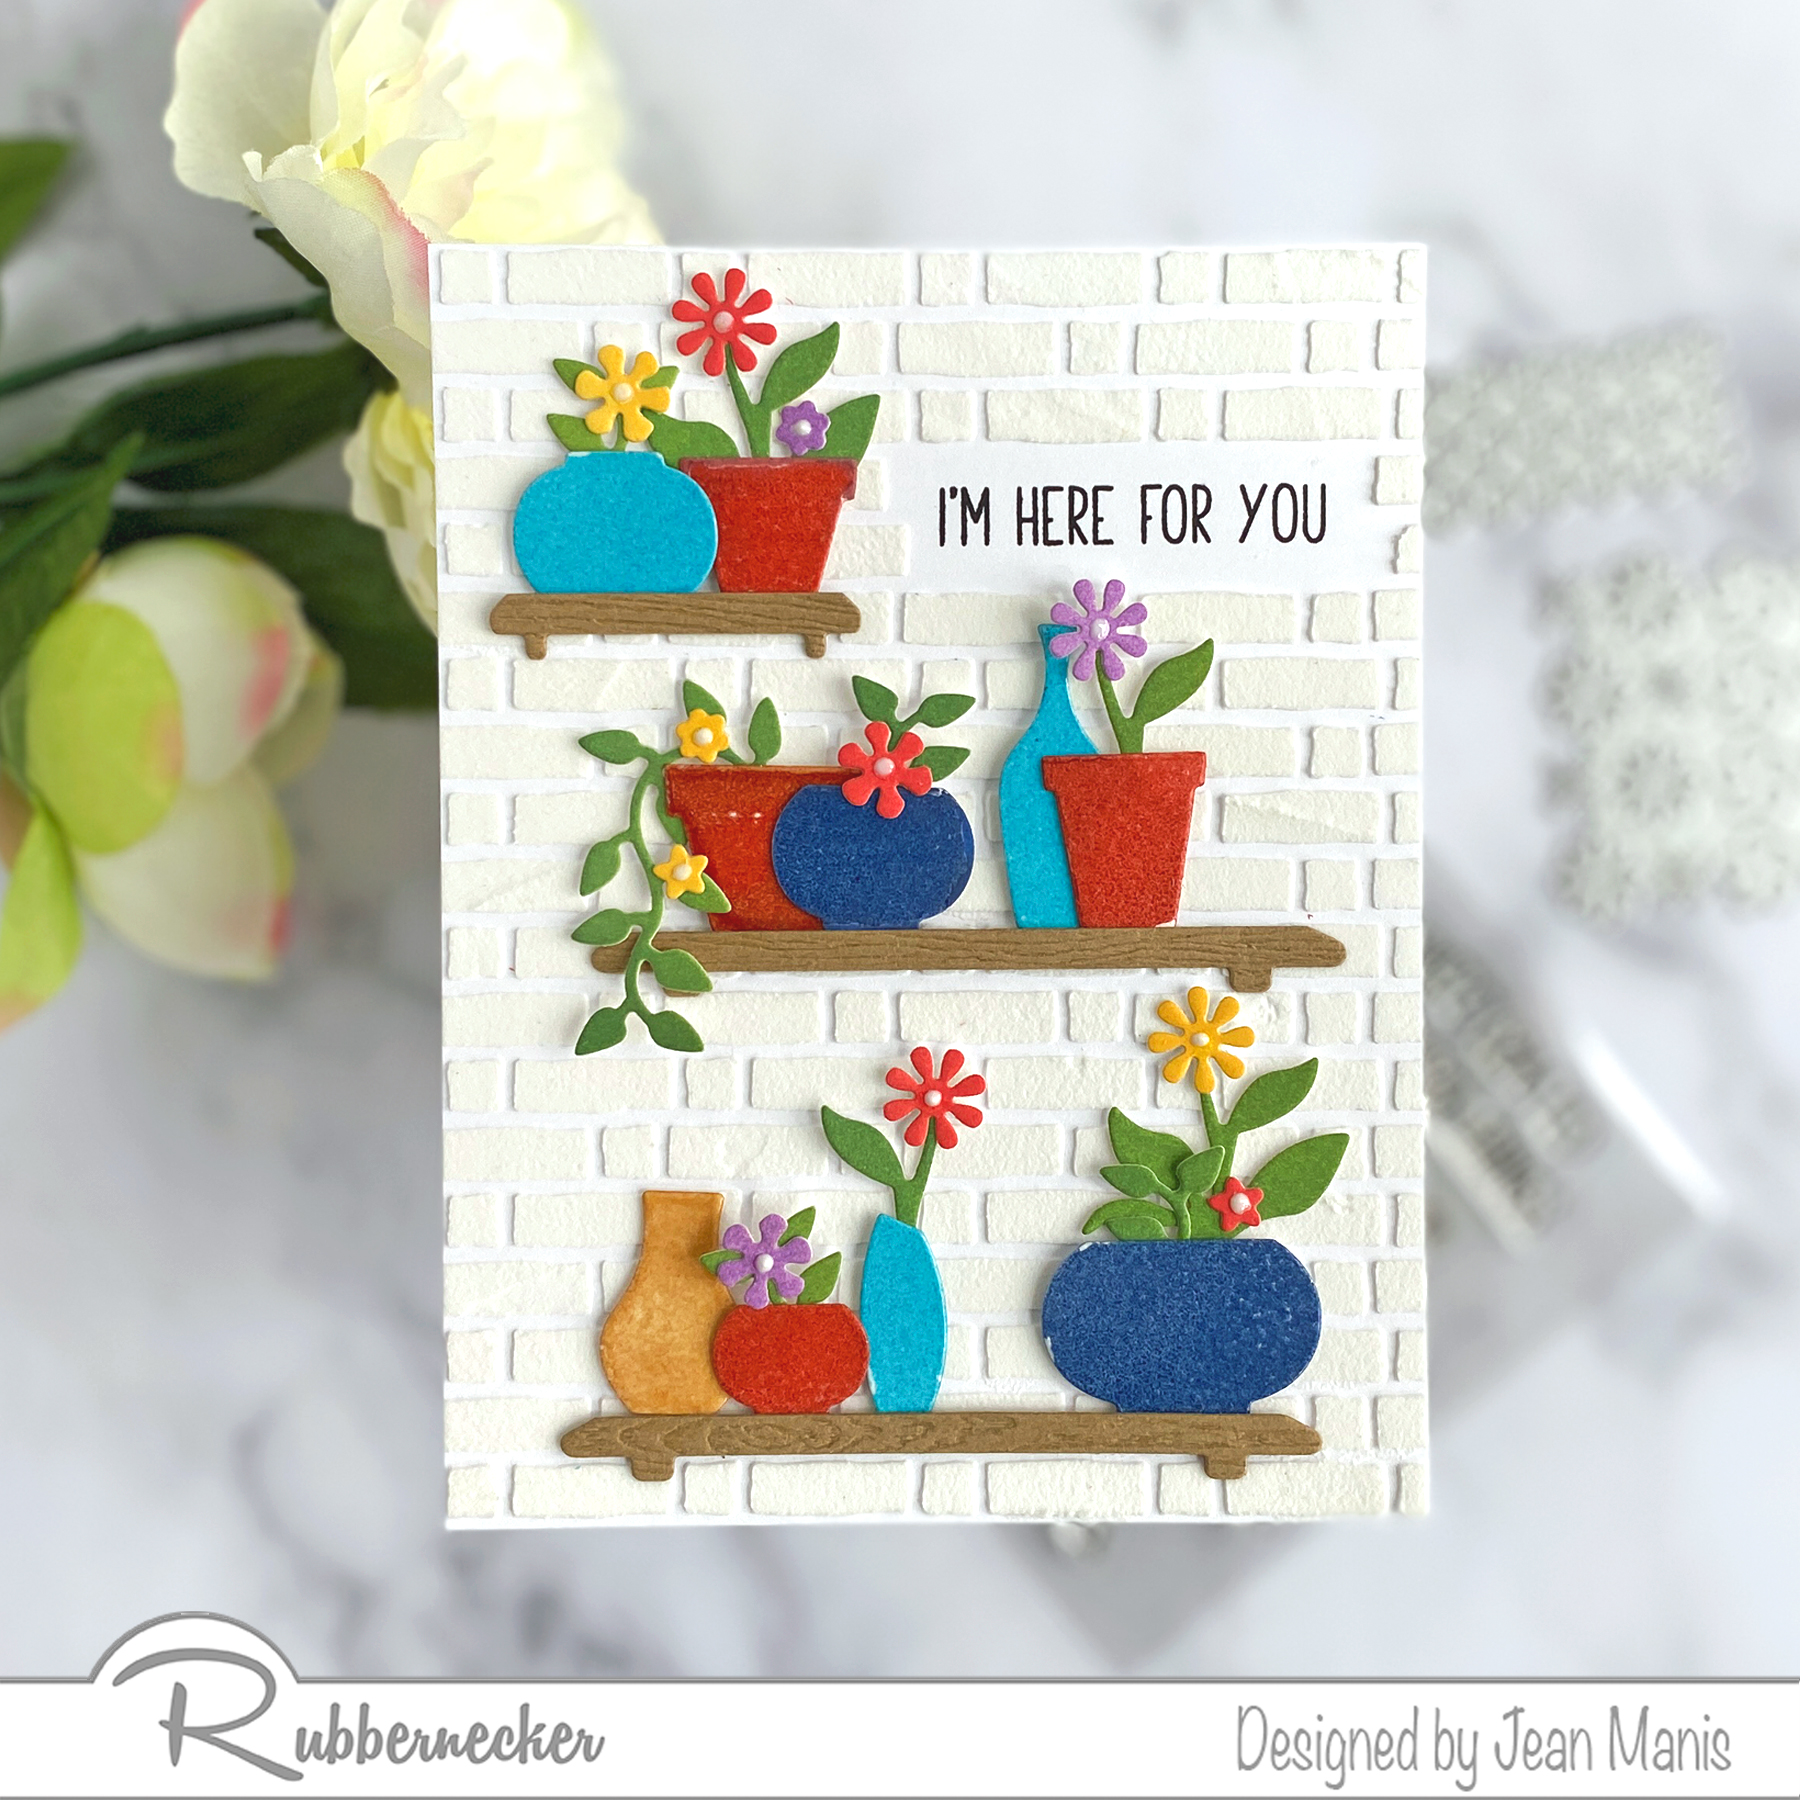
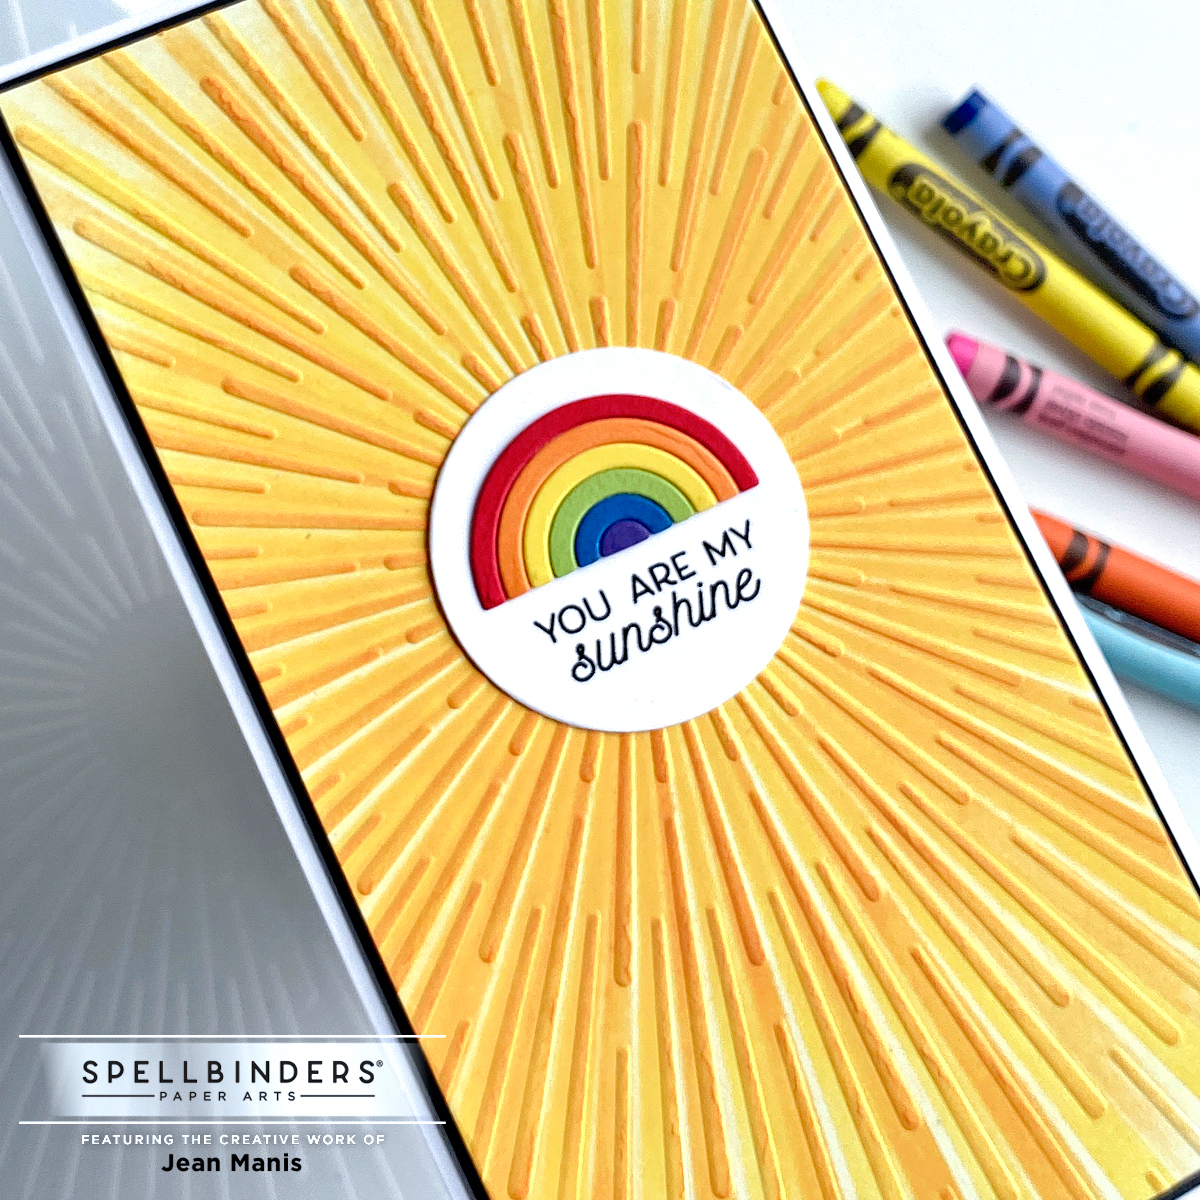
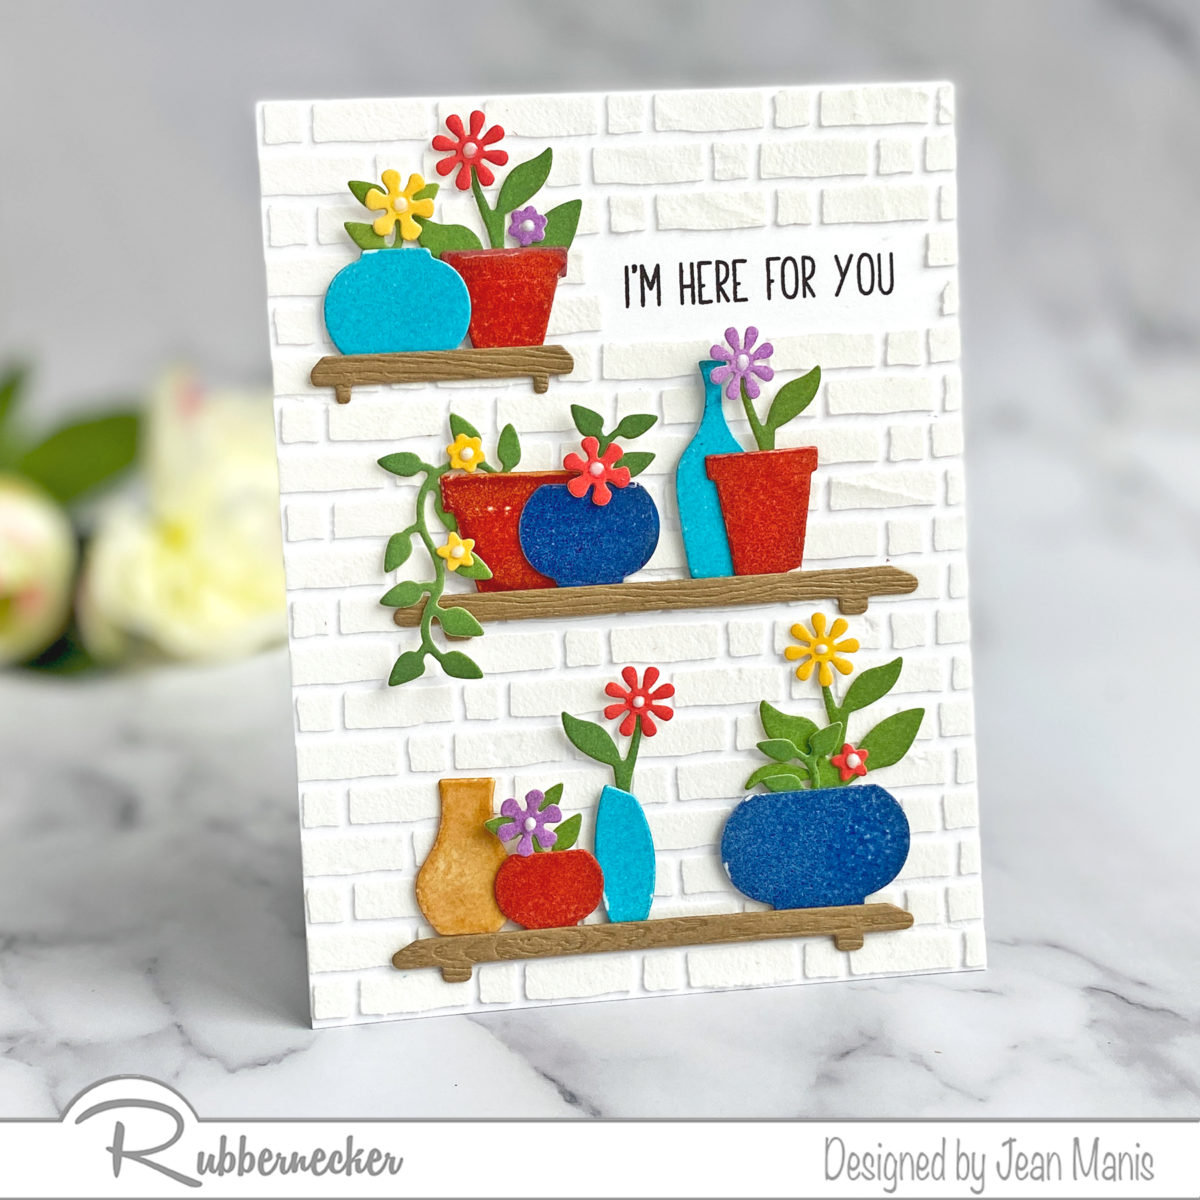
Hello! Today, I am sharing a die-cut encouragement card featuring Rubbernecker dies, stencil, and stamp set.
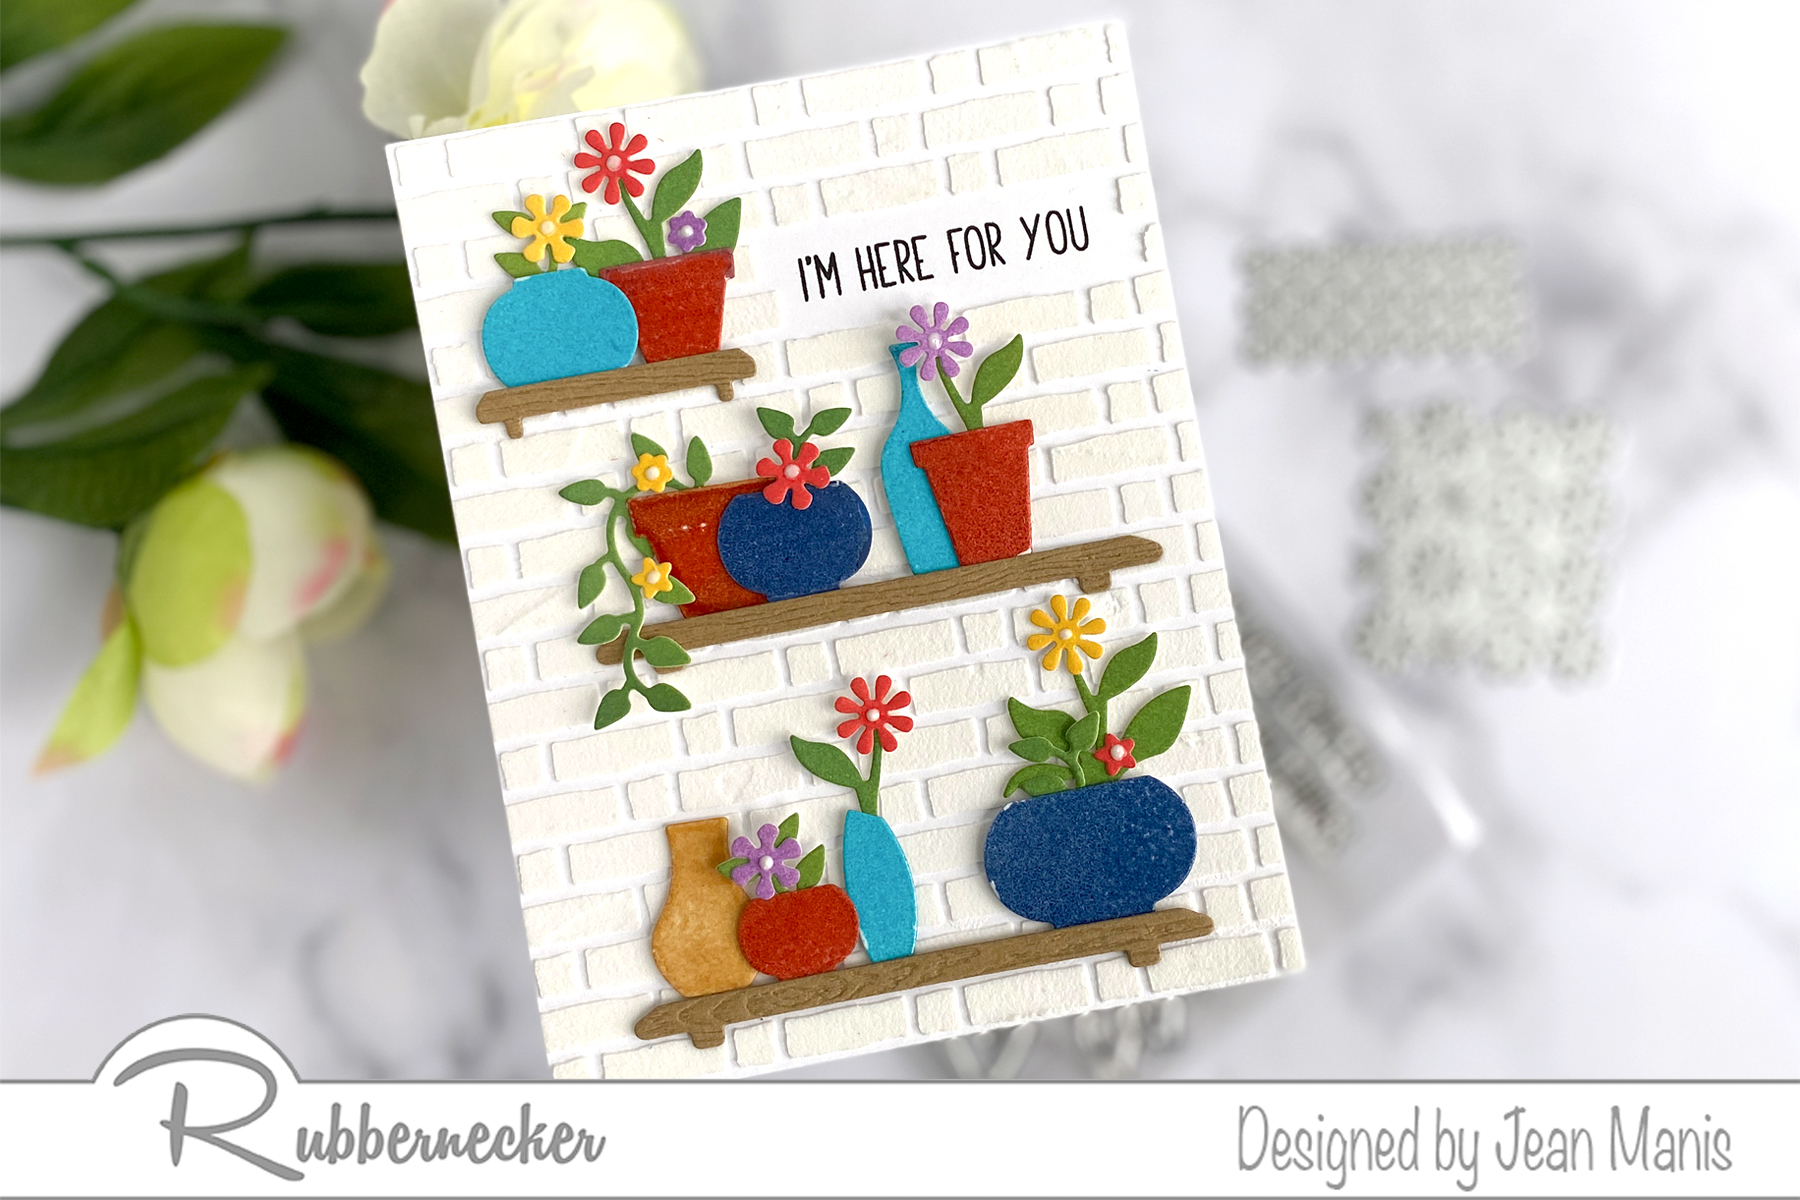
Create background
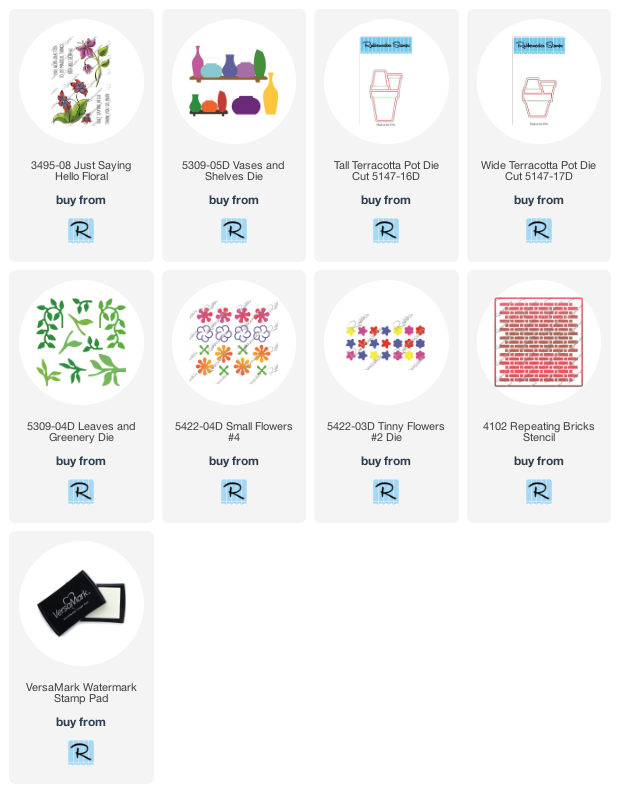
  • Stamp Just Saying Hello Floral sentiment on white cardstock with VersaFine Black Onyx ink.
  • Place Repeating Bricks stencil over stamped panel. Mask sentiment with washi tape and apply white embossing paste.
  • Set aside to dry; once dry, add to A2-size card base.
Create focal elements
Assembly & Finishing Touches
  • Tape glazed pots to shelves.
  • Cut greenery from green inked cardstock with the Leaves and Greenery die. Glue to the insides of the pots.
  • Add enamel dots to the centers of flowers cut with the Small Flowers #4 and Tiny Flowers #2 die sets from inked cardstock.
  • Add shelves to card front with foam adhesive. Glue on flowers.

Rubbernecker | Die-cut Encouragement Card


Rubbernecker | April Stamp Release

Hello! Today, I am sharing a dog-themed card created with Rubbernecker supplies to celebrate the April stamp release. I used the brand-new Dogs Front and Back stamp set for the sentiment with Rubbernecker die sets and stencil.

Rubbernecker | April Stamp Release

Rubbernecker | April Stamp Release


Spellbinders | April 2022 Embossing Folder of the Month

Hello! I’m sharing a CAS, mini-slimline card created with the Spellbinders April 2022 Embossing Folder Kit Club “Radiant Burst.”

Spellbinders | April 2022 Embossing Folder of the Month

Spellbinders | April 2022 Embossing Folder of the Month

Spellbinders | April 2022 Embossing Folder of the Month

The embossing folder, measuring 5.5 x 8.5 inches, can be used to make cards in a variety of sizes including slimline, mini-slimline, 5 x 7, and A2.


Spellbinders | CAS Rainbow Card

Hello! Today I am sharing a CAS card created with Spellbinders supplies, suitable for many occasions including friendship and congratulations.

Spellbinders | Rainbow Card

  • Stencil Squeezed Lemonade ink through the Sun Burst stencil on to a white, A2-size panel, masked to 3.75 x 5 inches
  • To create the rainbow, apply Distress Oxide inks to white cardstock and cut with die in the Colorblock Circles & Stripes set; assemble.
  • Stamp Open Road Sentiments sentiment and cut with On Cloud Nine die. Cut additional clouds with the same set.
  • Add clouds and rainbow to stenciled panel.

Spellbinders | Rainbow Card


Tim Holtz Bold Tidings Mini

Hello! Today, I am sharing a CAS Christmas card created with Tim Holtz supplies that combines my favorite techniques: stenciling, die-cutting, and heat-embossing.

Tim Holtz Bold Tidings Mini

  • I applied white embossing paste through the Flurries stencil on an A2 teal card base.
  • I heat-embossed the Bold Tidings Mini sentiment with Wow silver glitter powder on white cardstock. I trimmed the sentiment and backed it with a silver cardstock mat.
  • I die-cut the Tree Line from white cardstock to which I had applied double-sided sheet adhesive. I added Clear Rock Candy glitter to the exposed trees. I like using Clear Rock Candy glitter as it does not have an undertone (some premade glitter sheets are blueish, yellowish, or pinkish).
  • Once the background was dry, I added the trees and the sentiment panel with foam adhesive.

Tim Holtz Bold Tidings Mini