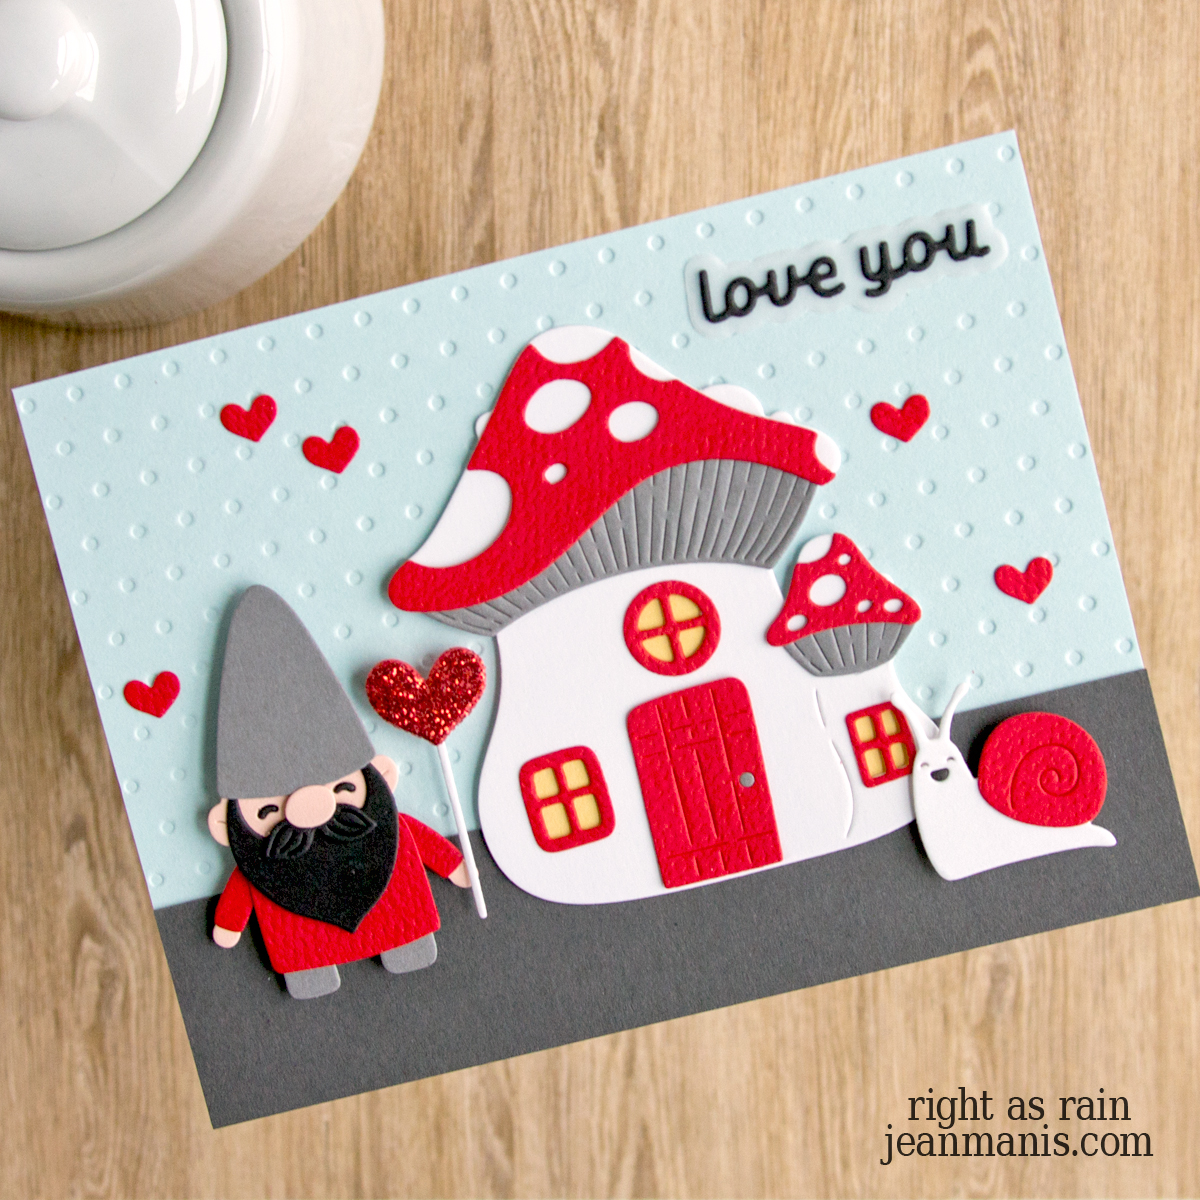
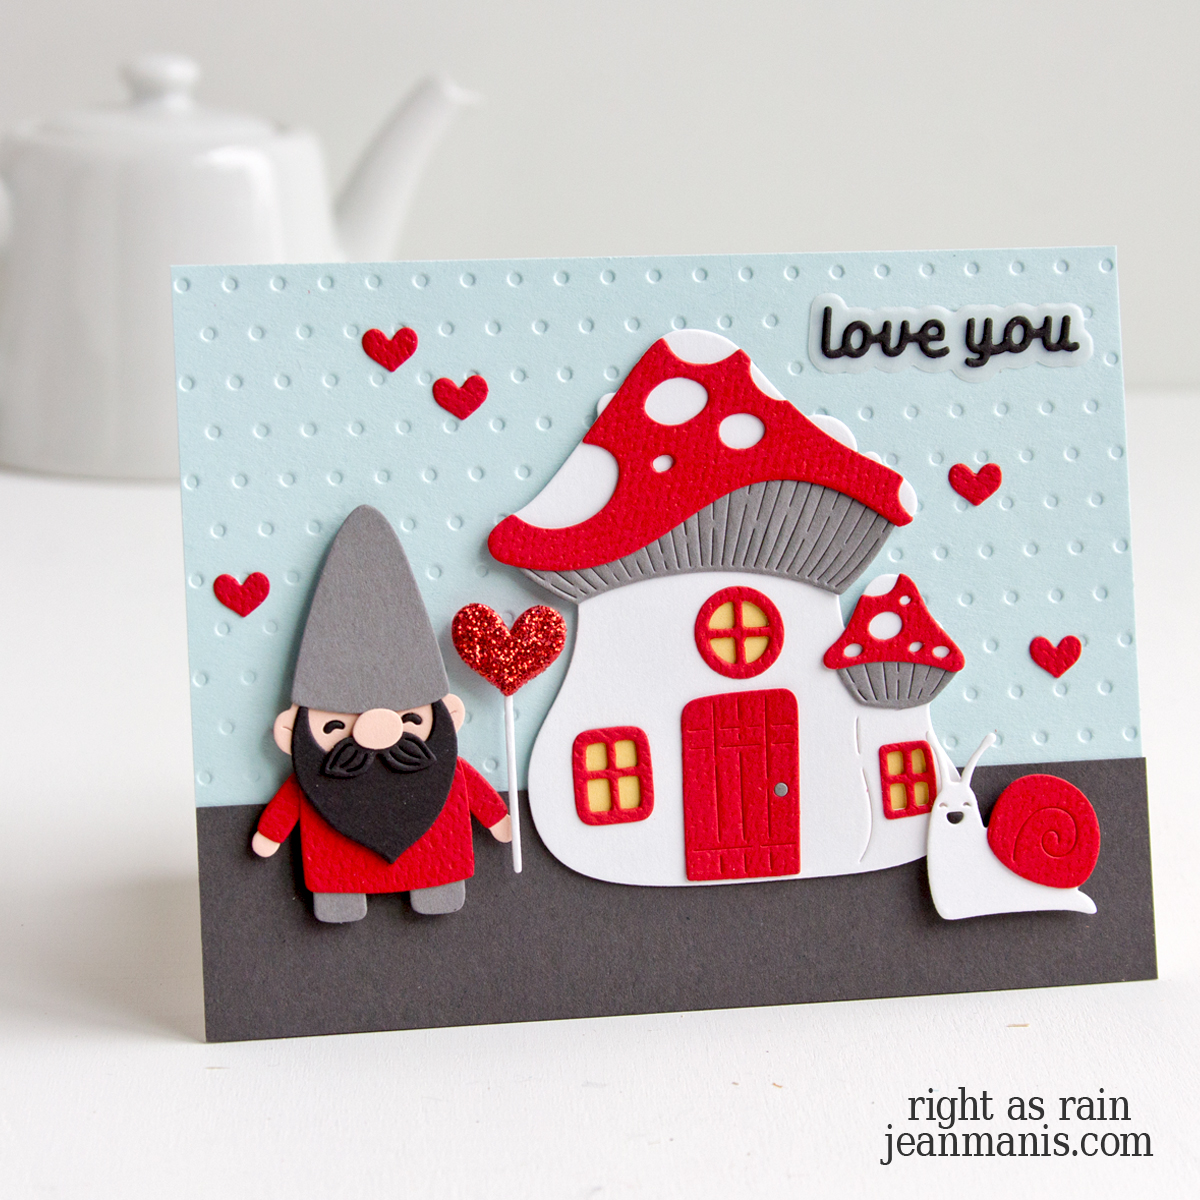
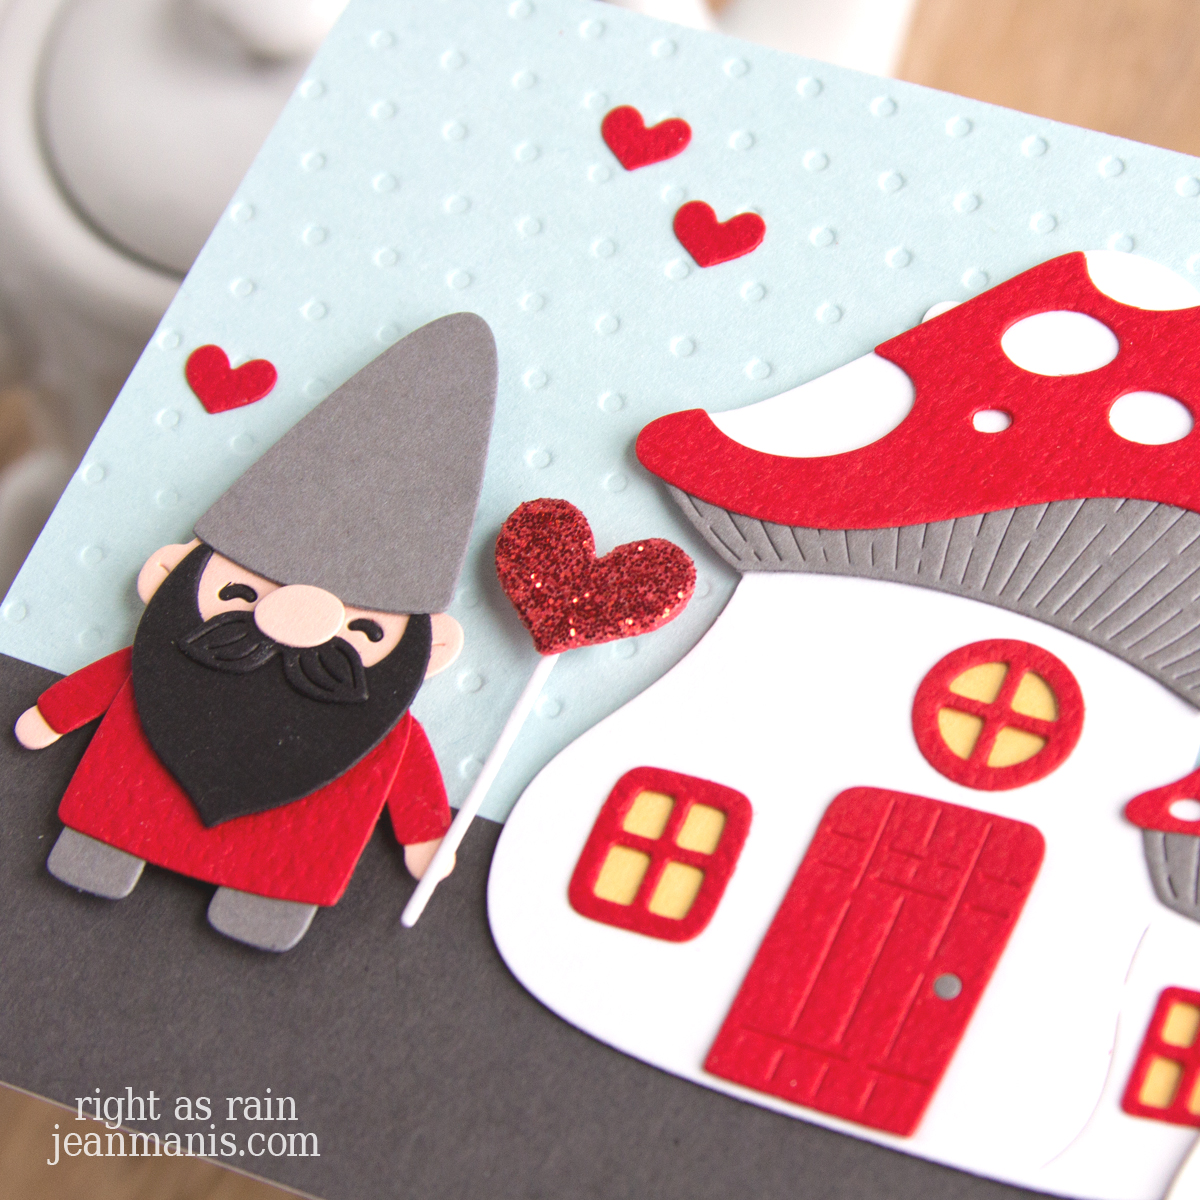
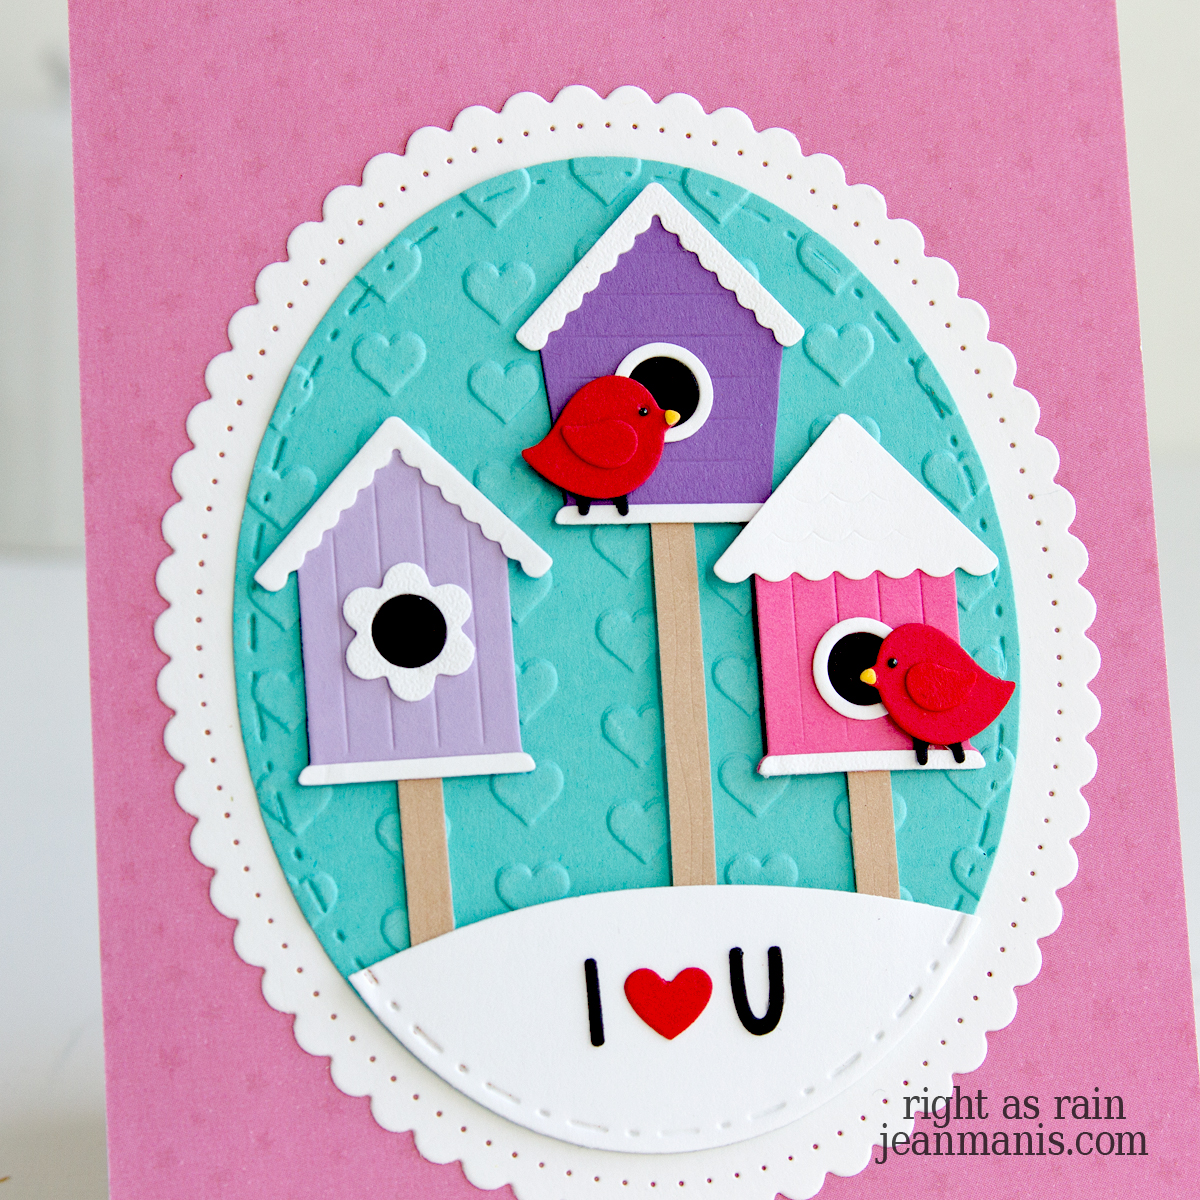
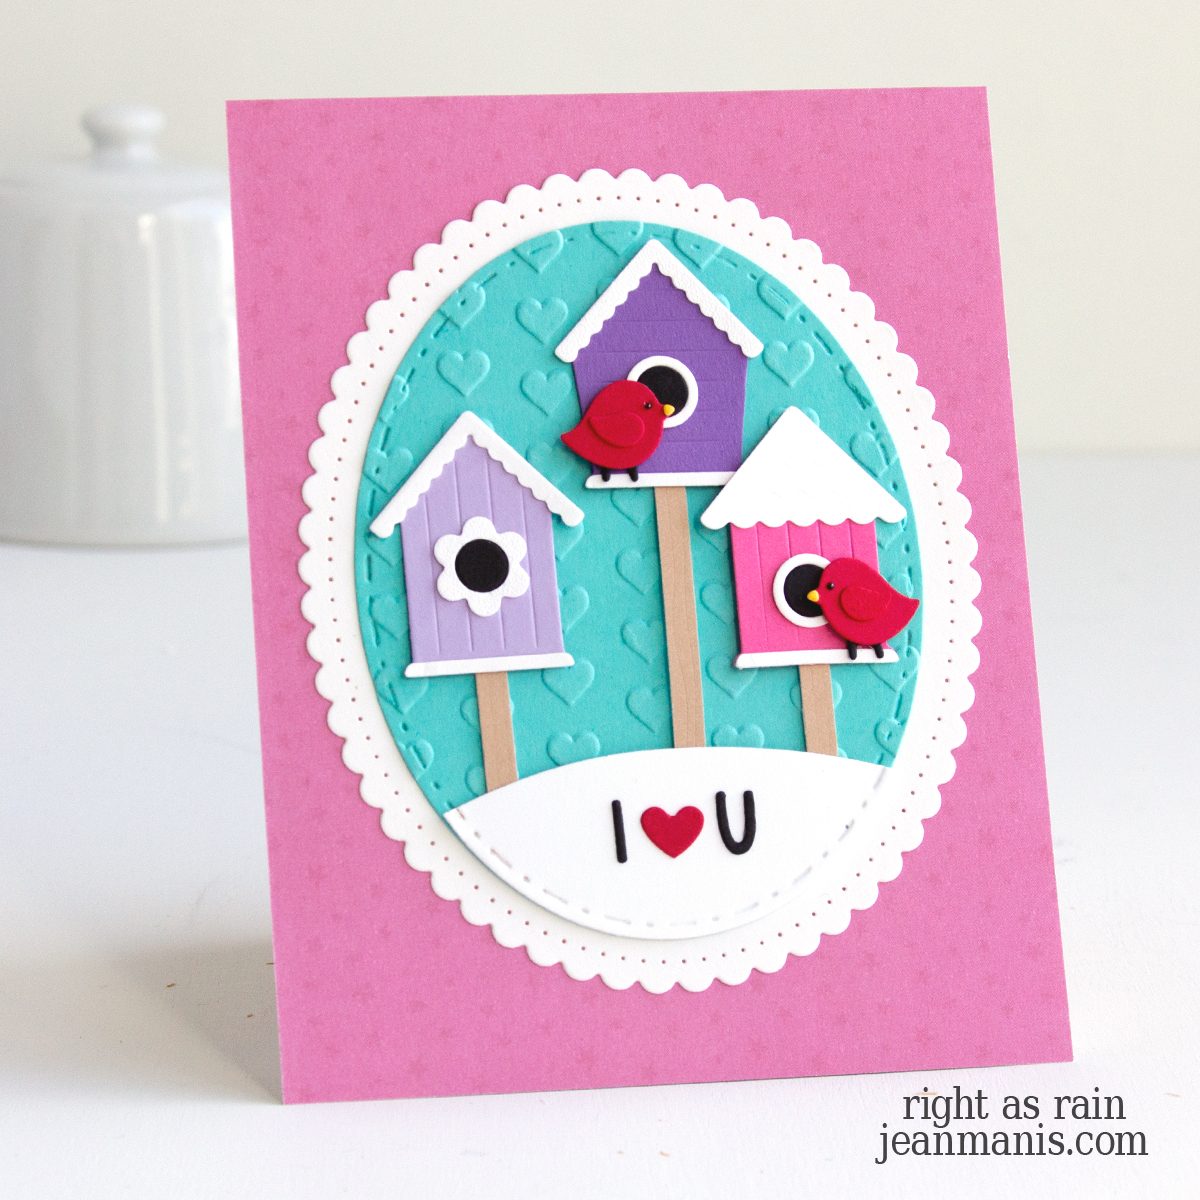
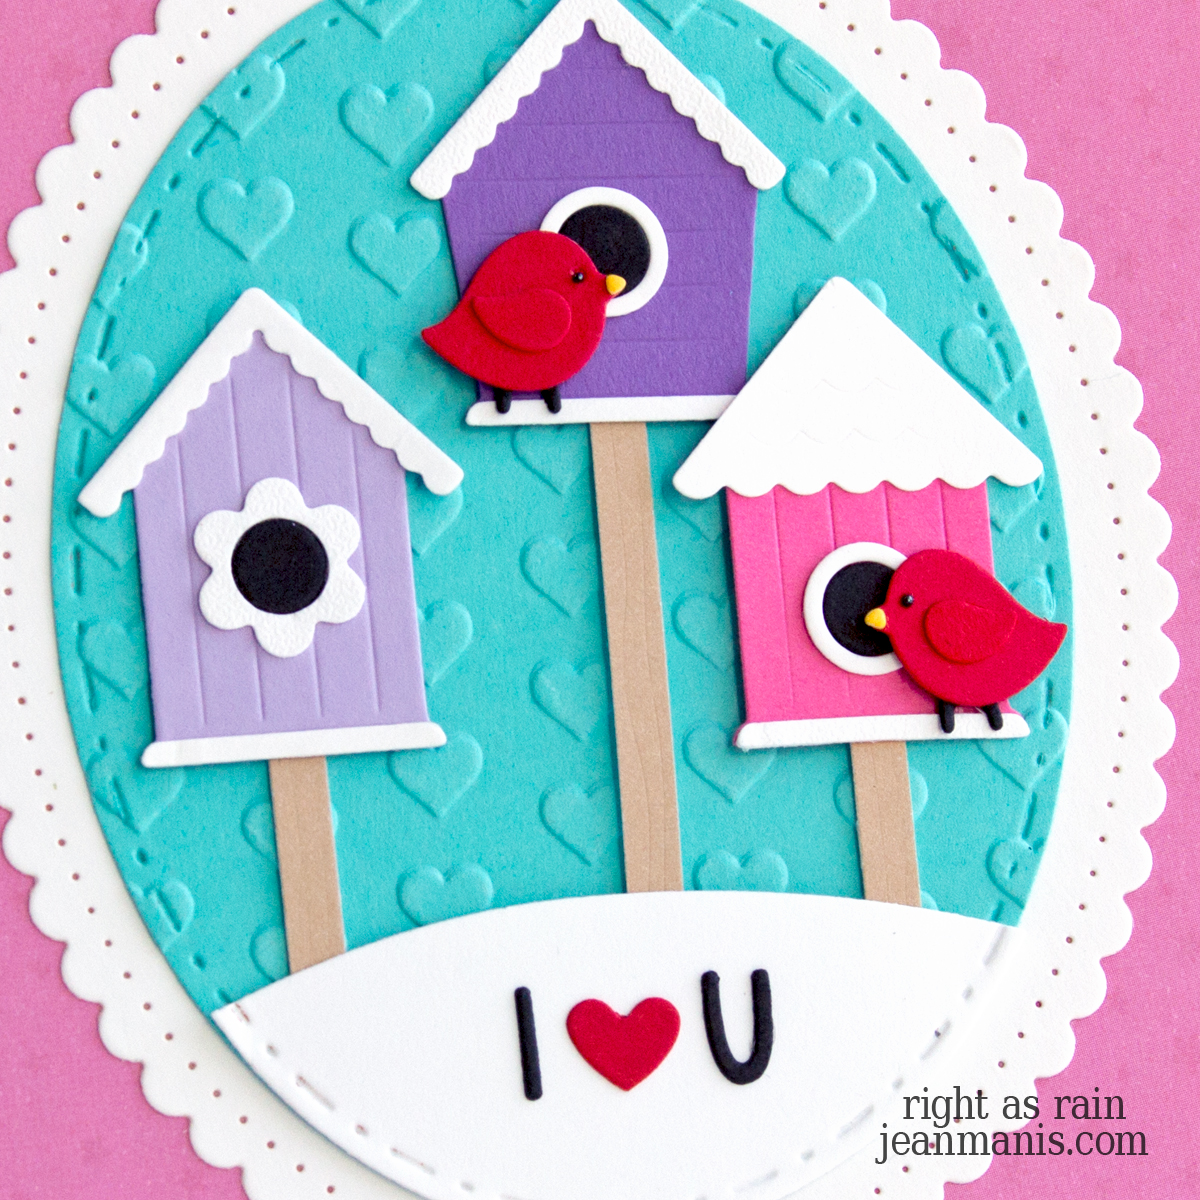
Fairy Tale Castle Birthday Card

Hello! Today, I am sharing a birthday card that combines the Deluxe Caboodle Value Club exclusive “Fairy Tales” die set with the Spellbinders  March 2024 Large Die of the Month Club Kit “Classic Tales.” You can see my first card created with the Large Die of the Month Club Kit – “Classic Tales” – HERE.

Fairy Tale Castle Birthday Card

Each month, Deluxe Caboodle Value Club members receive a bonus item. The March bonus item is the exclusive Fairy Tales die set, which is ONLY available to members of the Deluxe Caboodle Club.

Deluxe Caboodle Fairy Tales Die Set

    • Dry-emboss an A2-size cardstock panel with the Stargazer folder. Add to card base.
    • Cut castle and book pieces with the “Fairy Tales” and “Classic Tales” die sets from a variety of cardstock colors. Assemble.
    • BetterPress the Let’s Celebrate sentiment in black ink on Pomegranate cardstock. Trim with the book outline die in the “Classic Tales” die set.
    • Add castle, book assembly, and stars to the card front.

Fairy Tale Castle Birthday Card


Spellbinders | Wise Owl Small Die

Hello! Today, I am sharing a congratulations card featuring a bespeckled owl and ornate book, created with the Spellbinders March 2024 Small Die of the Month Club Kit – “Wise Owl.” This card, with strong Harry Potter vibes, would be perfect to send for a graduation.

Spellbinders | Wise Owl Small Die

Spellbinders | Wise Owl Small Die


Sunny Studio Stamps | Valentine Truckload

Hello! Today, I am sharing a Valentine’s Day card featuring the delightful Sunny Studio Stamps Truckloads of Love stamp set with coordinating dies. You can see a similar fall-themed card that I created with the set HERE.

Sunny Studio Stamps | Valentine Truckload

    • To begin, dry-emboss an A2-size panel of Dahlia cardstock with the Burlap embossing folder. Add to card base. You can read more about dry-embossed card backgrounds HERE.
    • Stamp Truckloads of Love pickup, hearts (twice), and two of the critters with Versafine on Arches Cold Press watercolor paper and heat set. Color the images with watercoloring mediums of choice (I used Tombow markers). Once dry, cut the images with the dies in the coordinating set. (Check out my “Resources for Watercoloring Stamped Images” HERE.)
    • Cut scallop mat from white cardstock with the Mini Mat and Tag 3 set.
    • Stamp sentiment on white cardstock and add Distress Oxide Inks to sky and road (using vellum to mask while applying the inks). I created the sentiment on my computer.
    • Trim inked sentiment panel to fit inside the Mini Mat and Tag 3 scallop mat. Add inked panel to mat.
    • Adhere truck, hearts, and critters. Add assembly to card base.

Sunny Studio Stamps | Valentine Truckload

Looking for more inspiration? You can see a roundup of Valentine’s Day cards that I created with a variety of products HERE.


Art Impressions Hedgehog Birthday

Hello! Today I am sharing a birthday card featuring the Art Impressions Hedgehogs stamp set. I recently shared a round-up of birthday cards HERE and mentioned that following Christmas cards, birthday cards are the type I send most frequently.

Art Impressions Hedgehog Birthday

    • Cover an A2-size card base with Bazzill Canvas Texture cardstock.
    • Cut a 4 x 5 1/4-inch bright green cardstock panel (I used Stampin’ Up Granny Apple Green) and dry-emboss with the Floating Balloons 3D folder. Add panel to prepared base.
    • Stamp Hedgehogs image with VersaFine ink on Arches Cold Press watercolor paper; heat set. Color the image with watercoloring mediums of choice (I used Tombow markers). Set aside to dry. (You can read more about watercoloring stamped images HERE.)
    • Once dry, cut the hedgehog image with die in the Hexagon Double Stitched set.
    • Stamp Hedgehogs image on Masking sheet and fussy-cut.
    • Cover watercolored hedgehog image. Using a vellum sheet, add Hickory Smoke ink for the ground and Tumbled Glass ink for the sky.
    • Add hexagon panel to card front.
    • Stamp Hedgehogs sentiment in black ink on white cardstock and cut with a 1 1/2″ circle die. Add to card front with foam adhesive.

Art Impressions Hedgehog Birthday


Spellbinders | Rain Boot Bouquet

Hello! Today, I am sharing a friendship card, featuring a charming pair of rain boots and an array of exquisite floral elements, created with the Spellbinders February 2024 Small Die of the Month Club Kit – “Rain Boot Bouquet.”

Spellbinders | Rain Boot Bouquet

Spellbinders | Rain Boot Bouquet

    • To begin, dry-emboss an A2-size panel of Waterfall cardstock with the Tiny Dots folder. Attach to card base.
    • With the Small Die of the Month Club Kit set, cut boots, foliage, and greenery. Assemble.
    • Use the BetterPress System to create the sentiment in Black ink on Snowdrift cardstock with the Always and Forever Sentiment set. Use the coordinating die to cut.
    • Add sentiment to the card from with dot adhesive.
    • Add boots to the card front with foam adhesive.
    • Fill boots with greenery and floral pieces.