Reverse Confetti – November Countdown to Confetti Day One

Hello! It’s Day One of the November Reverse Confetti Countdown to Confetti! This release is packed with stamps and dies with which to create for a number of occasions including the holidays.

My first project combines the Botanical stamp set (which has a coordinating die set) and Mixed Messages, a sentiment stamp set. Both are terrific for friendship cards.

Reverse Confetti - November Countdown to Confetti Day One

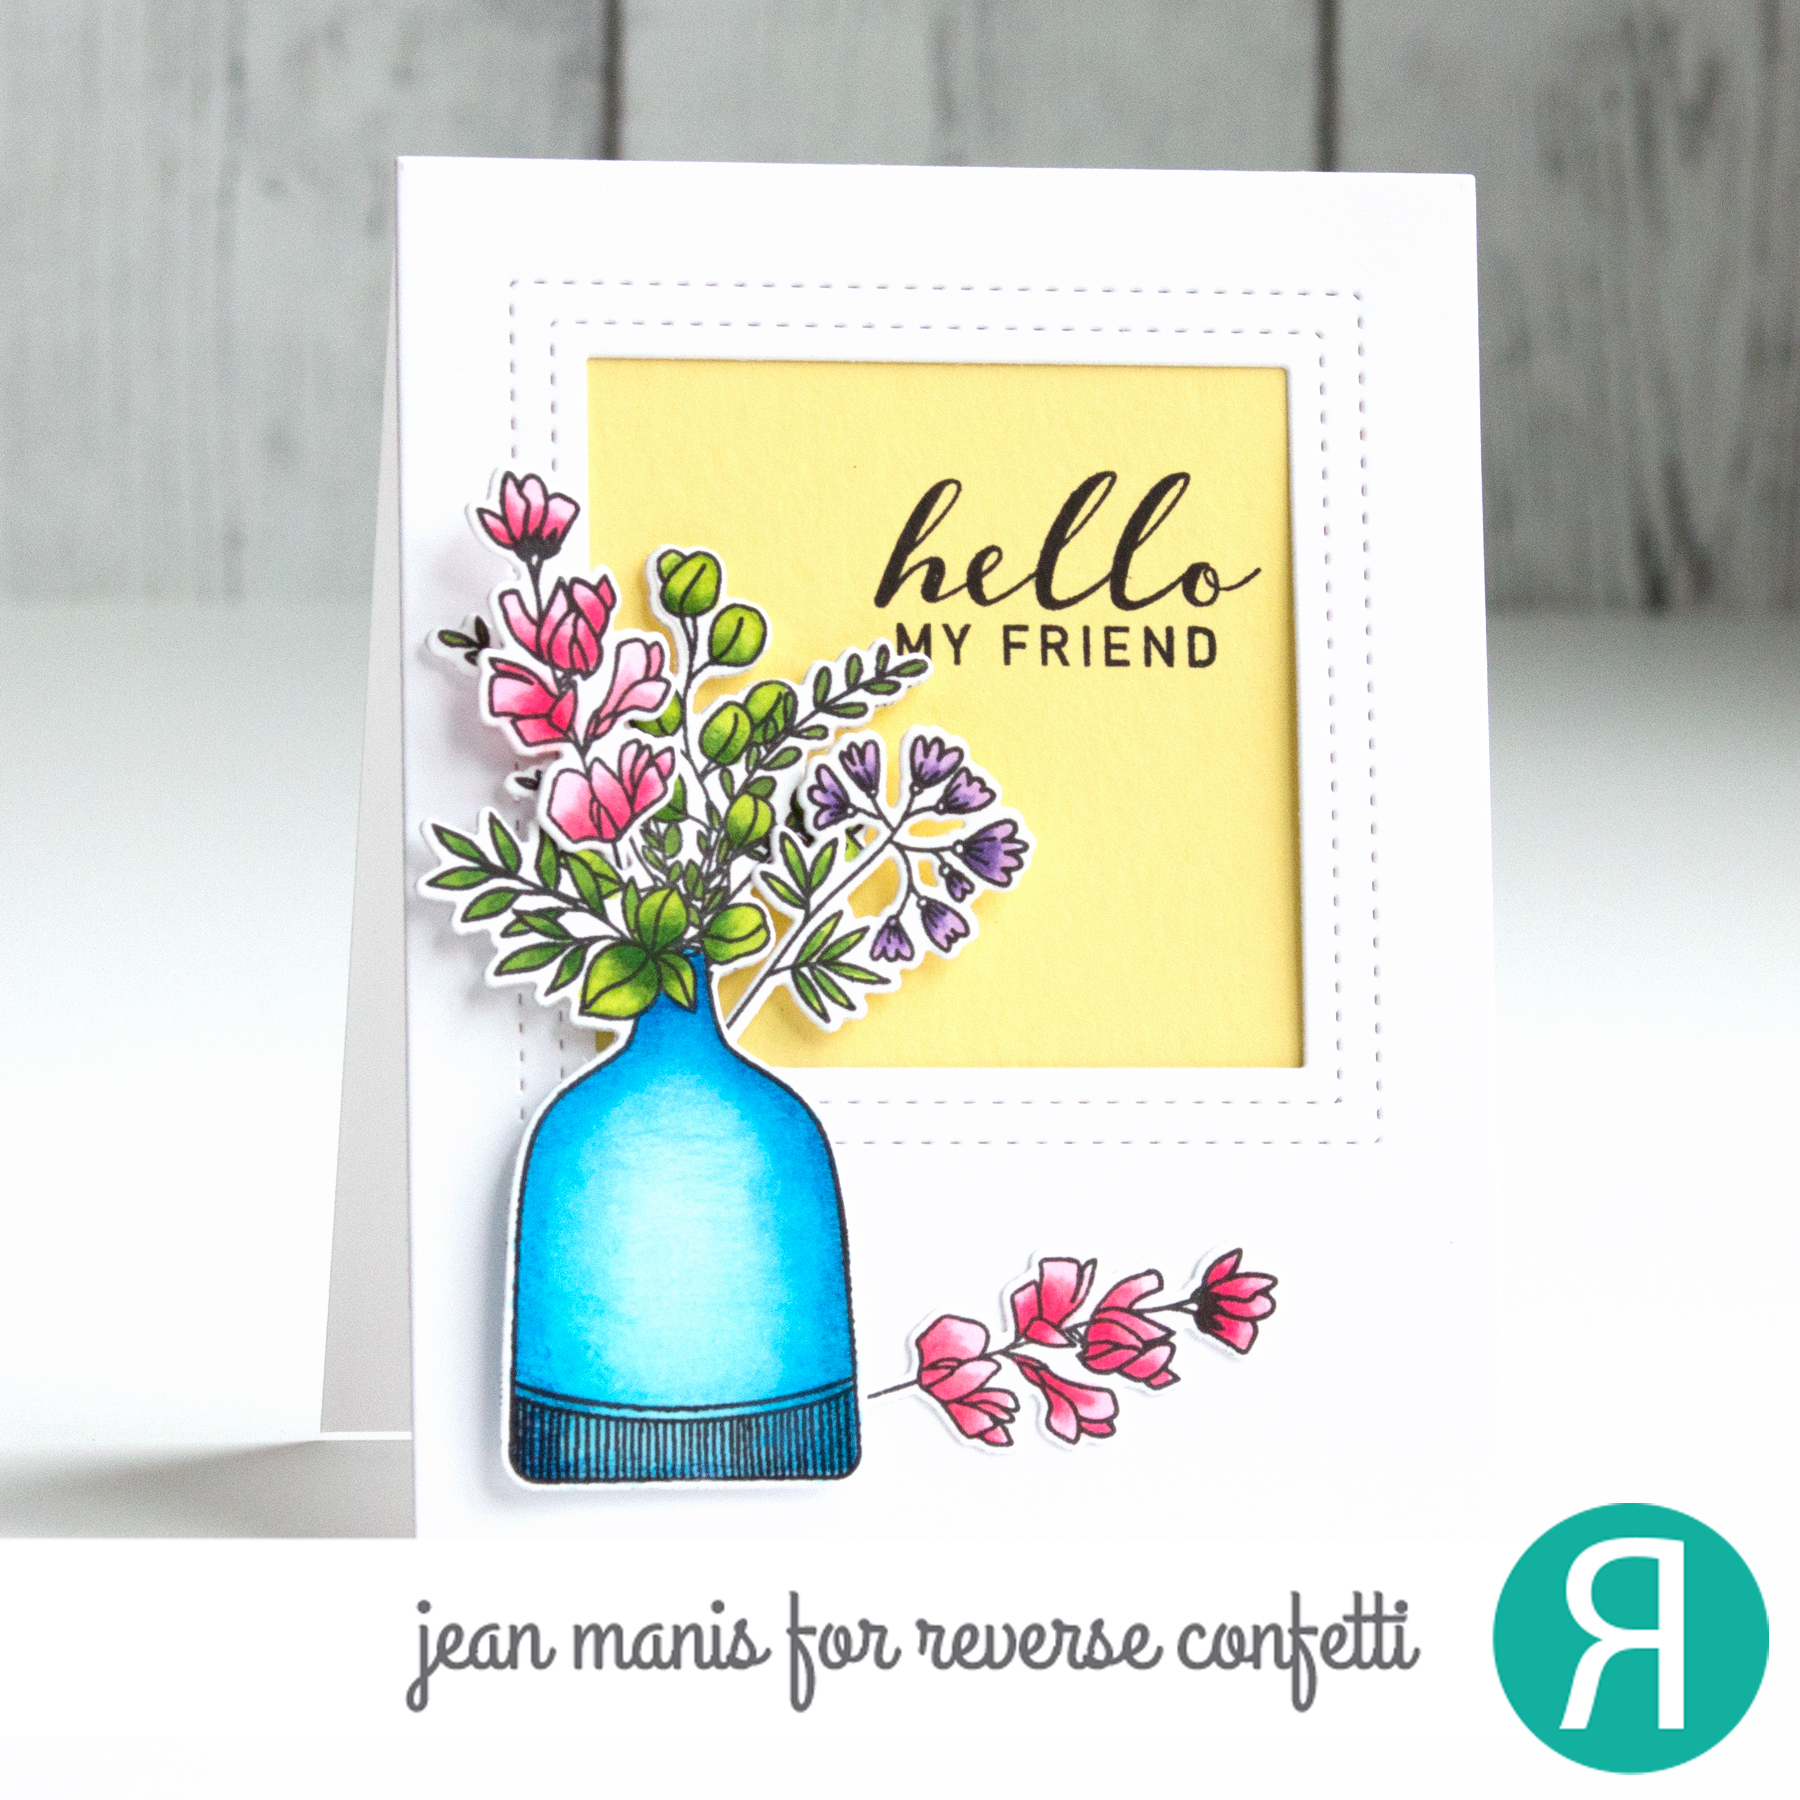
  • I stamped the Botanical images, Copic colored them, and cut them with their coordinating dies.
  • I stamped the Mixed Messages sentiment and framed it with the Double Stitch Window.
  • I added the foliage to the front of the frame.

Reverse Confetti - November Countdown to Confetti Day One

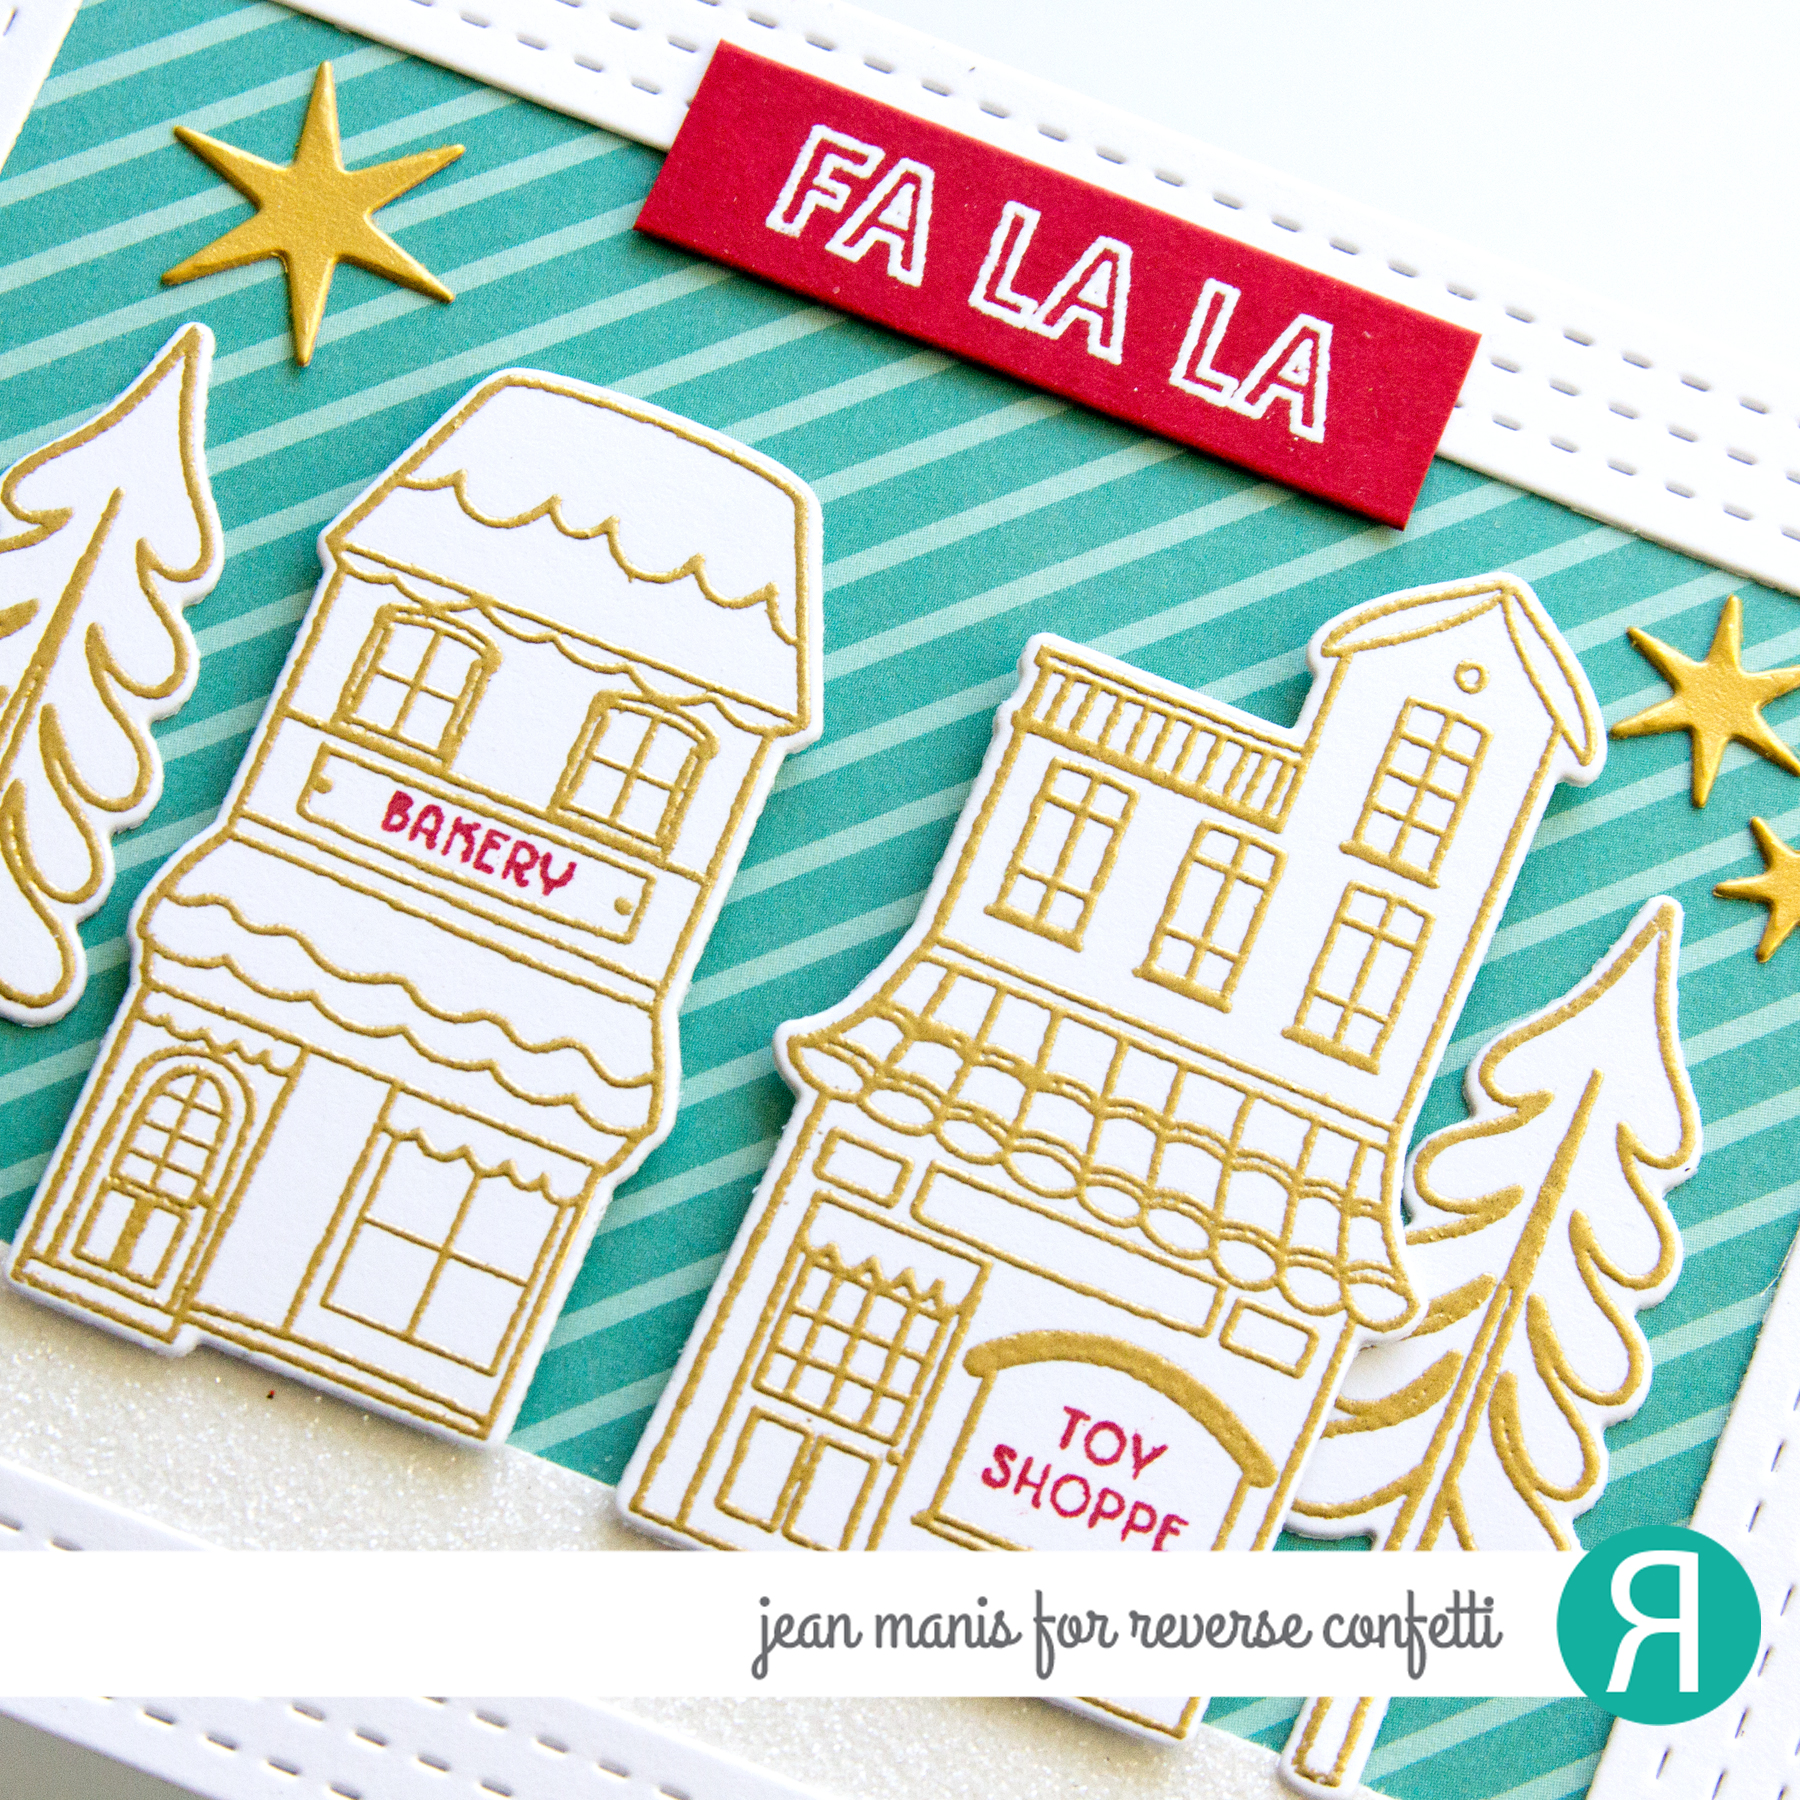
On my second card, I’ve used the Home for the Holidays stamp set, which has a coordinating die set.

Reverse Confetti - November Countdown to Confetti Day One

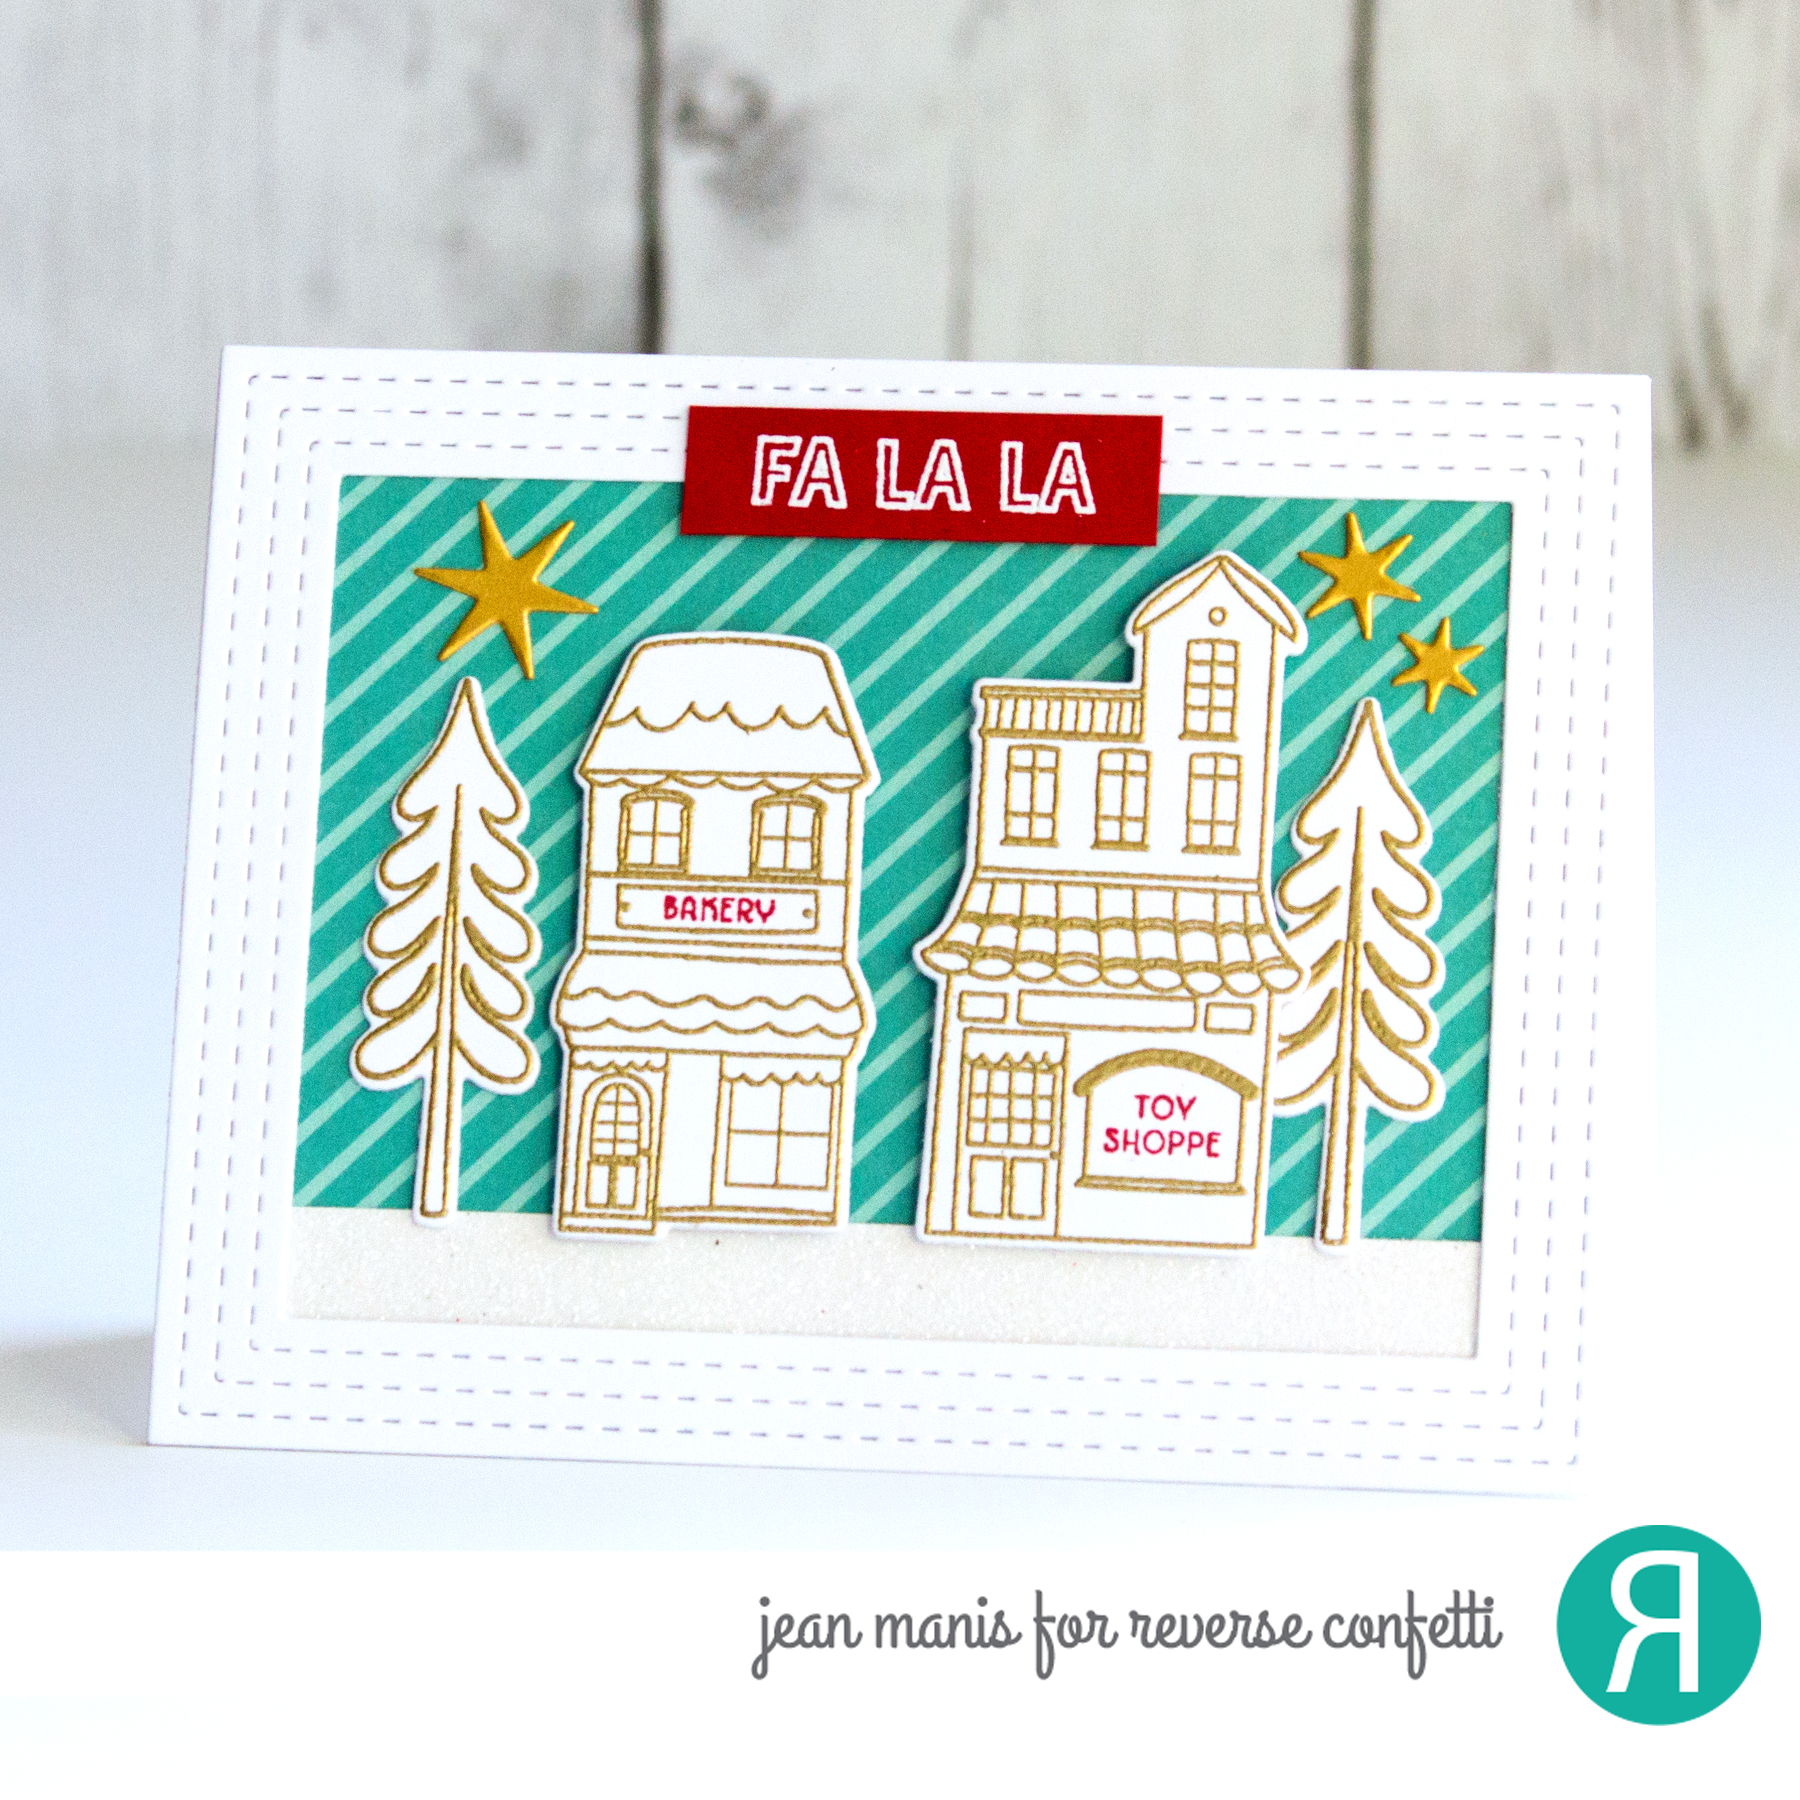
  • I heat-embossed the Home for the Holidays stores and trees in gold and cut them with their coordinating dies.
  • I added the store names in red ink.
  • I framed the scene, created with paper from the Sweet Stripes 6×6 Paper Pad and glittered cardstock with a Stitched Notes & Frames frame.
  • I added stars cut from gold cardstock with the Starstruck Cover Plate (a standalone die in the release).
  • I heat-embossed the Seasonal Say It All sentiment on Salsa cardstock.

Reverse Confetti - November Countdown to Confetti Day One

Reverse Confetti Spooktacular

Hello! Today I am sharing a slimline Halloween-themed card featuring the Reverse Confetti Spooktacular stamp set with coordinating die set.

Reverse Confetti Spooktacular

  • I stamped and Copic-colored the Spooktacular images and cut them out with their coordinating dies.
  • I heat-embossed the sentiment (in the same set) on a black cardstock strip.
  • I cut the stars using dies in the coordinating die set (the dies coordinate with stamped images).
  • I cut circles from cardstock that was cut first with the Reverse Confetti Pointed Cover Plate.

Reverse Confetti Spooktacular Reverse Confetti Spooktacular

  • I added the circles and sentiment to a 3 1/4″ x 8 1/4″ white cardstock panel, which I matted with a 3 1/2″ x 8 1/2″ patterned paper base.
  • I added the colored images to the circles with foam adhesive and the stars with glue.

Reverse Confetti Spooktacular

Supplies:

Reverse Confetti – Give Thanks

Hello! Today, I am sharing a CAS card created with a Reverse Confetti stamp and coordinating die set called “In All Things” from their most recent release.

Reverse Confetti - Give Thanks

  • I stamped the wreath image and colored it with Copic markers and colored pencils.
  • I cut the wreath with its coordinating die.
  • I stamped the sentiment on American Crafts orange peel-texture cardstock.
  • I trimmed the panel and matted it on a rust card base.
  • I added the wreath to the card base with foam adhesive and glued clear jewels for textural interest.

Reverse Confetti - Give Thanks

Supplies:

Reverse Confetti – Multi-Step Cacti

Hello! Today I am sharing a “Hello” card created with Reverse Confetti supplies. The Multi-step Cacti images are created with three stamps each: the solid image, the detail, and the outline.

Reverse Confetti - Multi-Step Cacti


  • For the cactus on the left, I stamped with Mowed Lawn, then Pine Needles, and finally Jet Black. I cut the image with the coordinating die.
  • For the middle cactus, I stamped with Peeled Paint, then Archival Olive, and finally Jet Black. I cut the image with the coordinating die.
  • For the cactus on the right, I stamped the solid image with Lucky Clover, the detail with Library Green, and the outline with Jet Black. I cut the image with the coordinating die.
  • The flower is stamped with two stamps: the solid image and outline.
  • For the pots, I cut stencils with the coordinating dies and colored cardstock through the stencils. I then stamped the images in Archival Black and cut the images with their coordinating dies.
  • For the background, I colored white cardstock with gray and blue inks (to create a horizon line). I stamped the Best Sentiments sentiment and cut the cardstock with a circle die.

Reverse Confetti - Multi-Step Cacti

Details:

Paper Smooches – CAS Spring-themed Floral Bouquet

Hello! The sun is out here in the Pacific Northwest and the longer days are much appreciated. I am sharing a CAS spring-themed card featuring some favorite Paper Smooches dies – Dainty Flowers and Dainty Flowers 2.

Paper Smooches - CAS Spring-themed Floral Bouquet

  • I used one of the dies in the Lawn Fawn Rectangle set (3 1/2″ x 2 1/4″) to cut the panel behind the flowers  from TE Confetti Cake cardstock.
  • The sentiment from the Reverse Confetti Carton Cuties stamp set was heat-embossed on Gina K Lagoon Blue cardtock (Gina K Autumn Rainbow pack) and cut with a Lawn Fawn banner die.
  • The flowers were cut from white cardstock, as well as, SU Pineapple Punch, SU Poppy Parade, Gina K Lagoon Blue (Gina K Autumn Rainbow pack), and Gina K Lucky Clover (2018 Add-On Collection). I attached the assembled flowers to the rectangle background and covered the bottoms of the stems with the sentiment banner.
  • I dry-embossed the white card base with the SU Simple Stripes Textured Impressions Embossing Folder.Paper Smooches - CAS Spring-themed Floral Bouquet

Thanks for stopping by. Hope you have an incredible day!

Supplies: