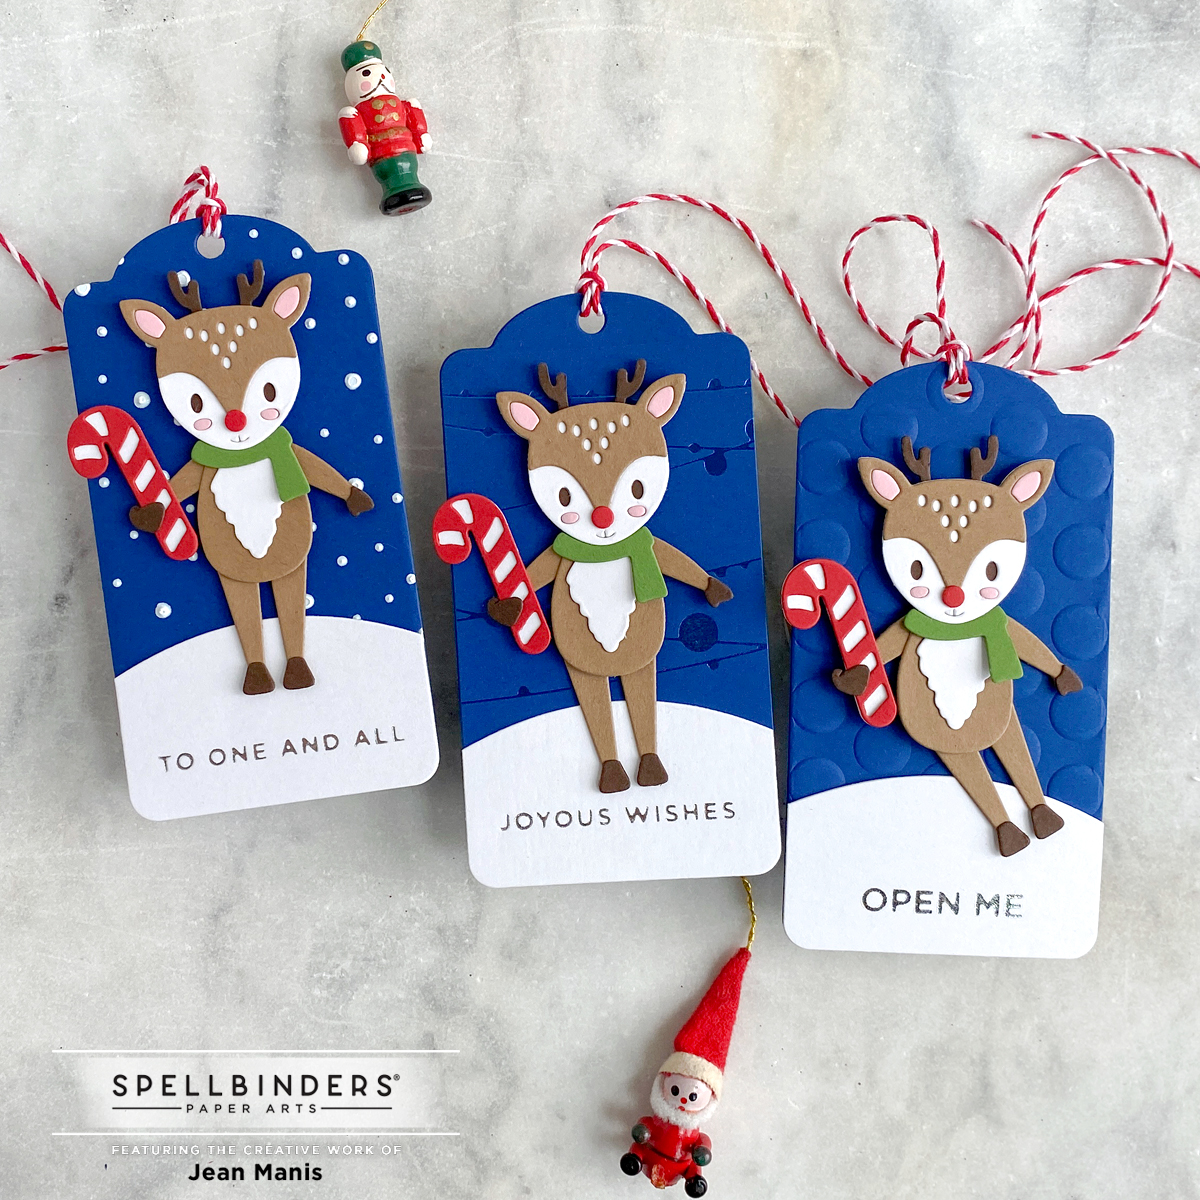
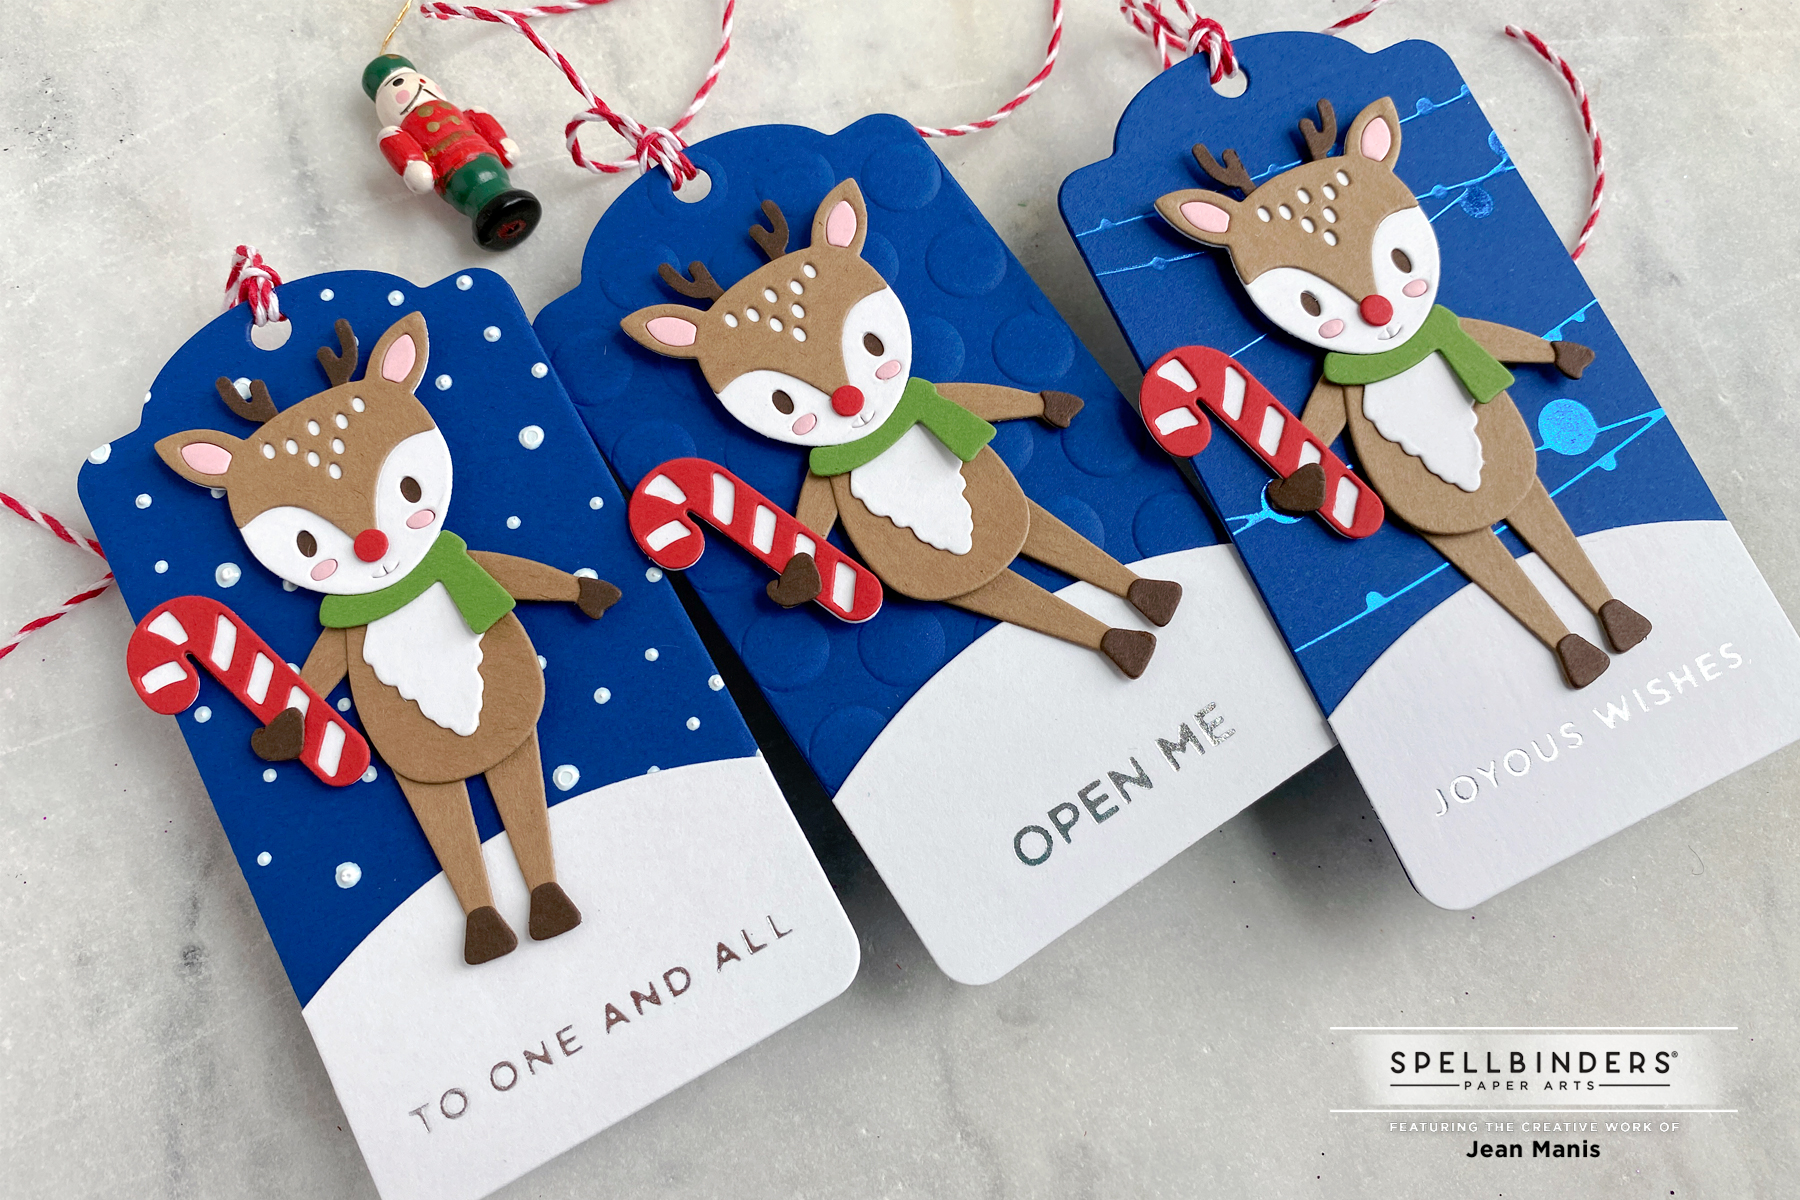
Rubbernecker | Whimsical Die-cut Christmas Scene

Hello! Today, I am sharing a whimsical, Christmas scene created with Rubbernecker stamp and die sets. Rubbernecker has been sharing Christmas inspiration all month; head to their blog for more inspiration.

Rubbernecker | Whimsical Die-cut Christmas Scene

Here’s how you can make this card:

  • Stamp and heat-emboss the Christmas Phrases Large/Small sentiment, (this stamp set is filled with wonderful sentiments), on a dark blue A2-size cardstock panel. Cut glitter cardstock with die in the Slimline Hills set and add to bottom for snow.
  • Cut Slimline Christmas Tree layers from ink-colored cardstock. Cut snow from glitter cardstock with the tree layer dies and fussy-cut along the top. Adhere snow to tree layers. Assemble tree, titling the layers towards the right. Add star to top and add assembled tree to scene.
  • Cut deer and birds from ink-colored cardstock with Reindeer and Bird’s die set. Assemble and add to scene.
  • To embellish, cut packages from ink-colored cardstock with the Santa Mini set.

Rubbernecker | Whimsical Die-cut Christmas Scene

Rubbernecker | Whimsical Die-cut Christmas Scene


Spellbinders | Celebrate the Season “Winter Welcome Sled”

Hello! I have more Christmas inspiration to share from the recent releases at Spellbinders with a card that showcases the adorable Winter Welcome Sled die set, part of the Celebrate the Season Collection.

Spellbinders | Celebrate the Season "Winter Welcome Sled"

Here’s how you can make this card:

Spellbinders | Celebrate the Season "Winter Welcome Sled"

Thanks for dropping by!

Spellbinders Christmas in July


Spellbinders | Parcel and Post Collection

Hello! Christmas inspiration continues at Spellbinders, and today I am sharing a card to showcase the Parcel and Post Collection.

Spellbinders | Parcel and Post Collection

Here’s how you can make this card:

Spellbinders | Parcel and Post Collection

Thanks for dropping by!


Lawn Fawnatics Challenge 128 – Christmas in July

Hello! Today, I am sharing a Christmas card that I created for the Lawn Fawnatics Challenge 128 – Christmas in July. I enjoy house scenes and often create them. I particularly like the pairing of the large house with the small village border.

Lawn Fawnatics Challenge 128 – Christmas in July

  • Create blue A2-size card base.
  • Stamp Simply Winter Sentiments sentiment on white cardstock and cut with the Little Town Border. Back house windows with yellow cardstock. Add to card base.
  • Cut house pieces with the Build-A-House and Christmas Add-On die sets. Add glitter glue to light pieces. Assemble when dry and add the decorated house to the card.
  • Embellish with snowflakes cut with dies in the Mini Snowflakes set.

Lawn Fawnatics Challenge 128 – Christmas in July

Lawn Fawnatics Challenge 128 – Christmas in July


CAS Reverse Confetti Holiday Card – Inspired by Starbucks Holiday Cups

Hello! Today I am sharing a CAS holiday card created with Reverse Confetti products inspired by this year’s Starbucks holiday cups.

CAS Reverse Confetti Holiday Card - Inspired by Starbucks Holiday Cups

Image Source

  • I die-cut the Big Polkas Cover Panel from Polar White cardstock.
  • I cut circles in red, two shades of green, and light gray with a circle die, slightly larger than the holes in the cover plate.
  • I taped the circles to the frame on the back.
  • I heat-embossed the Sentimental Christmas sentiment (I particularly like the font on this set and thought it worked well with the whimsical feel of the card) on red cardstock.
  • I cut the sentiment with a circle die and matted it with a slightly larger white cardstock circle.

CAS Reverse Confetti Holiday Card - Inspired by Starbucks Holiday Cups
Cardstock: SU Mint Macaron, MFT Poppy Prestige, Reverse Confetti Polar White, SU Tranquil Tide, Taylored Expressions Sea Salt