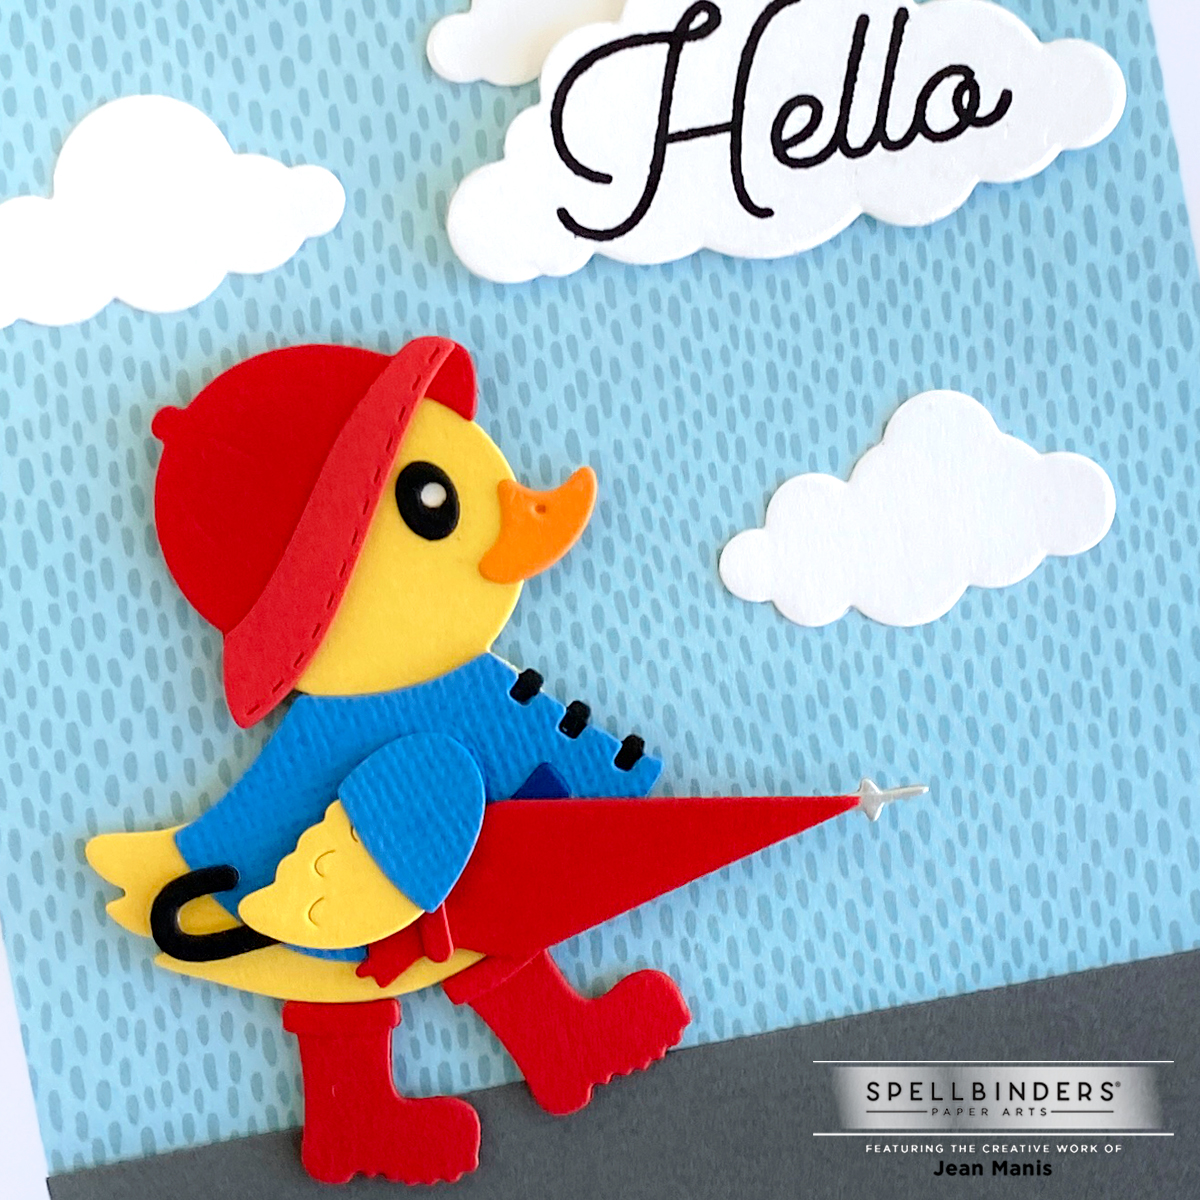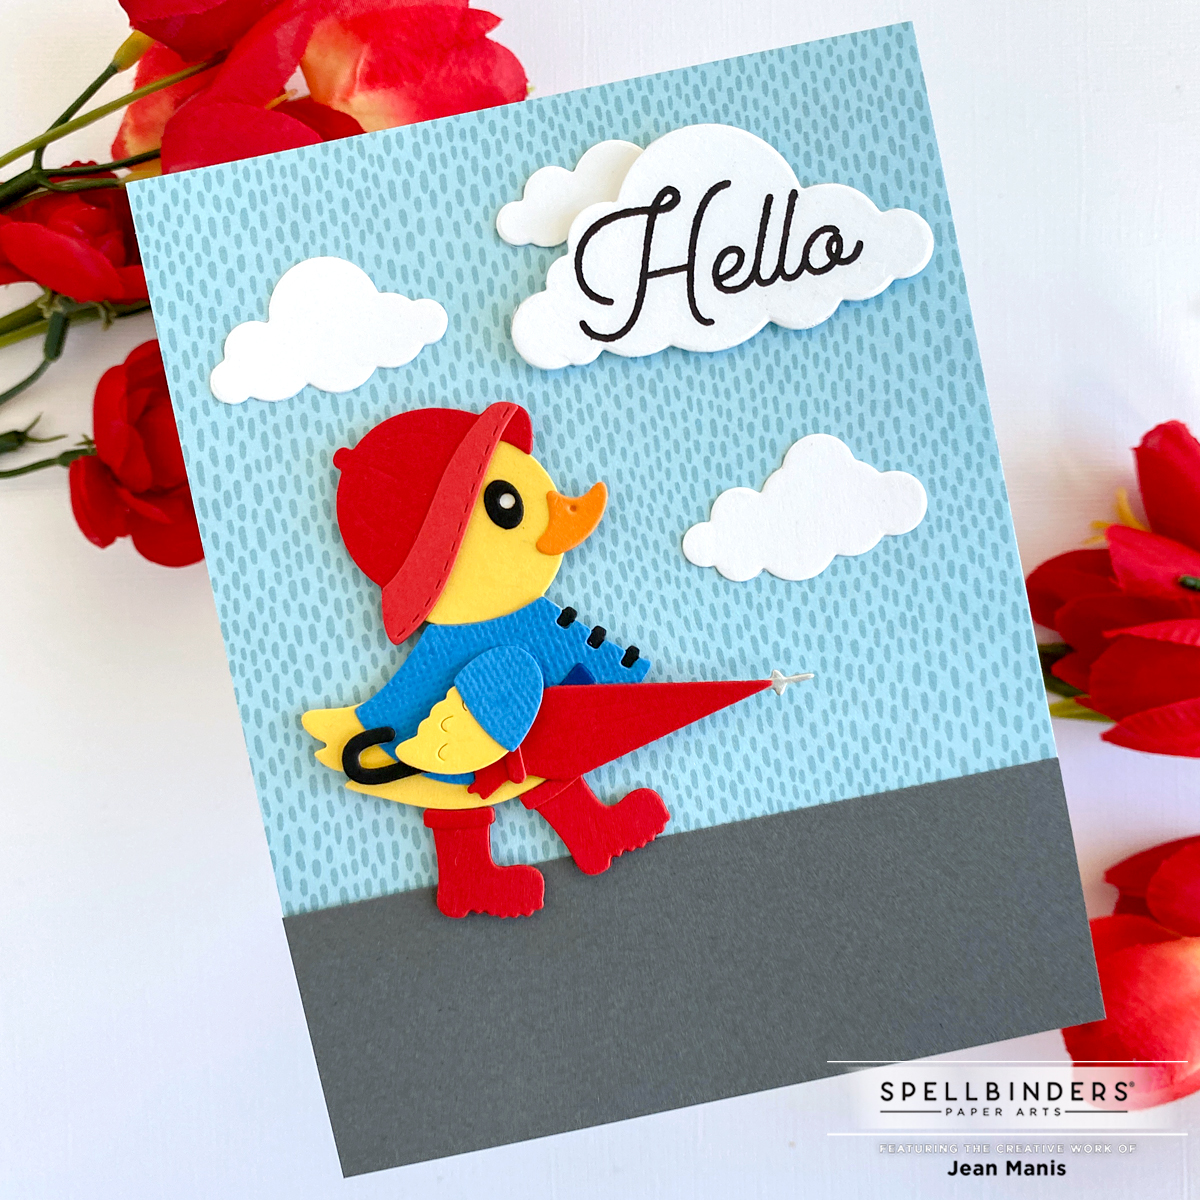
Hello! I am sharing a “hello” card created with several Spellbinders supplies including the cute Duck with Umbrella die set, part of the Showered with Love Collection.
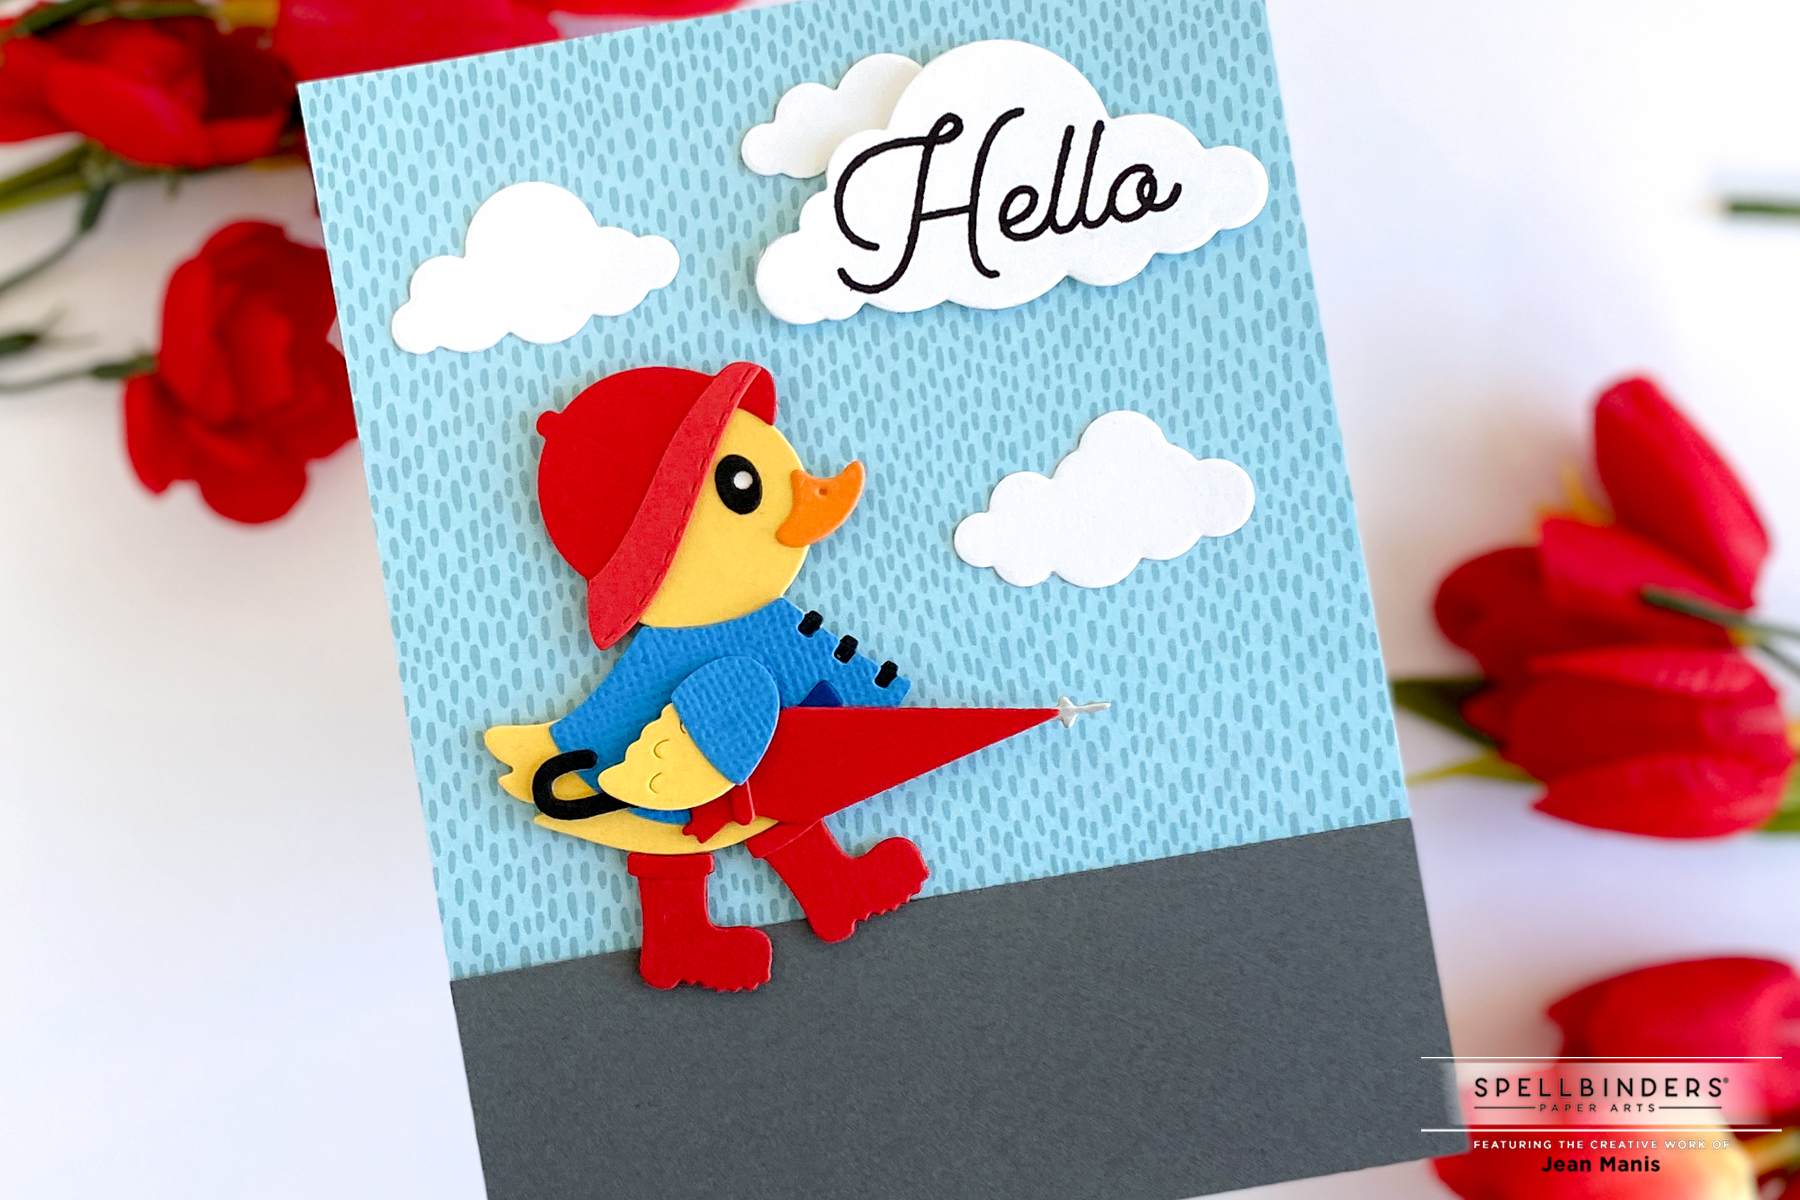
- Create background by adding a 1-1/2 inch of dark gray cardstock to patterned paper (I used a paper from an Echo Park pad that I had in my stash). Add to A2-size card base. (I first tried a background without a defined ground; it left the duck floating in space.)
- Cut Duck with Umbrella from a variety of cardstock colors and assemble. (After I had the duck assembled, I realized I had dressed him like Paddington Bear!)
- Stamp I’ve Got You Covered sentiment on Snowdrift and cut with one of the On Cloud Nine dies. Cut additional clouds.
- Add elements to background, using foam adhesive on duck and sentiment cloud.