Elizabeth Craft Designs | Joy to the World

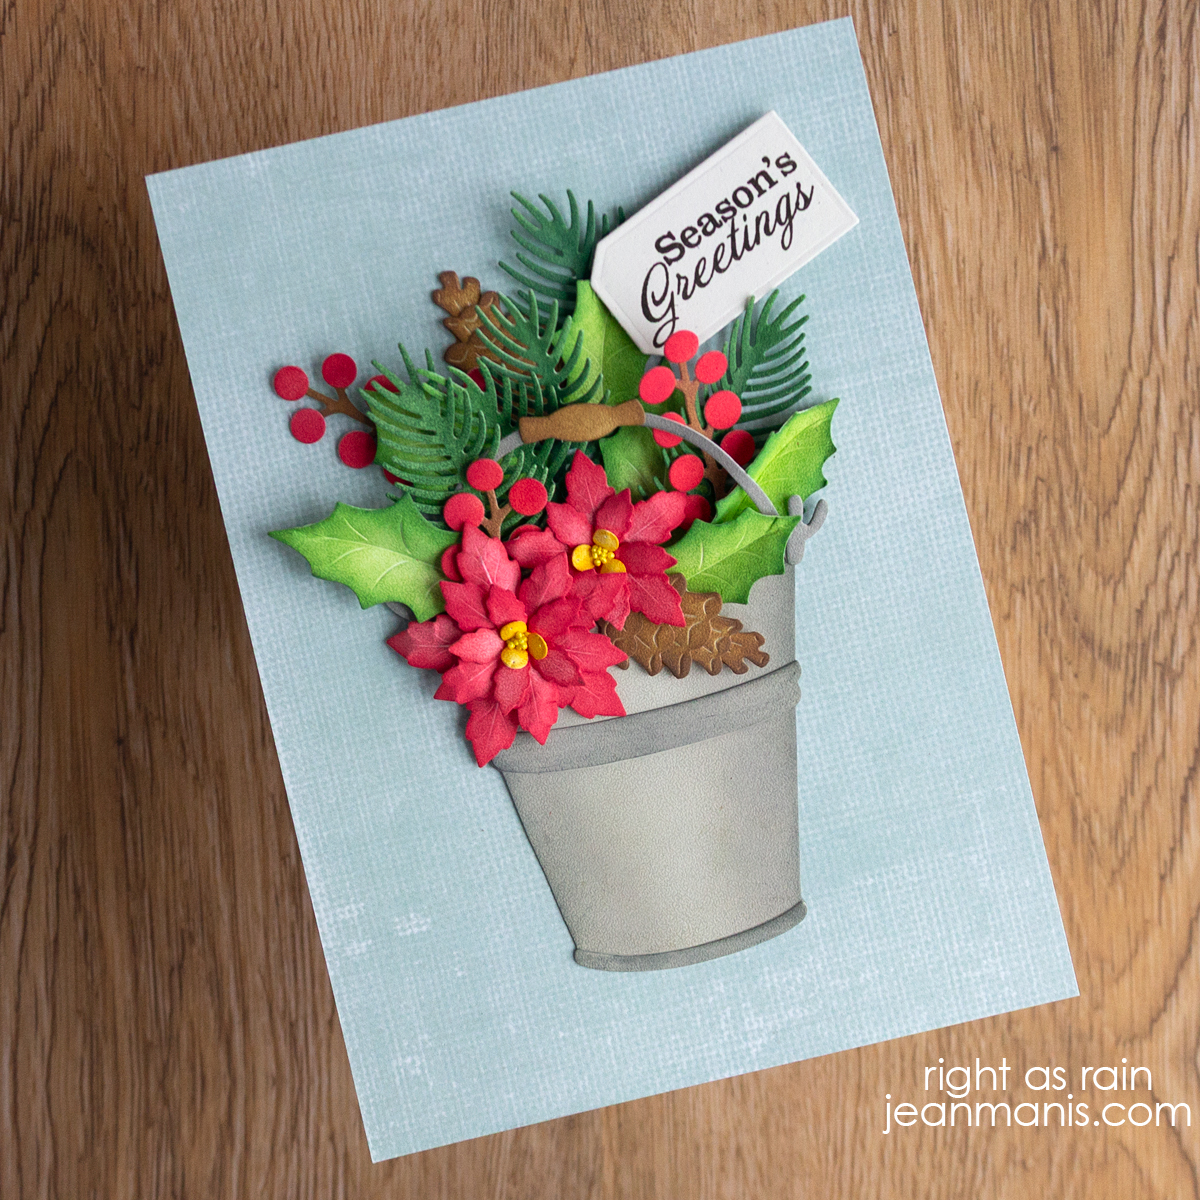
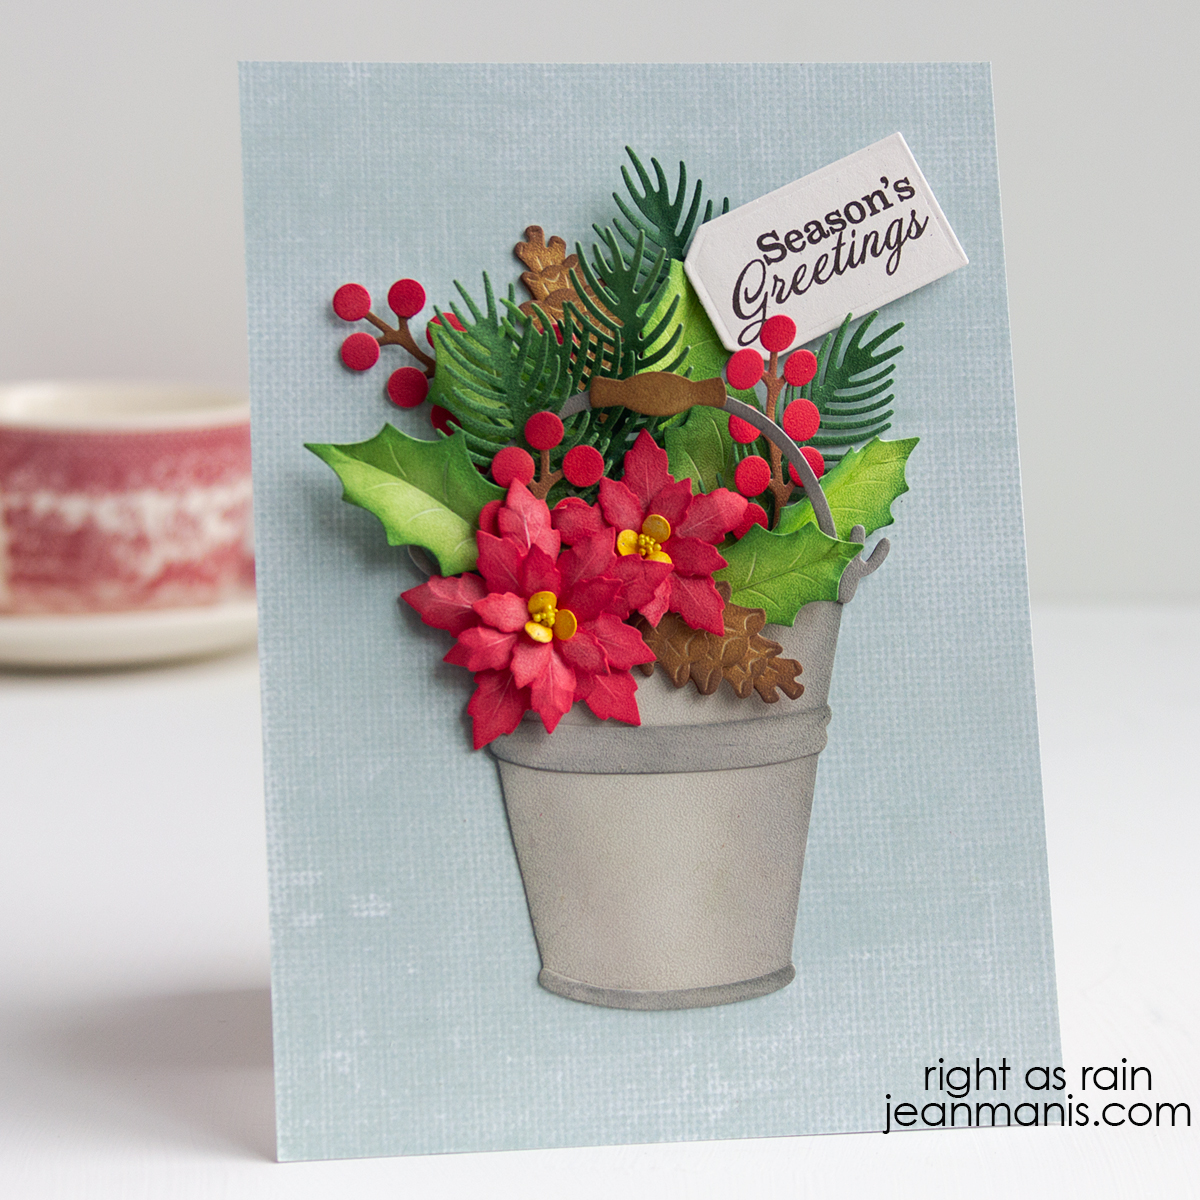
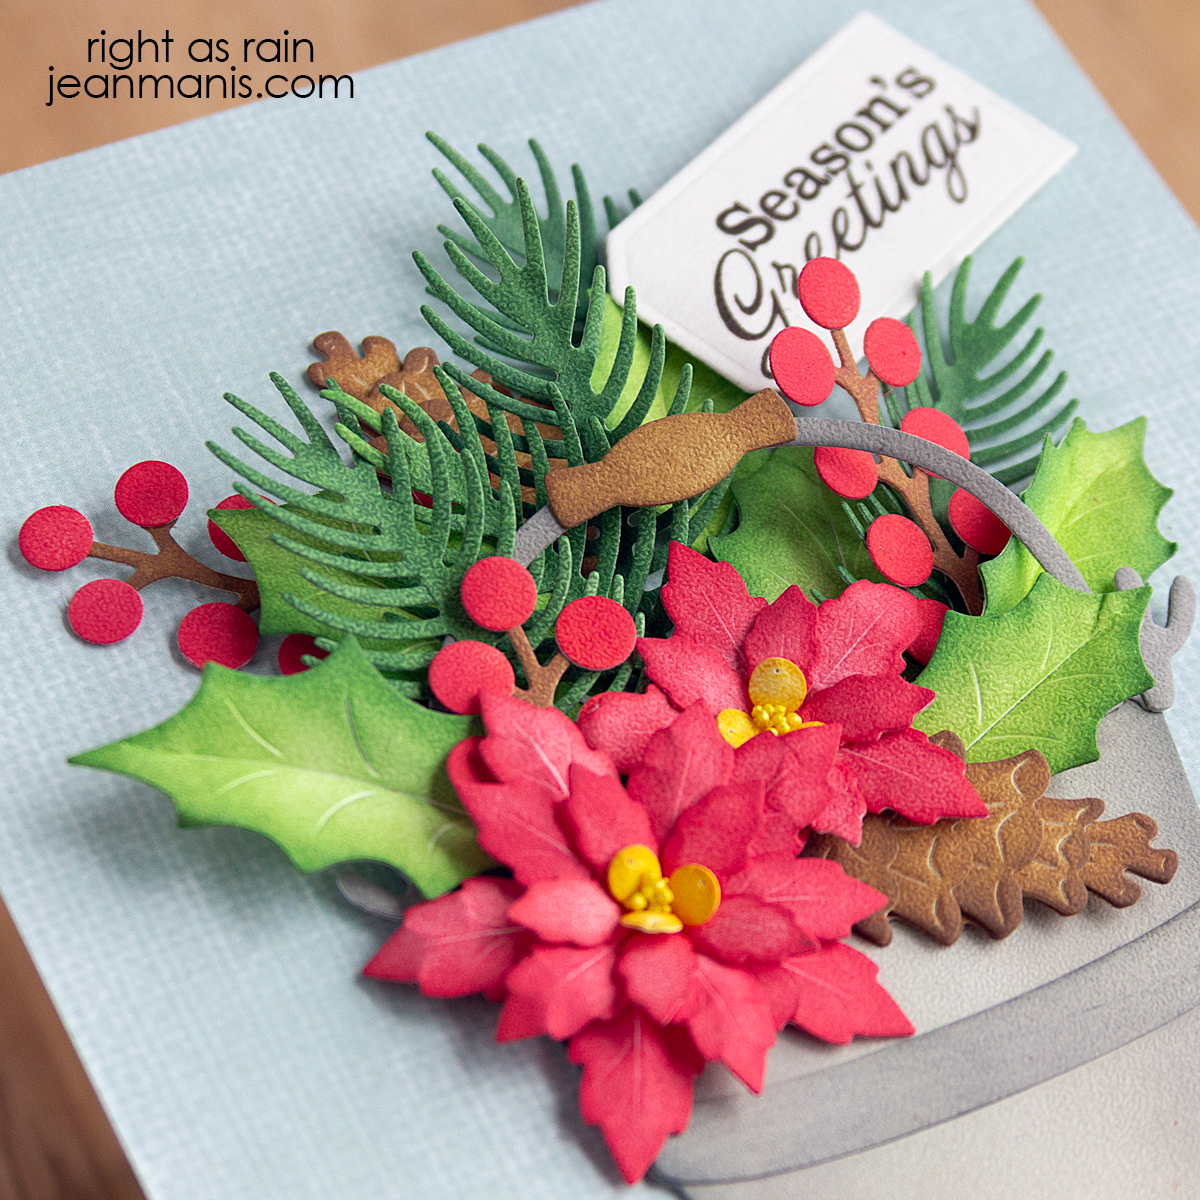
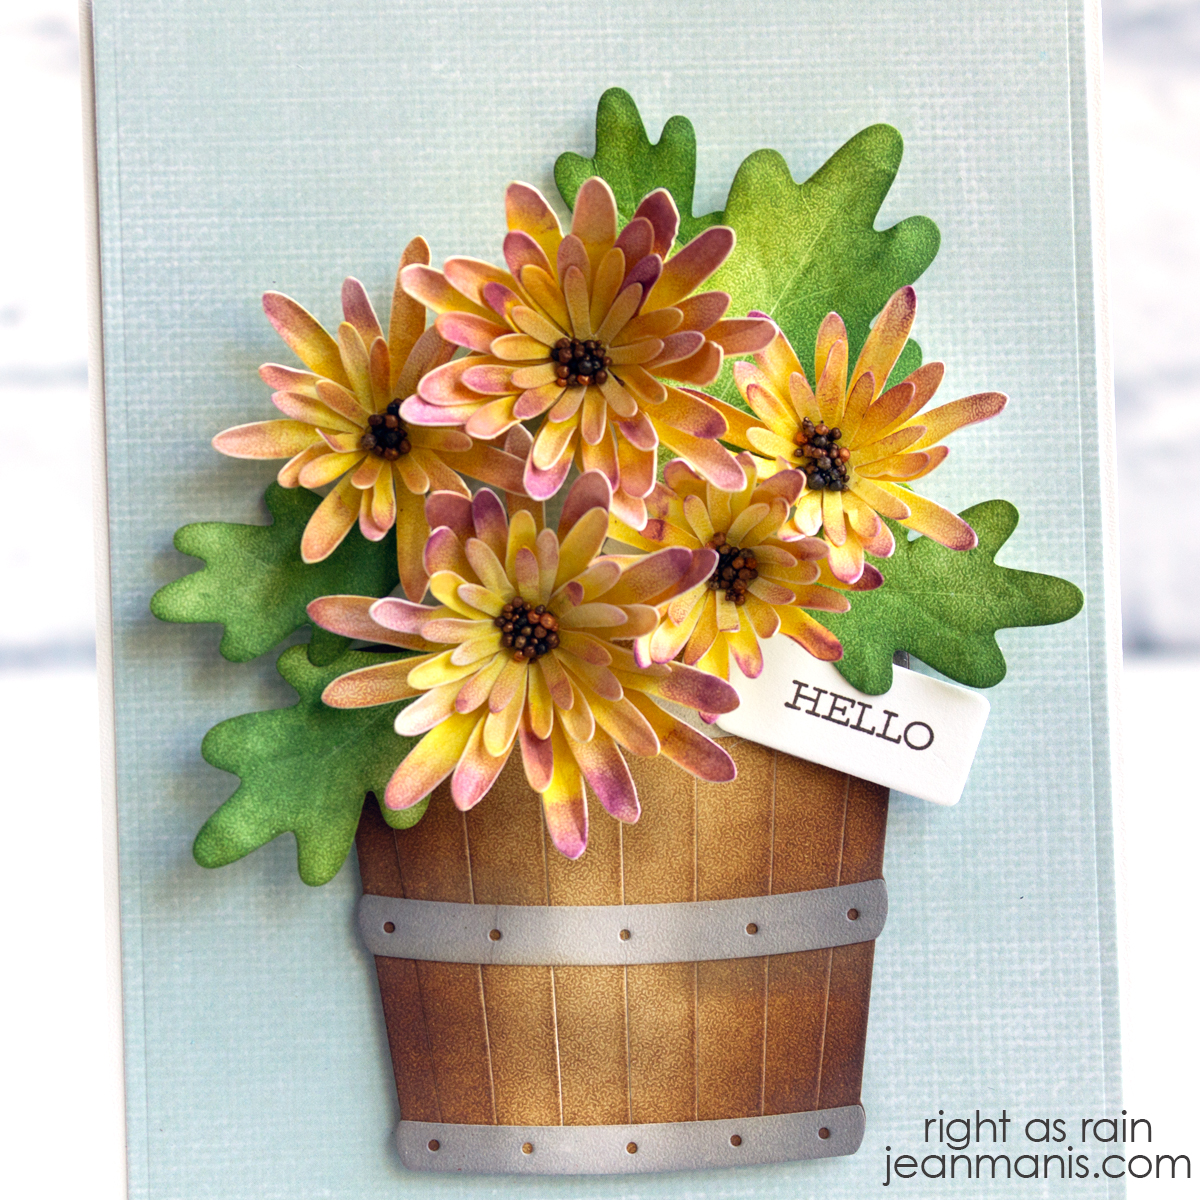
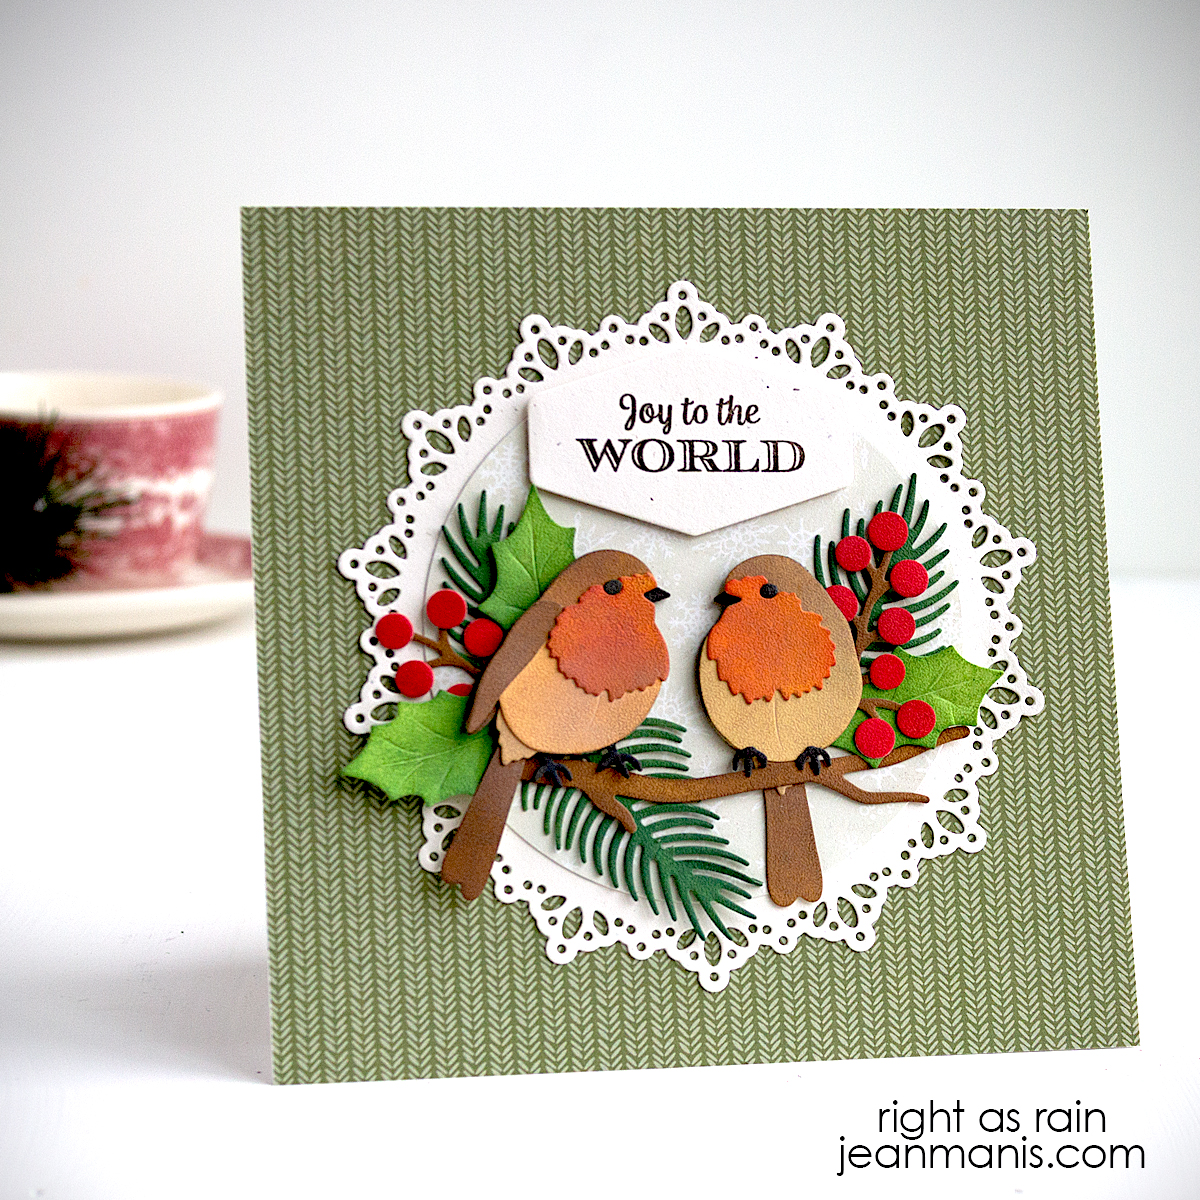
Hello! There’s something comforting about classic Christmas imagery, and this card celebrates the season with timeless botanical details. Using several Elizabeth Craft Designs die sets, I created an arrangement of robins perched among holly, pine, berries, and branch, all die-cut from soft finish cardstock and colored with Distress Oxide inks for a realistic look. A detailed frame helps draw the eye to the focal points, and softly patterned paper in the background adds texture and warmth without overpowering the design. Finished with the “Joy to the World” sentiment, the card feels both peaceful and quietly celebratory.

Elizabeth Craft Designs | Joy to the World

    • To begin, cover a 6″ square card base with patterned paper.
    • Cut the Joyous Ornament Round detailed frame from Lawn Fawn Speckled Eggshell cardstock. Use the plain circle die in the same set to cut patterned paper. Add patterned paper to the frame piece, add the assembly to the prepared card base.
    • Stamp the Joyous Christmas sentiment in Potting Soil on Lawn Fawn Speckled Eggshell cardstock and cut with a Layered Labels die. Add to the card base with foam adhesive.
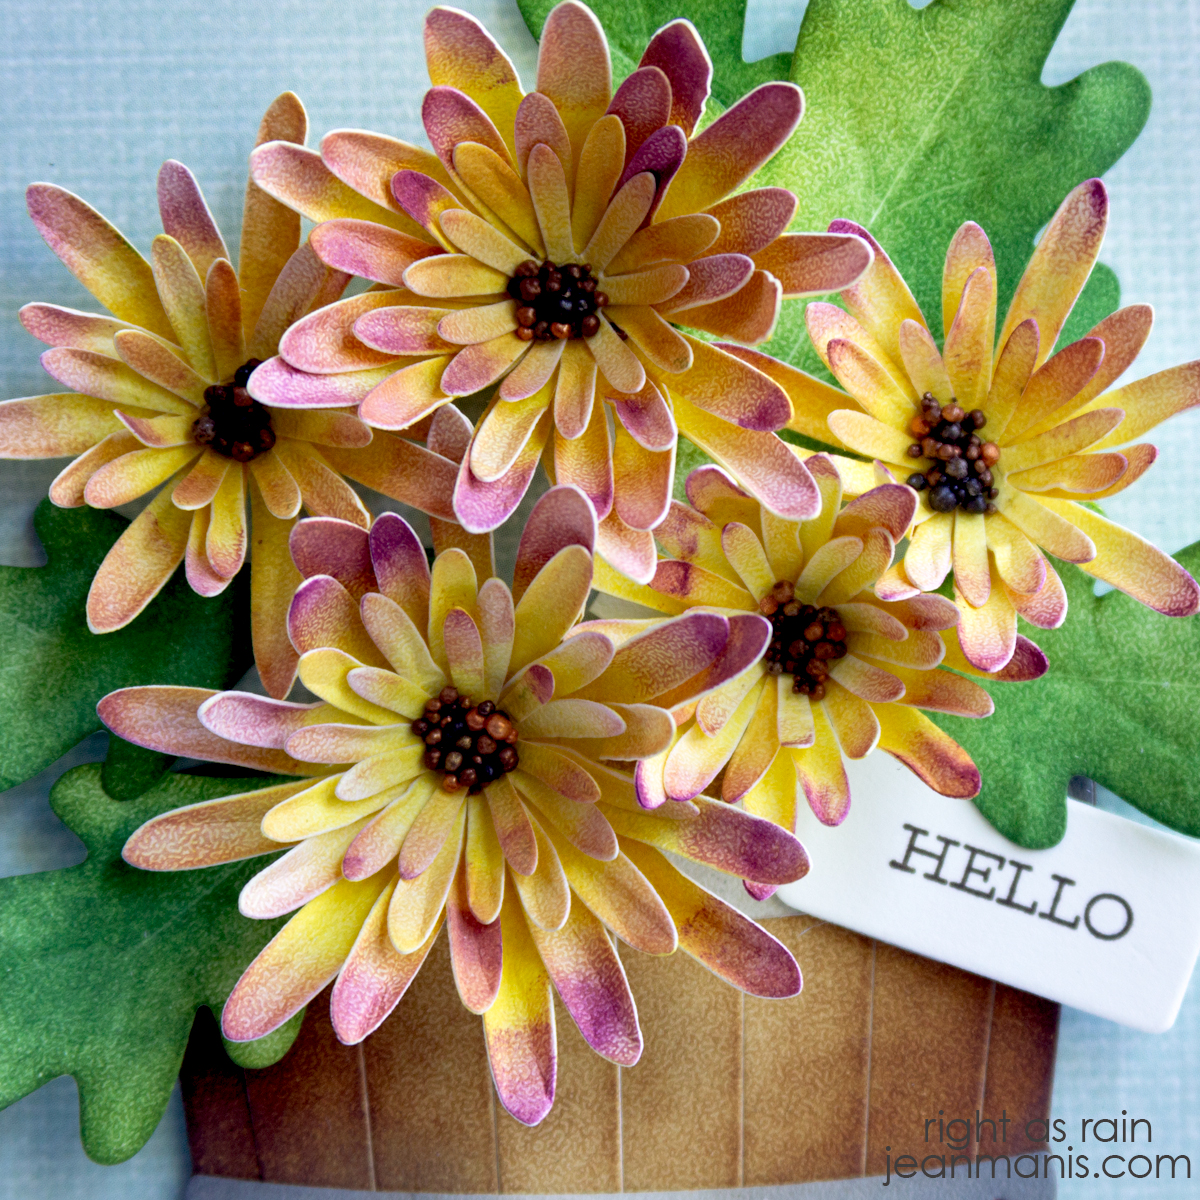
    • Cut the Festive Robin and Winter Greenery pieces from soft finish cardstock and color with Distress Oxide inks. Assemble robins and greenery items, as required. Gently shape holly leaves.
    • Add elements to prepared card base.

Elizabeth Craft Designs | Joy to the World


Winter Greenery Christmas Card

Hello!, Today I’m sharing a Christmas floral card crafted with several Elizabeth Craft Designs die sets, all cut and hand-colored for a beautifully natural look. I built the design as if I were creating a real winter arrangement, tucking sprigs of greenery, berries, and branches into a metal pail, just like you might at a florist or in your own holiday décor. It’s a warm, inviting project for anyone who enjoys bringing seasonal arrangements to life, whether on the craft table or at home.

Winter Greenery Christmas Card

    • To begin, cover a 5″ x 7″ card base with patterned paper.
    • Die-cut the Winter Greenery, Florals 29, and Flower Pot/Bucket (a retired Elizabeth Craft Designs set) from Soft Finish Cardstock. Add color with Distress Oxide inks. I like coloring after cutting, as the ink highlights the embossed details in the die-cuts.
    • Shape the pieces as needed and assemble the individual elements.
    • Stamp a sentiment from Festive Holly Sentiments in Potting Soil ink and cut it with a tag die. (I used a now-retired MFT tag set.)
    • Create your arrangement by layering and attaching the die-cut elements to the card base. Keep building until the greenery has that full, pleasing, zhuzhed-up look you’d aim for in a real holiday arrangement. Finish by attaching the sentiment tag with foam adhesive for added dimension.

Winter Greenery Christmas Card


Elizabeth Craft Designs | Holiday Wreath

Hello! Today, I’m sharing a classic Christmas card featuring the Festive Holly Collection from Elizabeth Craft Designs. The collection’s wreath includes dies for foliage, berry sprigs, and a bow—perfect for building realistic, layered wreaths.

Elizabeth Craft Designs | Holiday Wreath

I created a 5 1/8″ card base and covered it with patterned paper from my stash. I cut the wreath pieces from soft finish cardstock, colored them with Distress Oxide inks, and hand-shaped the elements for added dimension. Once assembled, I added a subtle glaze (Judikins Diamond Glaze) and dry glitter to give the wreath a frosty holiday sparkle. The berries and ribbon were created with Doodlebug velvet cardstock. The sentiment was stamped in Potting Soil ink and cut with a now-retired Sizzix tag die.

Elizabeth Craft Designs | Holiday Wreath

You might also enjoy my Christmas Card Roundup with Poinsettias & Wreaths post that includes botanical-themed holiday card inspiration.


Elizabeth Craft Designs | Handcolored Mums

Hello! Today I’m sharing a handmade card, created with Elizabeth Craft Designs die sets, that features mums arranged in a rustic oak barrel.

Elizabeth Craft Designs | Handcolored Mums

I handcolored the blooms to match the mums currently in our garden, and I encourage you to take inspiration from nature when choosing your own colors.

Mums in the Garden

    • Cover a 5″ x 7″ card base with a patterned paper panel. I used paper from 49 and Market.
    • Cut the Florals 32 (flower petals and leaves) and barrel (the Floral Foliage 1 set) pieces from Soft Finish cardstock. Color with Distress Inks. Shape petals and leaves with tools if desired. I use tools from Dress My Craft, Heartfelt Creations, Spellbinders, and McGill. Assemble.
    • The Florals 32 die set doesn’t specifically make a mum; rather, it’s a versatile floral design that can be colored and shaped to resemble many fall favorites like zinnias, asters, or dahlias. I chose to make mums because of the ones blooming in our garden, but the set easily adapts to other seasonal flowers depending on your inspiration.
    • Glue prills to the centers of the flowers.
    • To keep the flowers in the spotlight, I added a small “hello” tag tucked into the bouquet. Stamp sentiment (I used a retired stamp from Stampin’ Up) in Potting Soil ink and cut with a tag die.
    • Add the assembled items to the prepared card base.

Fall is the perfect season to look closely at nature’s colors and let them guide your crafting.

Elizabeth Craft Designs | Handcolored Mums


Cozy Fall Card with Big Mouse

Hello! Fall is one of my favorite seasons to craft for, and today I’m sharing a cozy handmade card that captures the warmth of autumn. I used the Big Mouse die along with the coordinating Fall Accessories set, both from Elizabeth Craft Designs, to dress the mouse for the season. To finish it off, I created a playful custom sentiment that reads “Fall Y’all,” cut with a letter die set. This card is full of charm and a fun way to celebrate the beauty of fall.

Cozy Fall Card with Big Mouse

    • Dry-emboss cardstock with the Honey Bee Burlap folder. Add to card base. Cut a strip of the Scary Stories patterned paper and add to base.
    • Cut Big Mouse and Fall Accessories from a variety of cardstock colors and assemble. The large pumpkin is from the ECD Hay Ride die set (now discontinued).
    • Add sentiment with die-cut letters (I used a set from Taylored Expressions).