Snow Much Fun | Waffle Flower

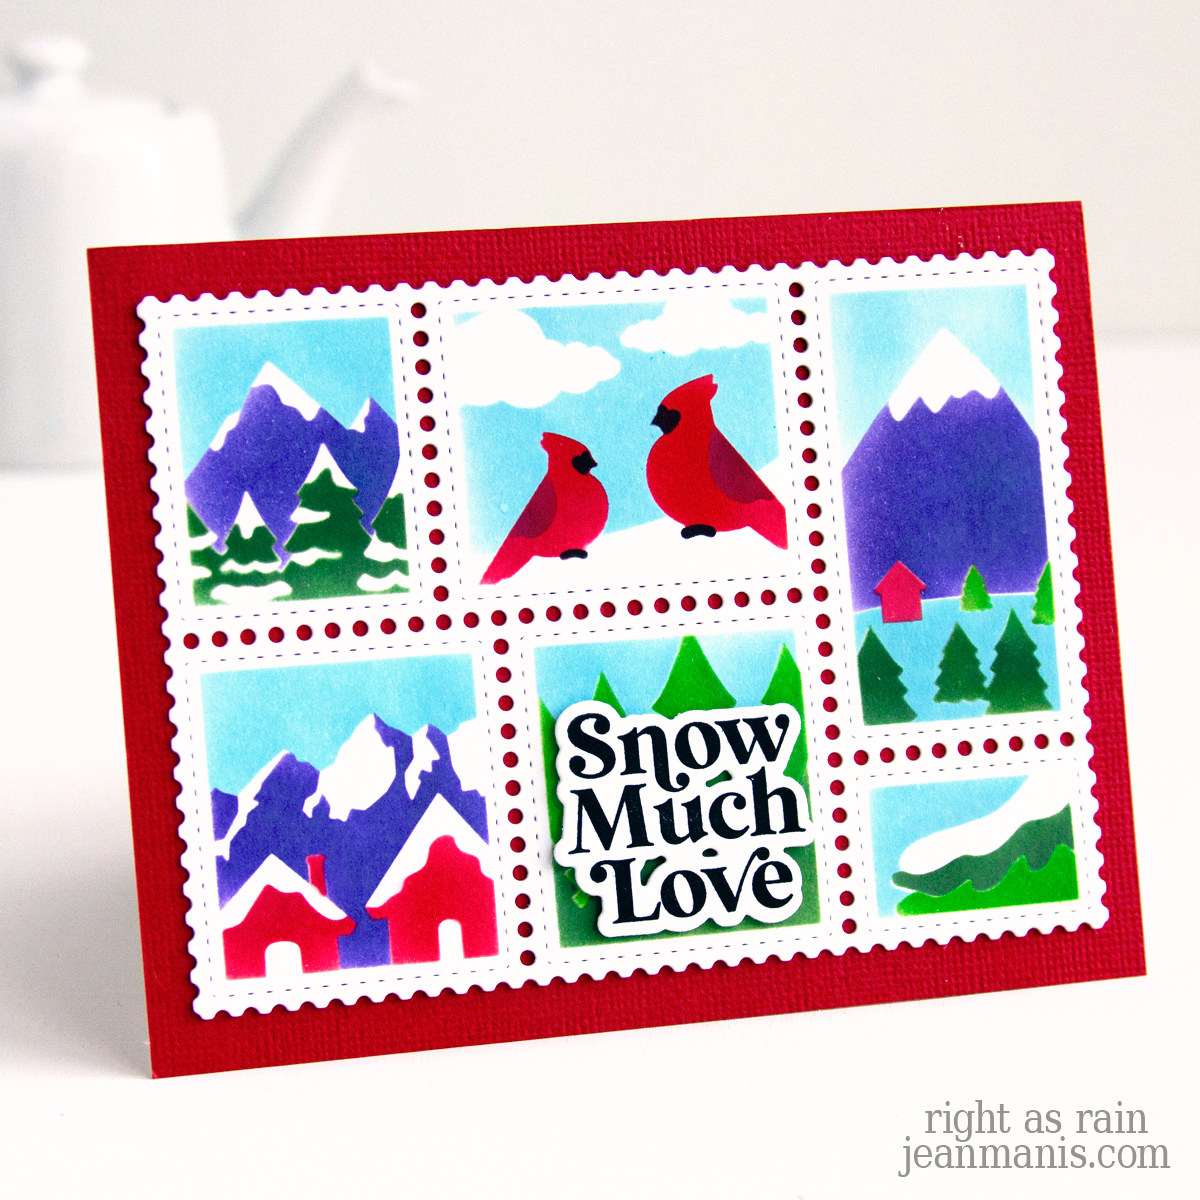
Hello! Today, I am sharing a winter-themed, holiday card created with one of the Postage Collage stencils offered at Waffle Flower. I have seen creations with these stencils for months now and wanted to give the products a try. The Waffle Flower Postage Collage Snowy stencil set makes it easy to layer winter mountain scenes with its multi-part stencil design. You can customize the colors for a different look, and the “stamps” can be separated for more creative possibilities.

Snow Much Fun | Waffle Flower

    • To begin, I swatched a number of different inks in my collection looking for purple, red, two shades of green, and two shades of blue. Knowing which inks I would use for the elements saved a lot of time. Scroll for the entire list of inks I used.
    • I cut the stenciled scenes with the Postage Collage die. Next time I will probably cut the cardstock first and then stencil. If you have used these products, what did you do – stencil first or cut the collage first?
    • I finished the card with one of the Snow Cheer Sentiments, which I cut with its coordinating die. I was particularly impressed that the sentiments are numbered on the packaging and the coordinating dies are etched with the corresponding number. All in all, I was very impressed with all of the Waffle Flower packaging.

Snow Much Fun | Waffle Flower

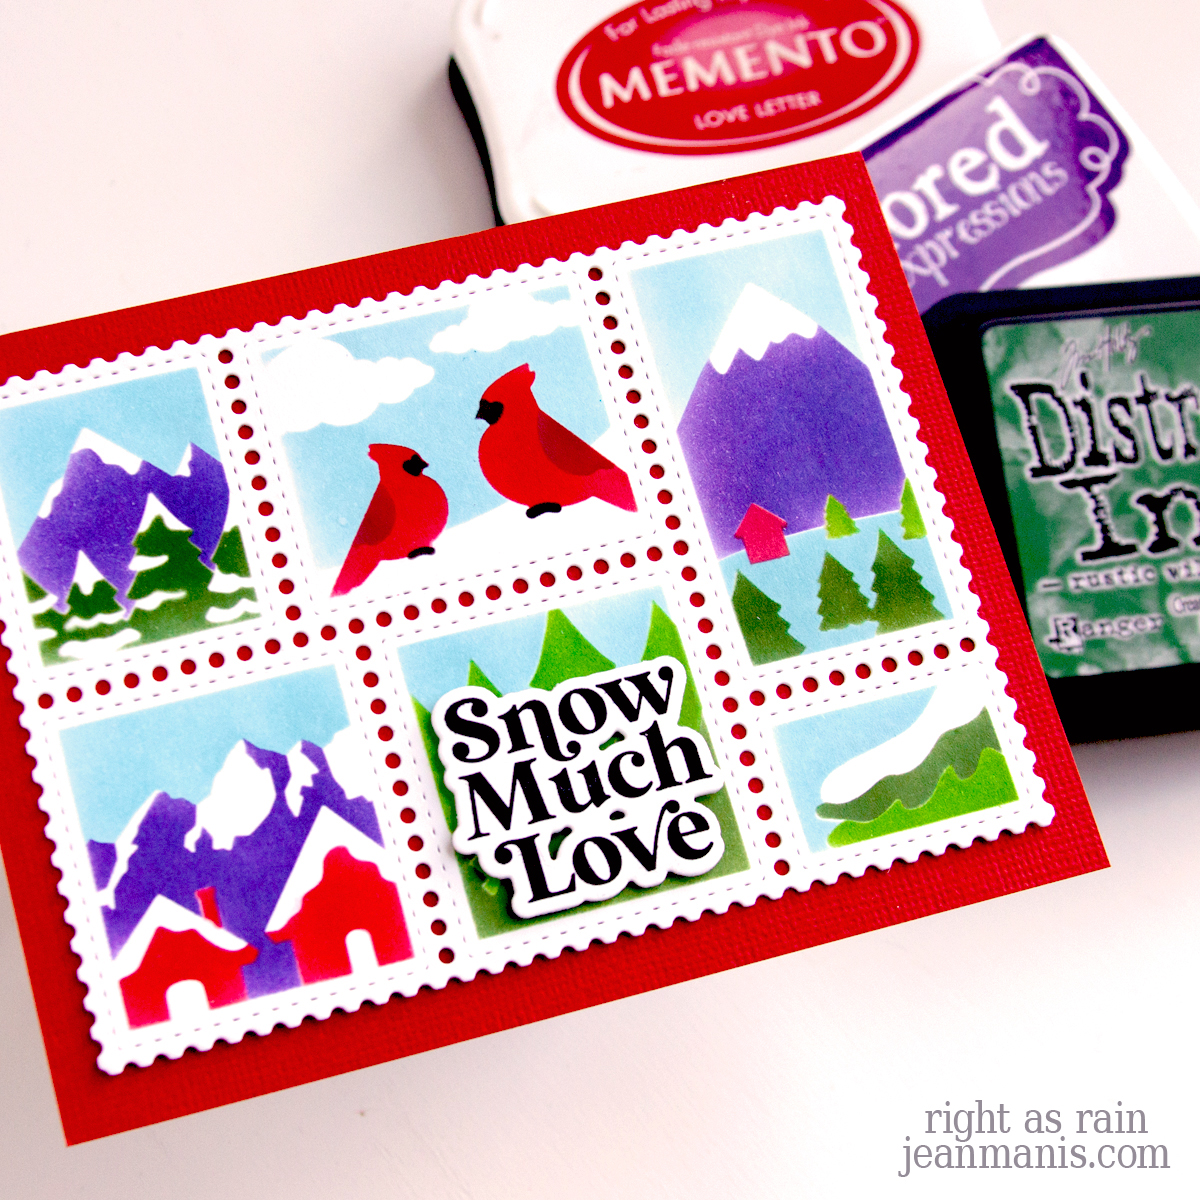
Ink List – Mountains: Taylored Expressions Jelly Donut; Sky: Distress Ink Tumbled Glass; Lake: Taylored Expressions Sprinkles; Trees: Simon Hurley Later Gator, Distress Ink Rustic Wilderness; Cardinals: Memento Love Letter, Distress Ink Aged Mahogany, Distress Ink Black Soot


Spellbinders | Winter Birthday Card

Hello! Winter birthdays offer a special kind of celebration, blending the magic of the holiday season without veering into full-on Christmas themes. Featuring a sweet mouse dressed in a cozy scarf and sweater, holding a balloon, this card combines winter magic with birthday joy. With a snowy ground and snowflakes in the sky, it’s perfect for anyone celebrating their special day during the colder months!

Spellbinders | Winter Birthday Card

    • Cover an A2-size card base with patterned paper.
    • Dry-emboss arch-shaped cardstock, cut with a die in the Essential Arches set, with the Floating Balloons folder.
    • Cut white-textured cardstock with a die in the Color Block Scenic Scape set and again with a die in the Essential Arches set. Add to the dry-embossed balloon arch; add assembly to the card base.
    • Stamp the Monster Birthday Sentiments on Chamomile cardstock and cut with a die in the Color Block Balloons set. Assemble and add to the card base.
    • Cut the mouse from a variety of cardstock colors with the Dancin’ & Giftin’ Mouse set. Assemble and add to the card base with foam square adhesive. This mouse die set was originally released with a Christmas collection. I gave it a fresh twist by adding a balloon from another set—showing how versatile Christmas-themed products can be with a few simple changes.
    • To reinforce the winter theme, embellish card with snowflakes cut with a die in the Christmas Wreath Add-Ons set.

Spellbinders | Winter Birthday Card


Christmas Window Scene for 52CCT Challenge

Hello! This week’s 52 Christmas Card Throwdown Challenge provided the perfect opportunity to create a festive holiday card using the August Sketch Challenge graphic as inspiration.

Christmas Window Scene for 52CCT Challenge

My design showcases a cozy window scene with die-cut shutters framing a decorated Christmas tree. A patterned paper background and intricate snowflake borders add seasonal charm, while the “Merry Christmas” sentiment completes the look. Let’s dive into the details of this cheerful creation!

    • Cover A-2 card base with patterned paper.
    • Cut the Snow Flurries Backdrop from Snowdrift cardstock and add to card front.
    • With the Wonderful Windows die, cut the window and shutters from a variety of cardstock colors.
    • Cut the Christmas tree from green cardstock. I used a now-retired Memory Box die (Frosted Christmas tree) and inked with Rustic Wilderness ink to create more contrast.
    • Trim the bottom of the tree, add to a yellow cardstock panel (SU So Saffron), and attach the assembly to the back of the window with foam adhesive. Attach the assembled shutters and add gold latches. Decorate the tree with adhesive pearls and gold circles (I used a die in the Wonderful Windows set). Attach the window and shutters to the card front with dot adhesive.
    • Press the Merry & Bright sentiment in Geranium ink on Snowdrift cardstock and cut with the coordinating die in the set. Add to the card with foam adhesive.

Christmas Window Scene for 52CCT Challenge

If you’re feeling inspired, head over to the 52 Christmas Card Throwdown Challenge site and join in—create your own card and share it with the community!


Penguin Card with Let It Snow Sentiment

Hello! After sharing a roundup of snowy techniques for handmade cards in this post, I couldn’t resist using those ideas to create my own! This whimsical penguin card, complete with a “Let It Snow” sentiment, brings together some of my favorite methods for capturing the magic of winter. Scroll for Early Black Friday sales at Spellbinders and Hero Arts!

Penguin Card with Let It Snow Sentiment

    • To begin, create an A2-size card base from textured white cardstock.
    • Cut Snowdrift cardstock with the Large Emerald Cut Scored die in the Emerald Cut Labels set and add to the card base.
    • Use the Large Label Insert die in the Emerald Cut Labels set to cut patterned paper for the snowy sky.
    • Use that same die to cut white glitter cardstock.
    • To create a snowy ground for the scene, cut the white glitter cardstock piece along the top with one of the Color Block Scenic Scape dies. Adhere to the patterned paper insert and add assembly to the card base.
    • Cut Dancin’ Penguin from a variety of cardstock colors and assemble.
    • Press the sentiment in black ink on Snowdrift cardstock and cut with the coordinating die.
    • To create the snowflakes, cut white glitter foam with dies in the Christmas Wreath Add-Ons set.
    • Add penguin to card with foam squares, adhere the sentiment and snowflakes with glue.

Penguin Card with Let It Snow Sentiment

This card combines die-cut snowflakes, snowflake-patterned paper, and a glitter cardstock hill to create a layered, snowy scene full of winter charm.

Hero Arts Early Black Friday 2024


How to Add Snow to Your Handmade Cards

Hello! You can bring the magic of winter to your handmade cards with a variety of techniques for adding snowy details. In this roundup, I’m sharing cards from past blog posts to illustrate different methods for adding snow, offering inspiration rather than focusing on specific products.

Snow can be featured in different areas of your cards, such as softly layered on the ground, gently falling in the sky, or as striking accents and focal points with die-cut snowflakes. I won’t be specifically mentioning where dies are used to create the snowflake accents, but you’ll see them featured in many of the examples throughout. Click on the card image to be taken to the original post for additional details.

One of the simplest ways to create a snowy scene is by using a hill die to cut white cardstock, adding instant winter charm to your card.

How to Add Snow to Your Handmade Cards

For an extra touch of sparkle, you can use glitter cardstock or glitter foam to create a snow-covered ground.

How to Add Snow to Your Handmade Cards

Glitter cardstock can be used to create focal items, such as sparkling snowmen, adding a festive and eye-catching touch to your card. When I use glitter cardstock for a snowman as a focal point, I don’t use it for the ground, as it would make the snowman less distinct and take away from its prominence. I own one die with snowflakes, and I used it on the card below, along with smaller die-cut snowflakes.

One easy option to use patterned paper featuring snowflakes or a gentle snowfall, instantly setting the scene for a winter feel. The style and color of the paper helps set the mood and tone for your card.

How to Add Snow to Your Handmade Cards

Another way to add snow is by using a background stamp. The ink color, along with the style and scale of the snowflakes, shapes the overall feel of the card, with subtle changes creating entirely different effects.

How to Add Snow to Your Handmade Cards

How to Add Snow to Your Handmade Cards

An embossing folder can add texture to create a snowy sky or overall background, with the style of the snow adding character to your card.

How to Add Snow to Your Handmade Cards

Stencils are a great way to add a snowy sky, whether you’re using designs like snowflakes, snowfall, or flurries. Applying white stencil paste through the stencil creates a textured, dimensional effect.

How to Add Snow to Your Handmade Cards

White embossing paste can be sprinkled with glitter before it dries, creating a beautiful, sparkly effect that enhances the snowy scene.

How to Add Snow to Your Handmade Cards

When I want to achieve the look of snow on greenery, such as evergreen trees or sprigs, I use various embossing powders to make the greenery look as though fresh snow has gently settled on it.

How to Add Snow to Your Handmade Cards

I hope these examples inspire you to get creative with adding snow to your cards. There are many ways to capture the magic of winter—how will you add snow to your next card?