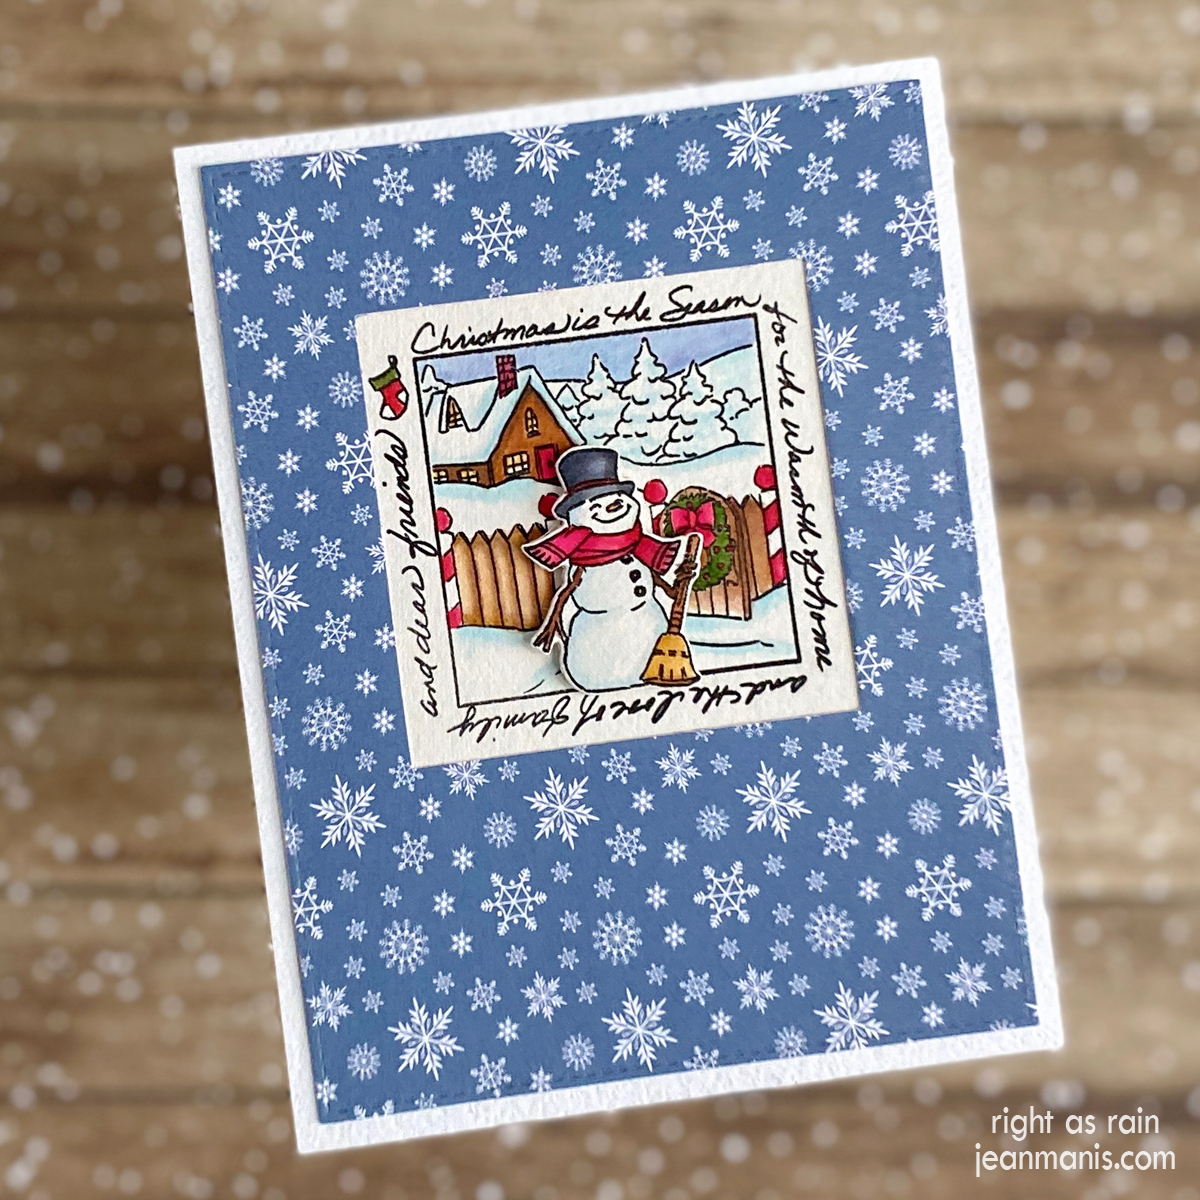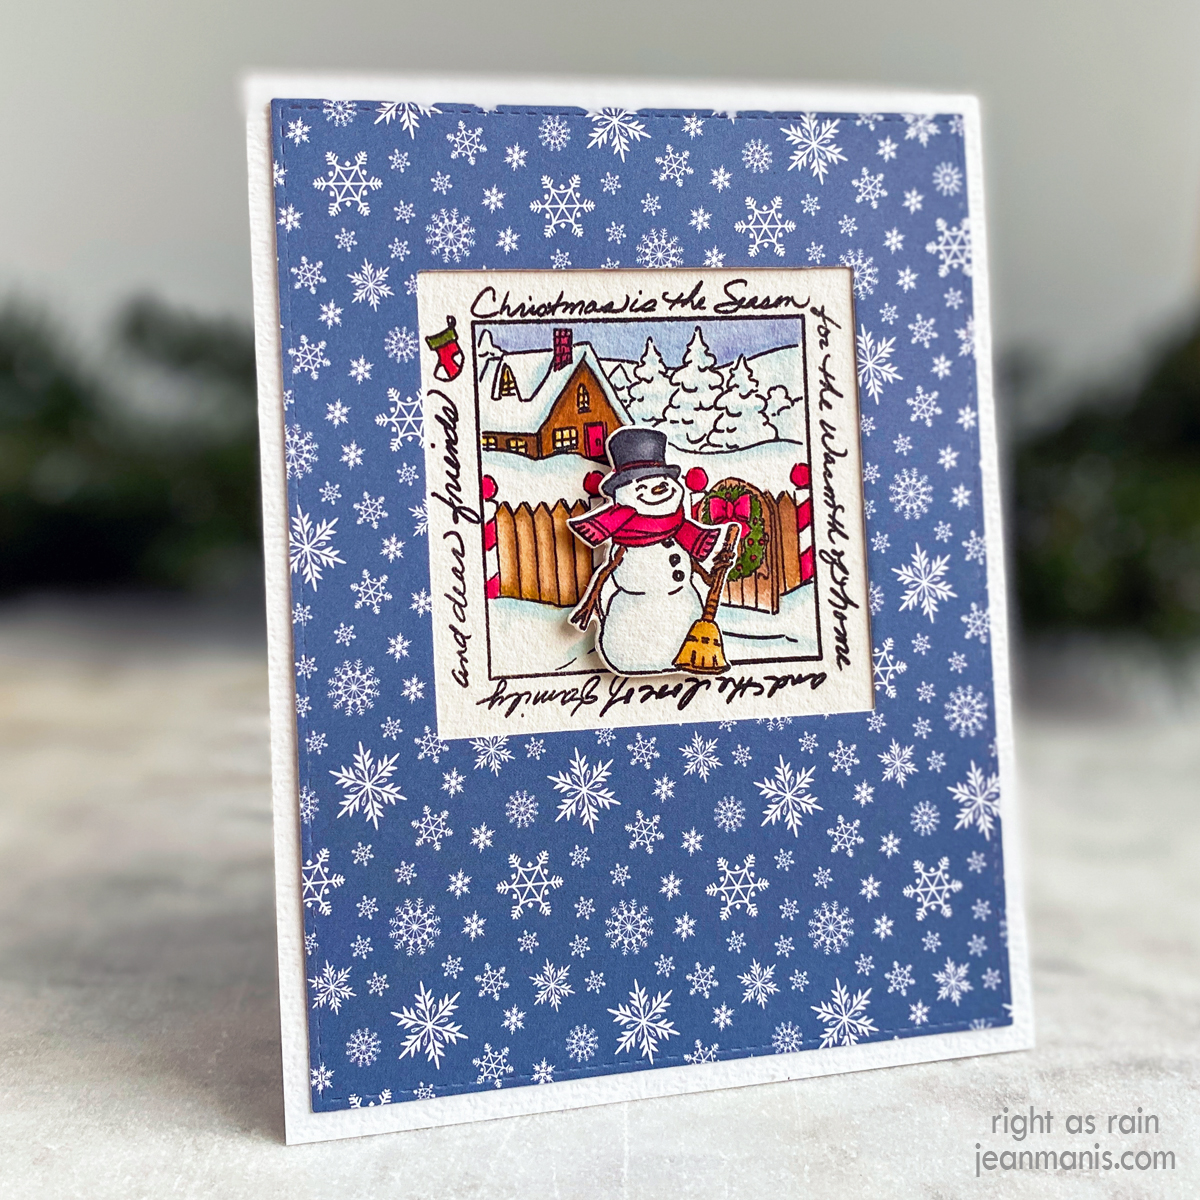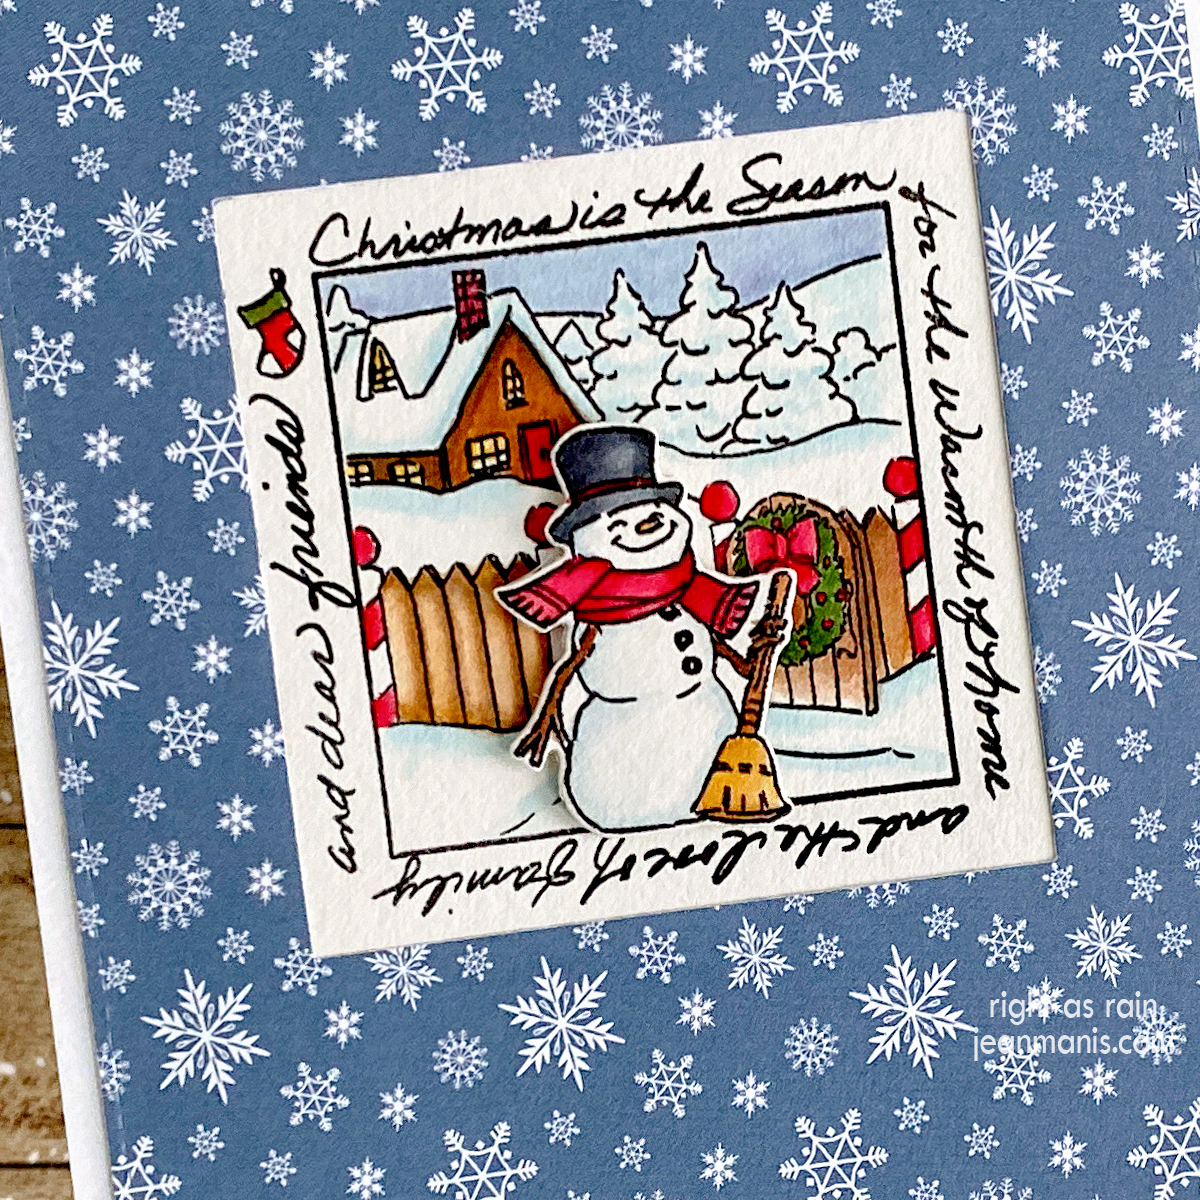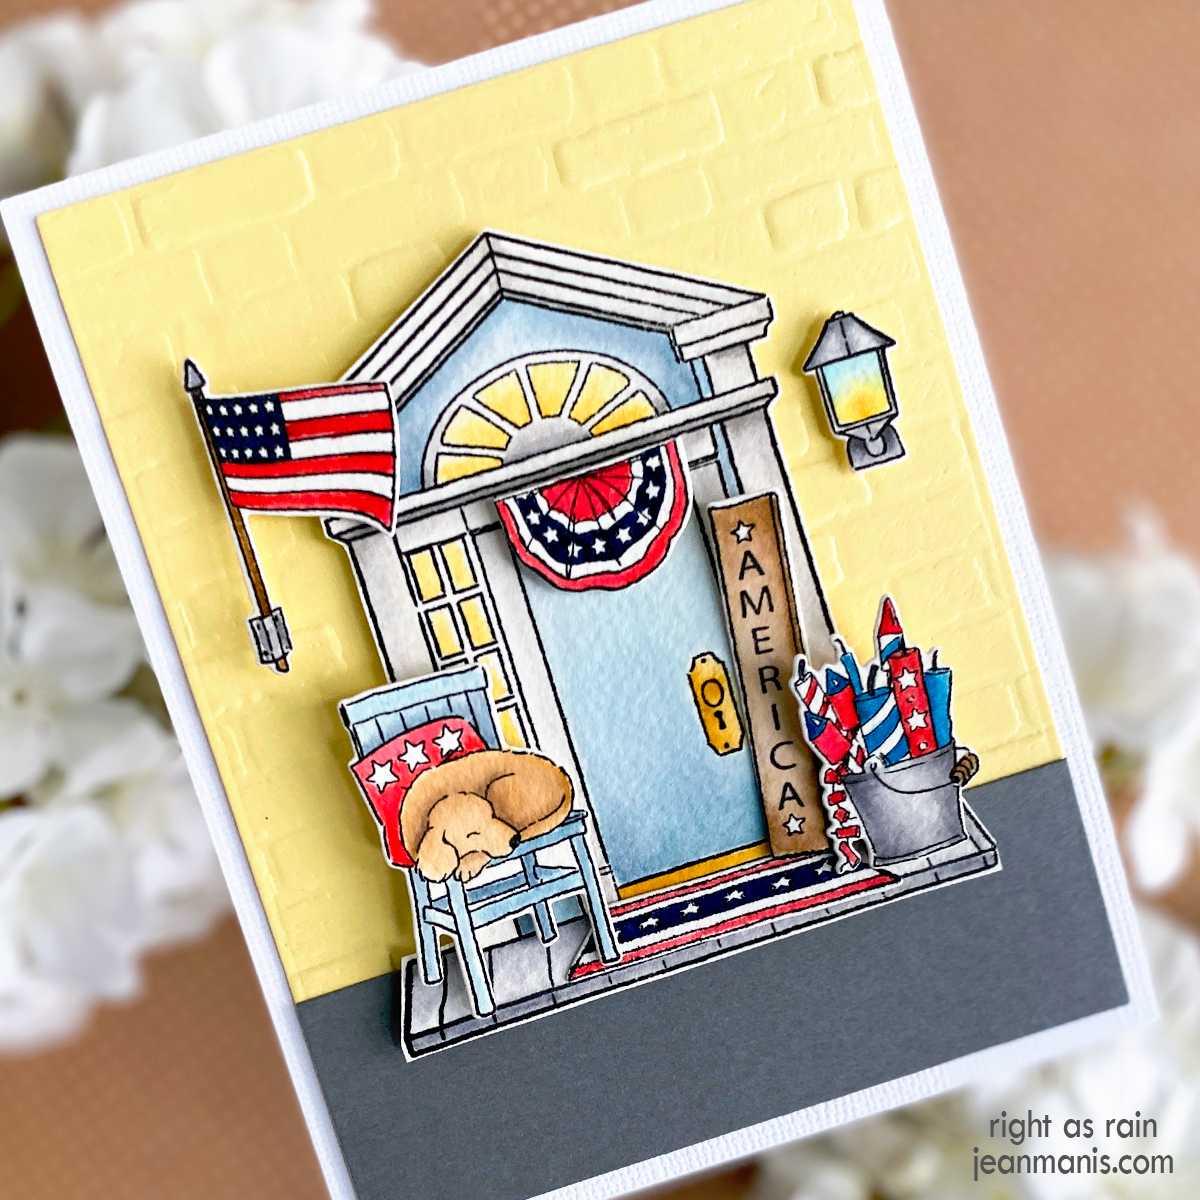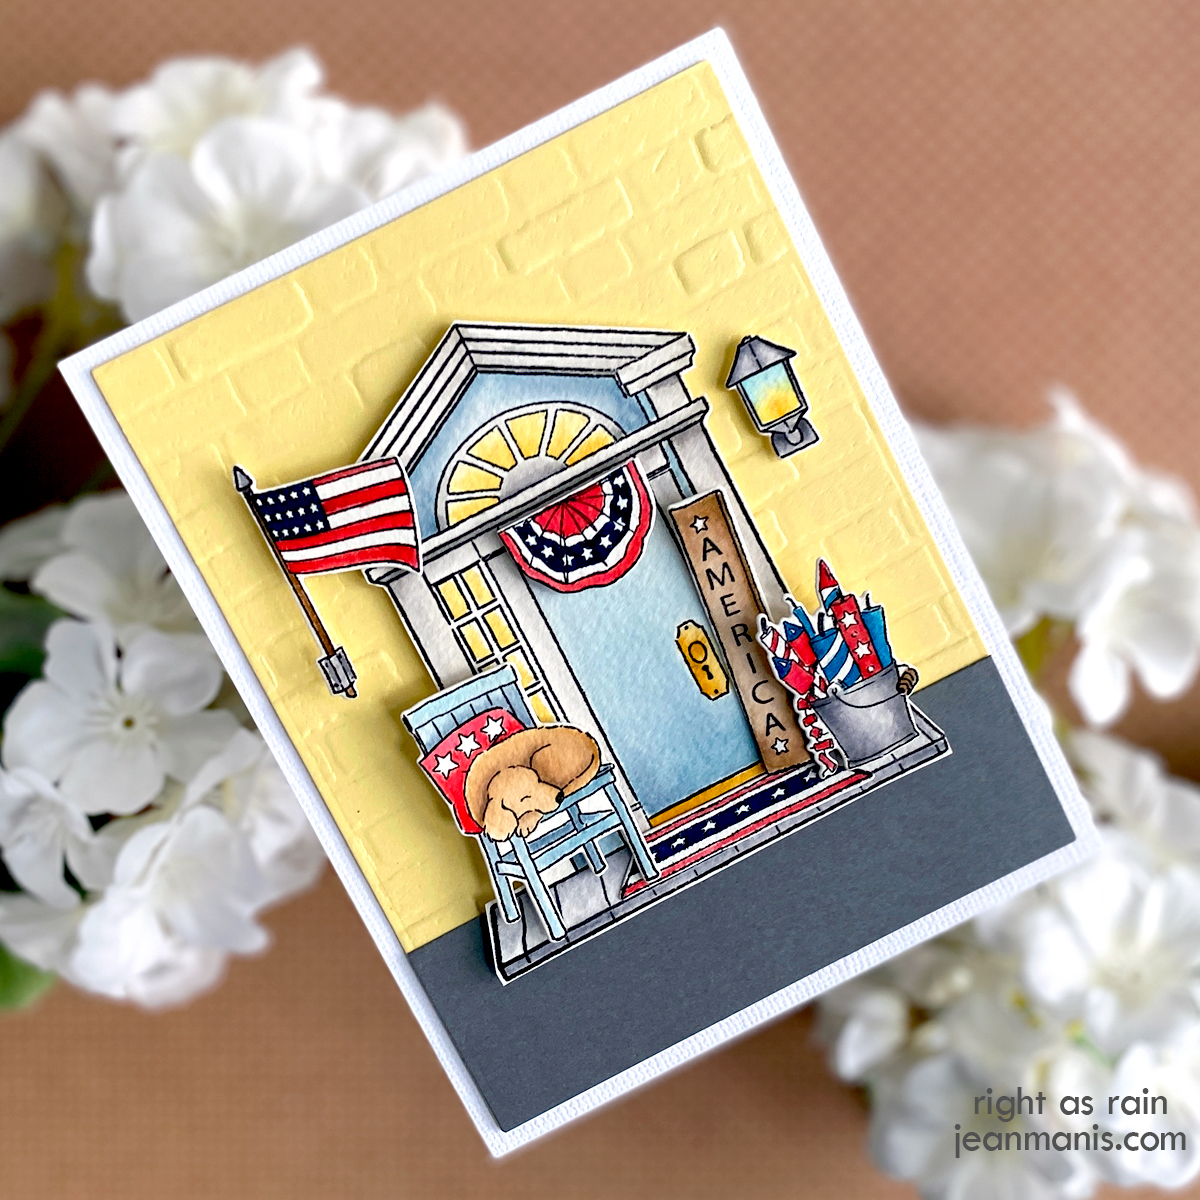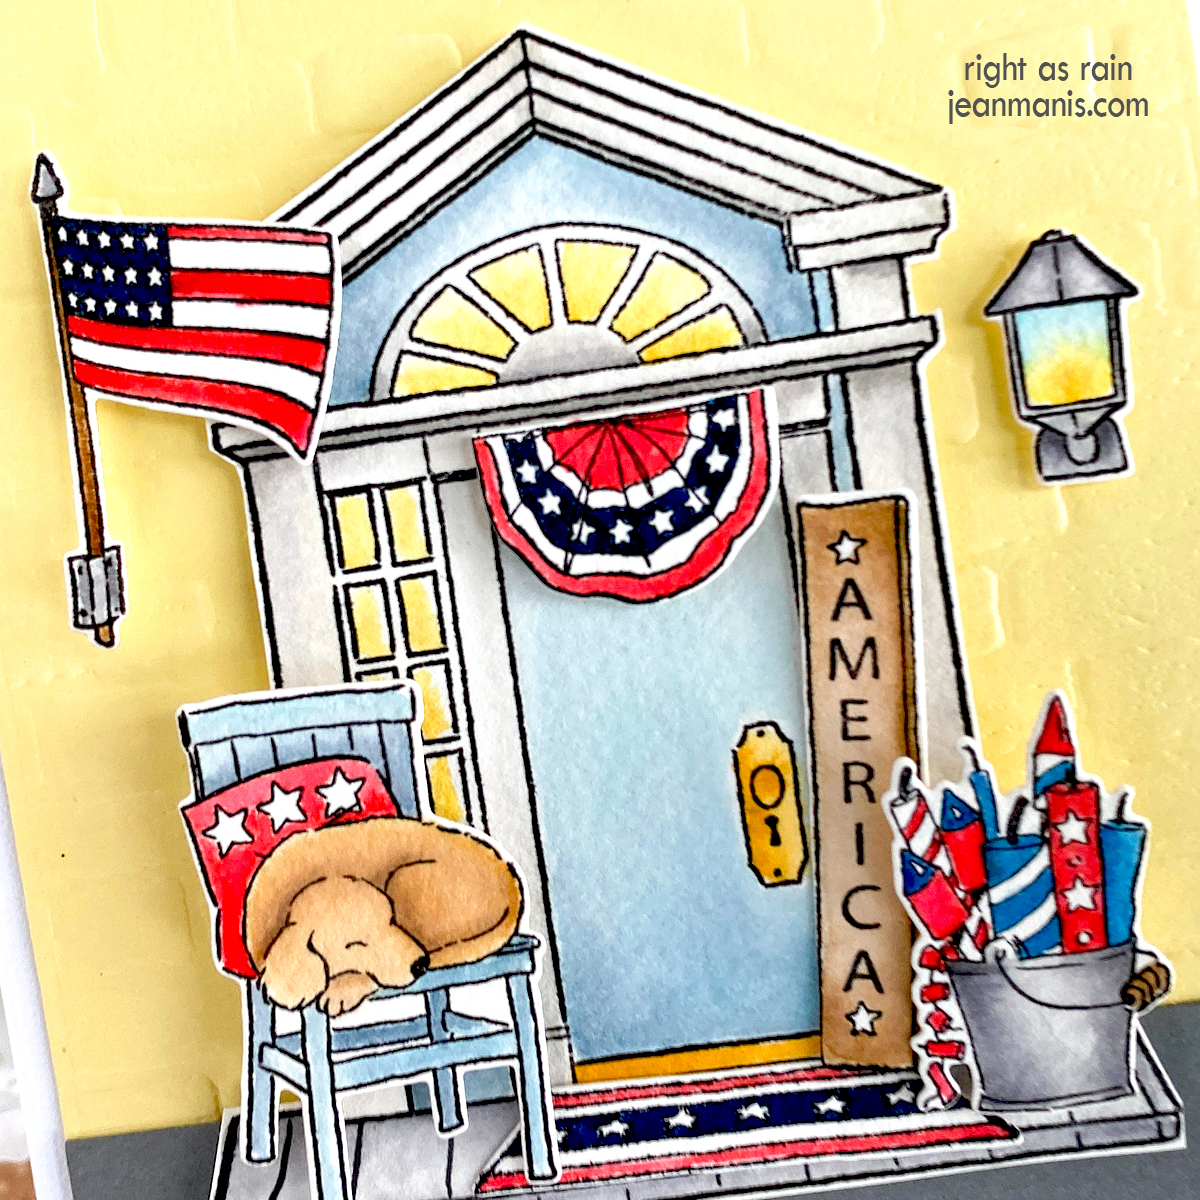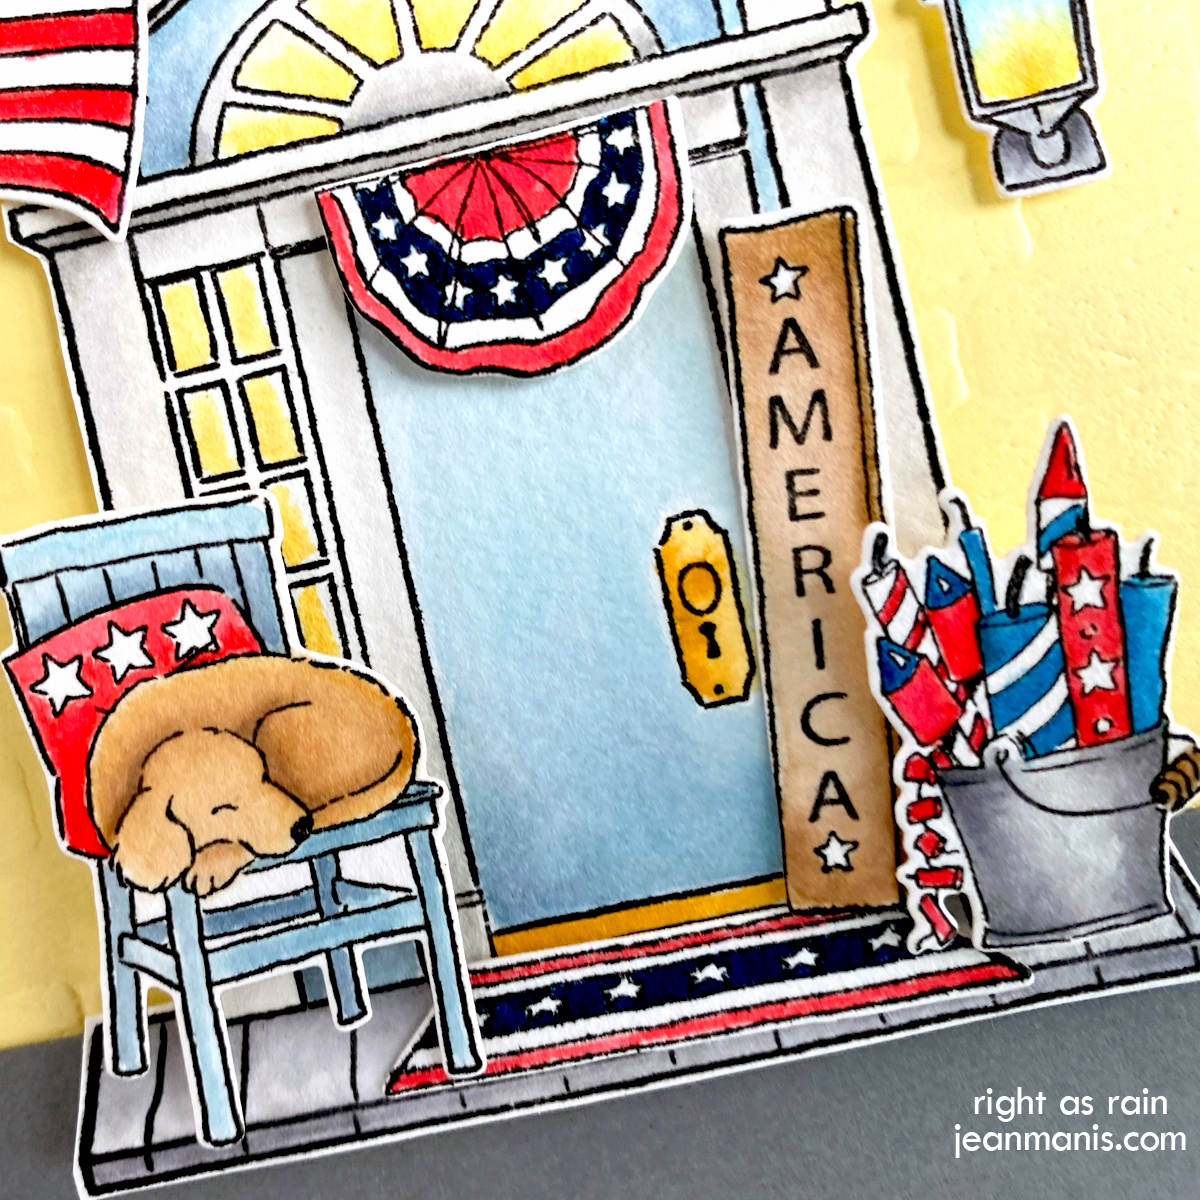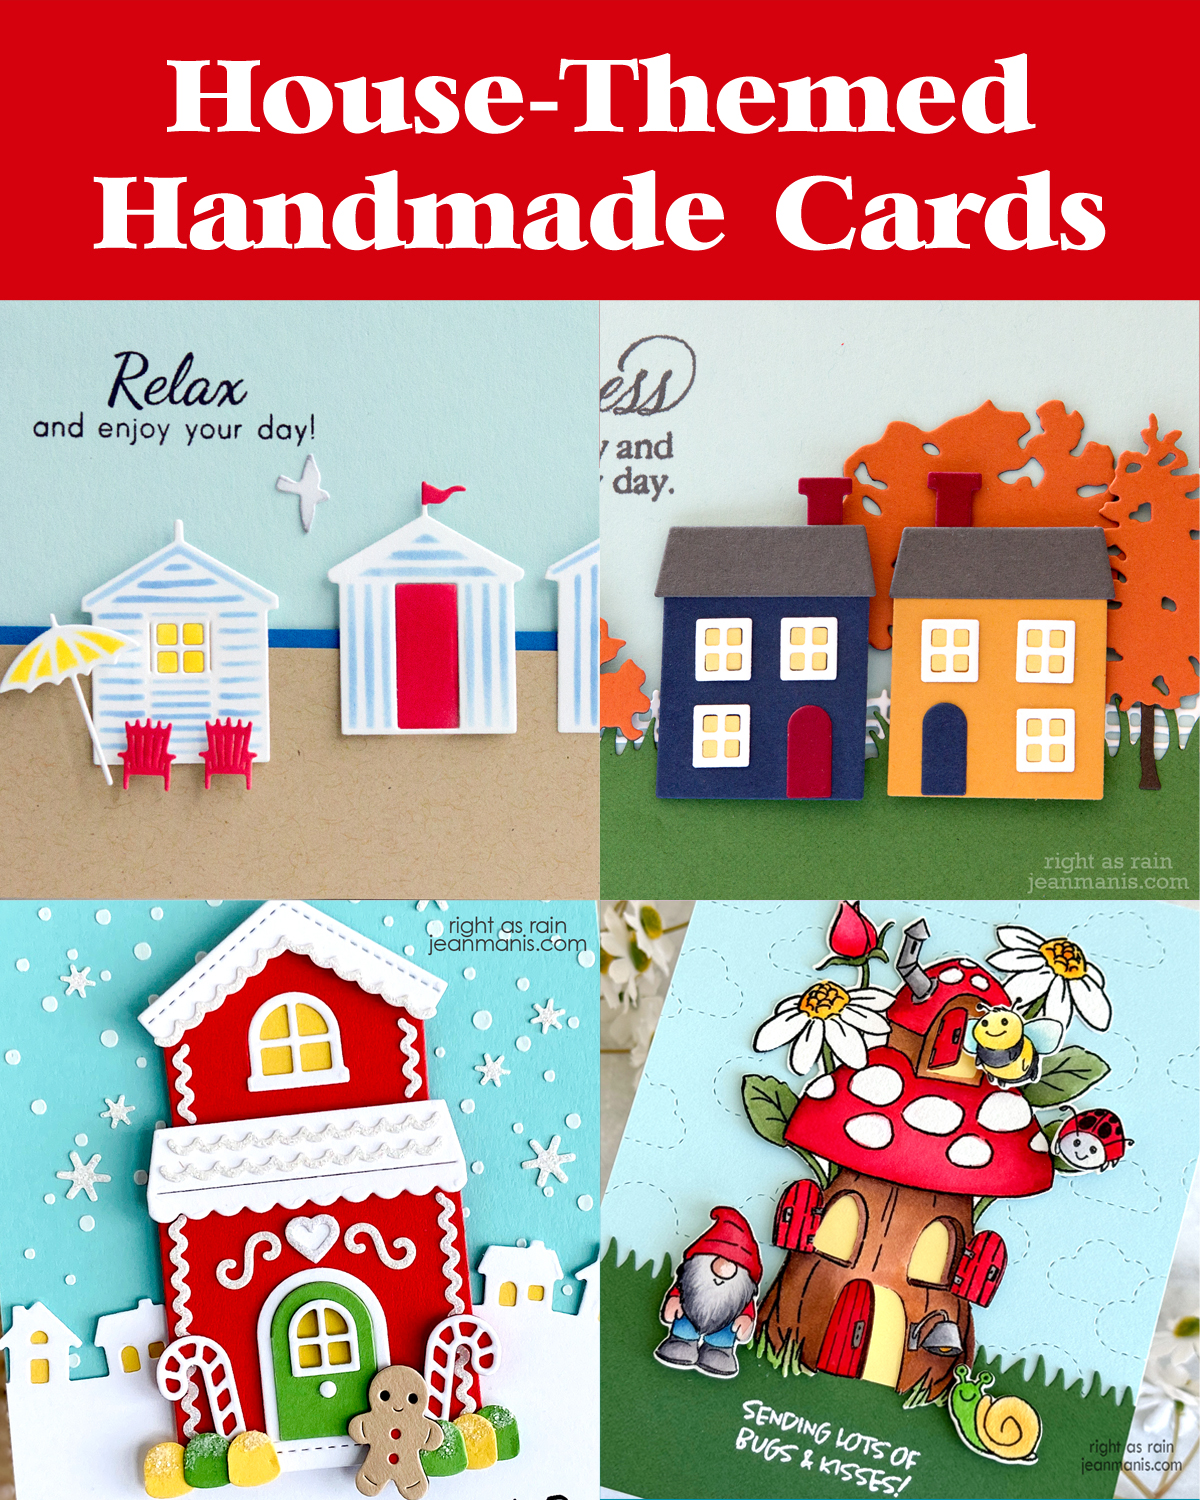
Hello! Depictions of houses on cards evoke a sense of comfort, nostalgia, and storytelling, inviting the viewer into a miniature world of charm and personality. My fascination with houses began in childhood, sparked by the illustration of the “Old Woman Who Lived in a Shoe” in Mother Goose. In this post, I’m sharing a roundup of cards from my blog archive where houses take center stage. Click on the card image to be taken to the original post for additional details.
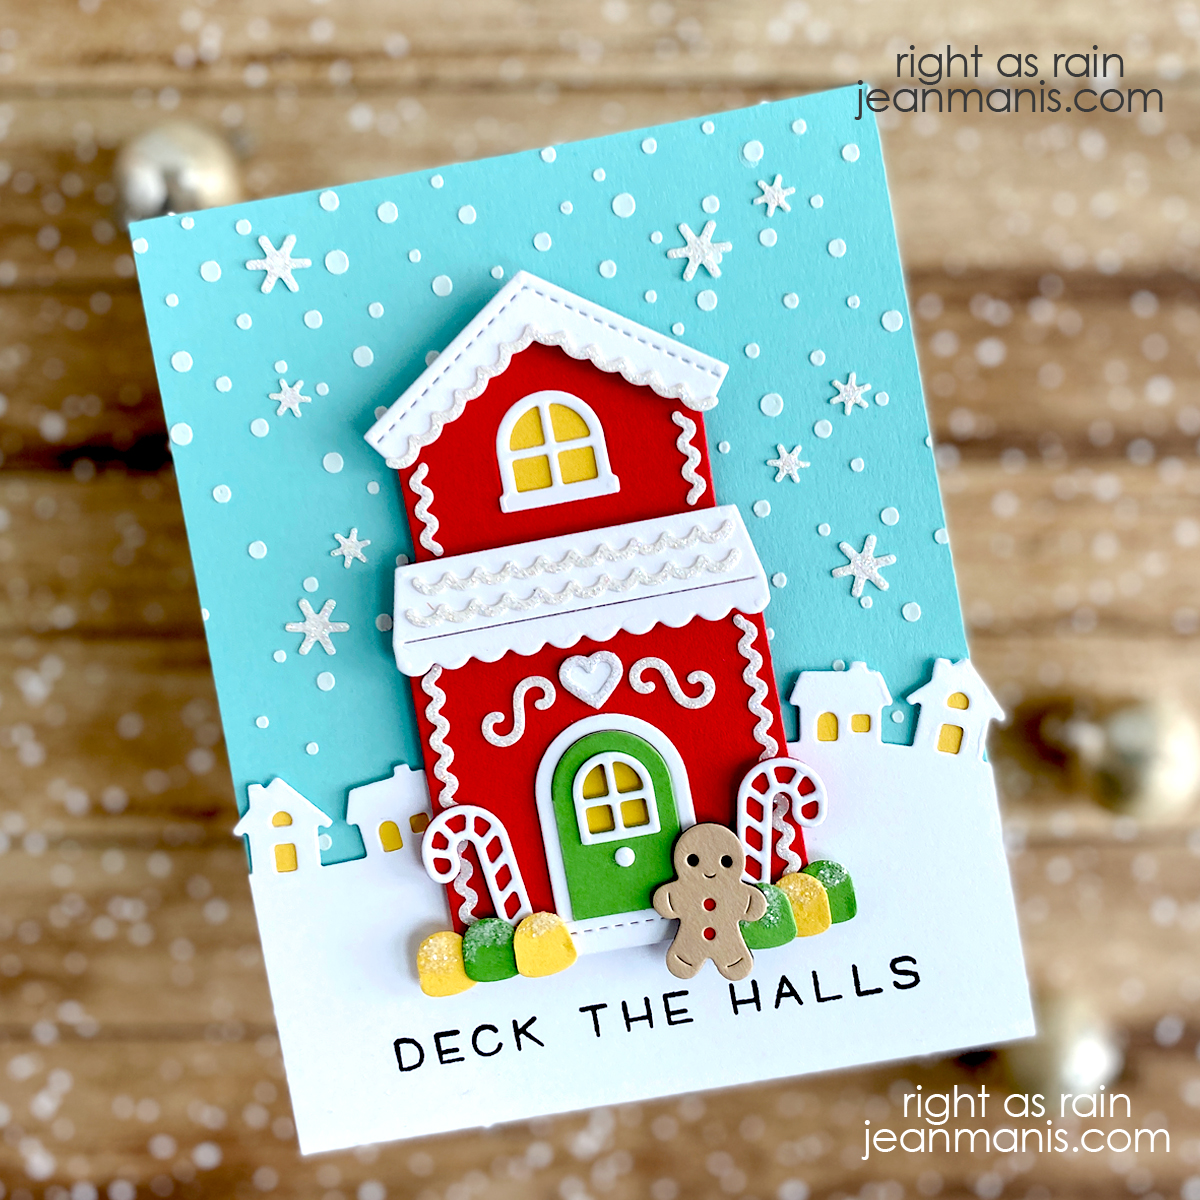
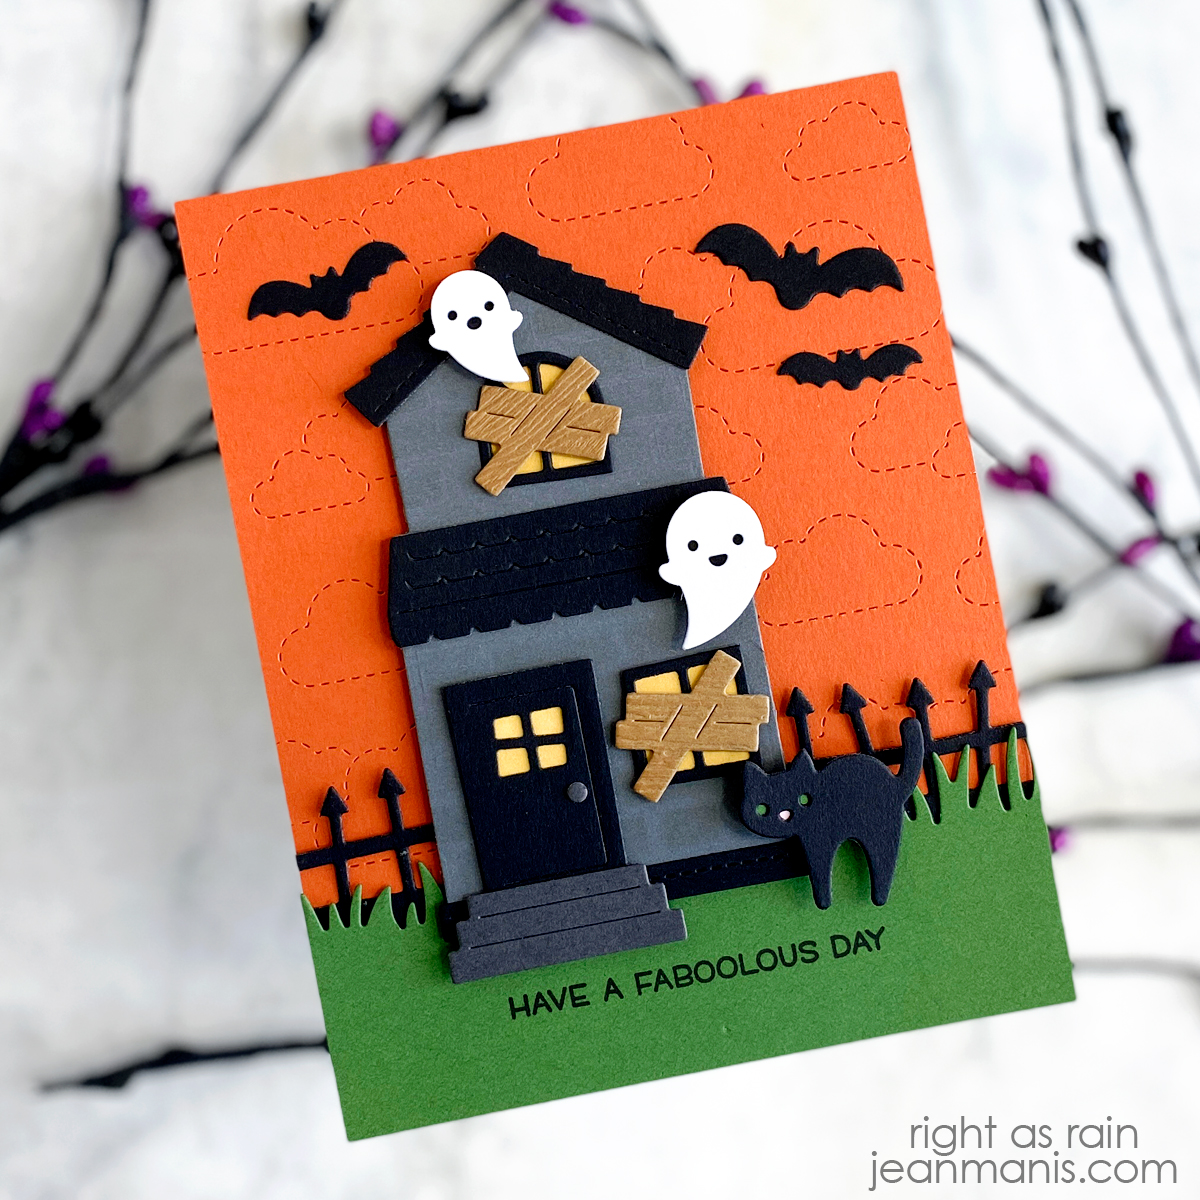
Of all the dies in my collection, I’ve used the Lawn Fawn Build-a-House die set and its add-ons more than any other. It’s perfect for crafting scenes that suit a variety of seasons and occasions, from Halloween haunts to cozy Christmas cottages.
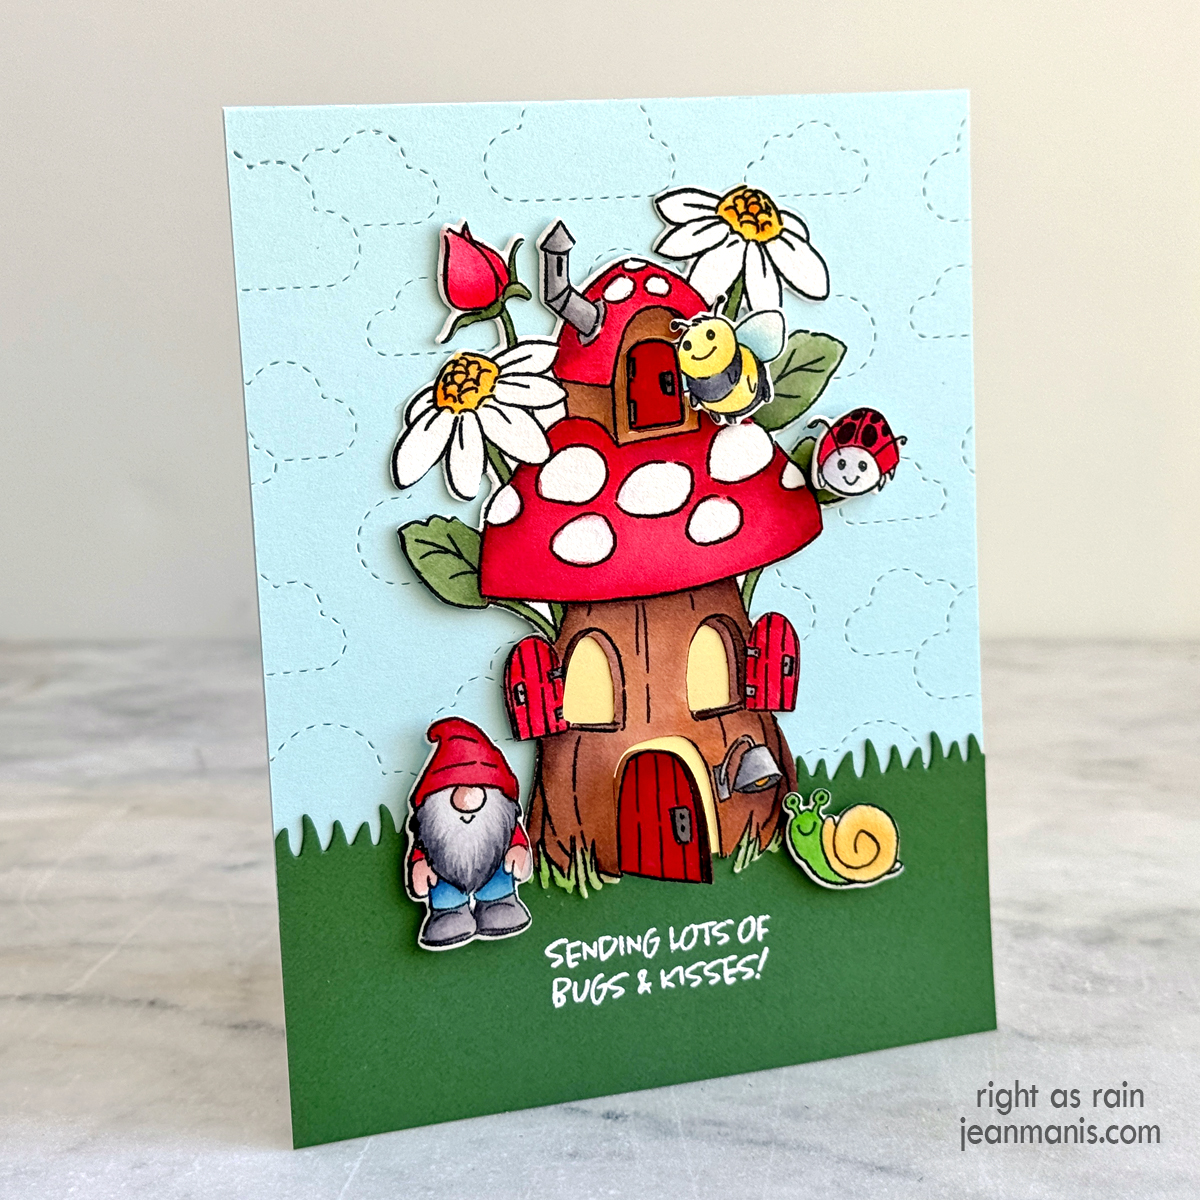
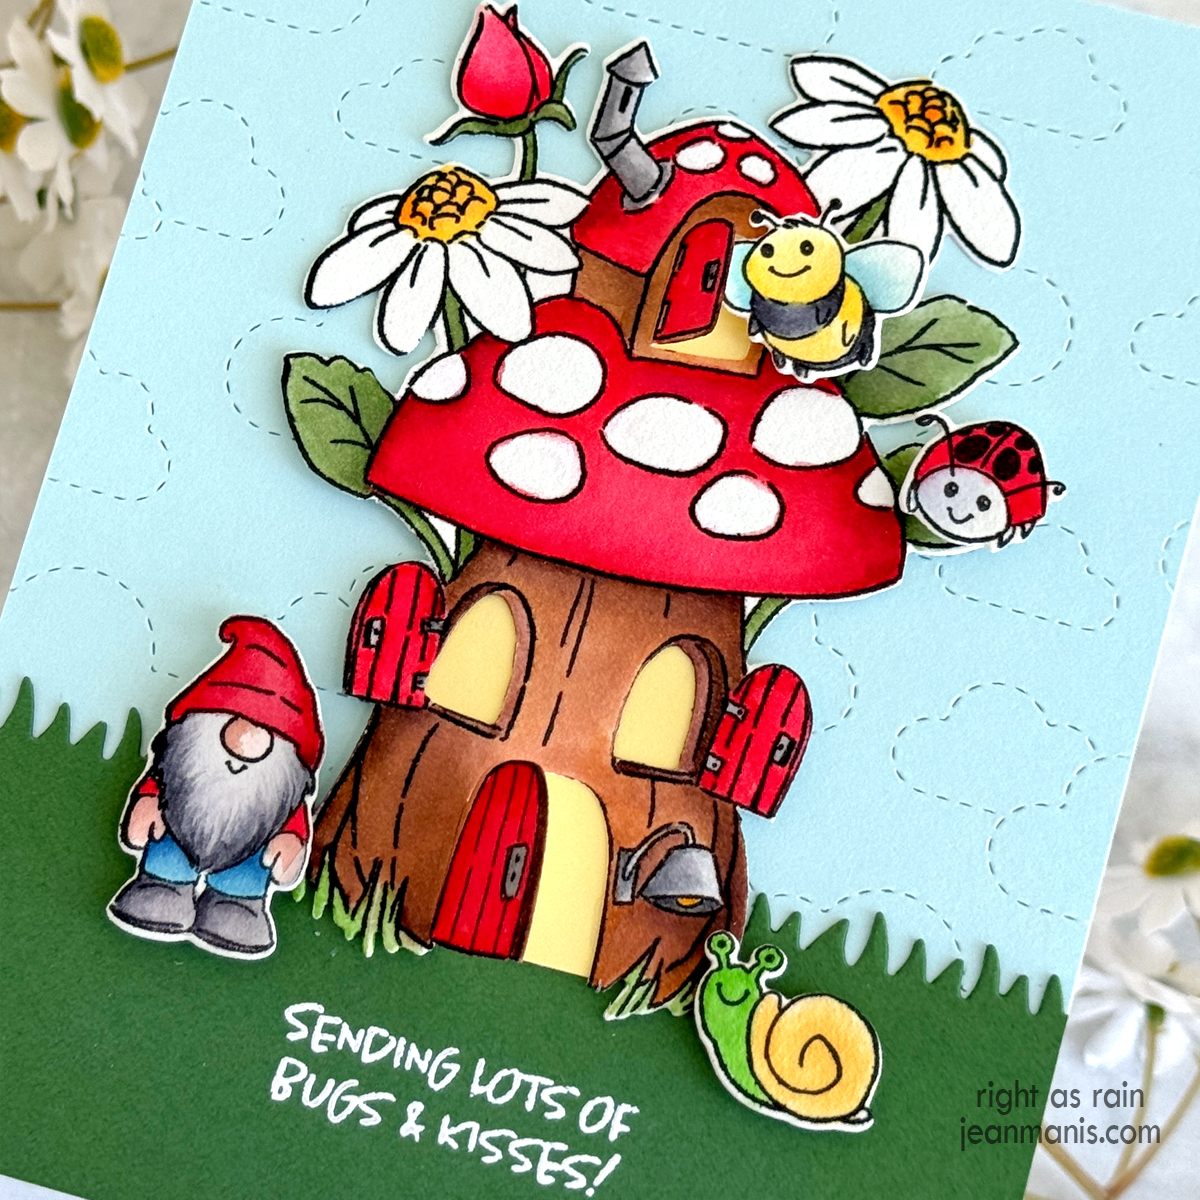
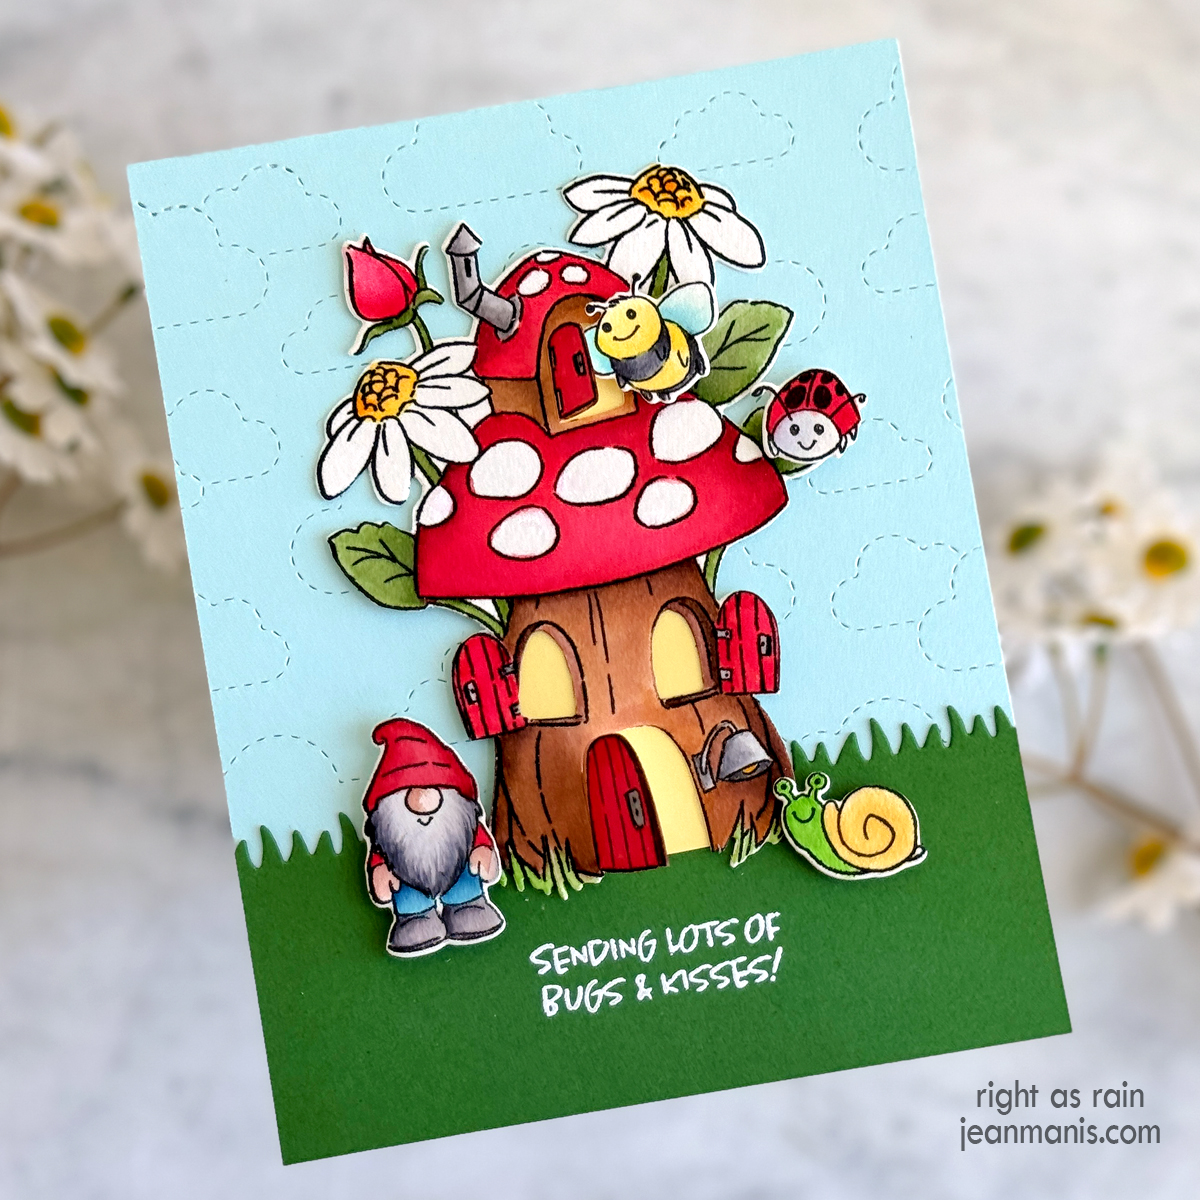
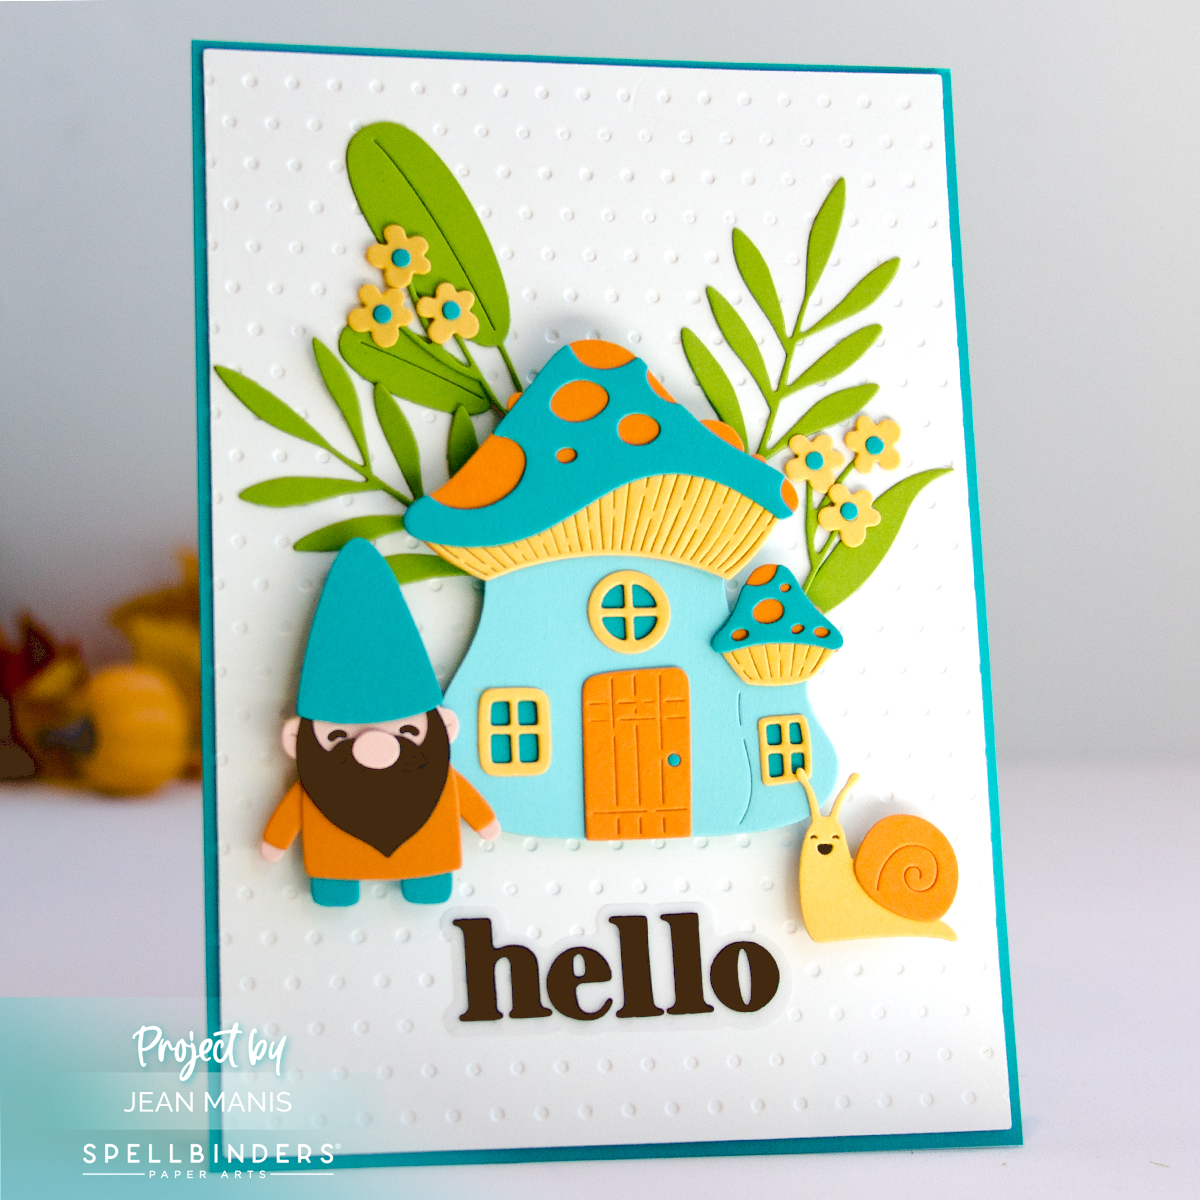
Mushroom houses bring a touch of whimsy to handmade cards. Here are two cards that showcase these charming homes: one with a stamped and watercolored design and another with a die-cut mushroom house. Both cards include playful gnomes adding to the magical and storybook-like feel of these creations.
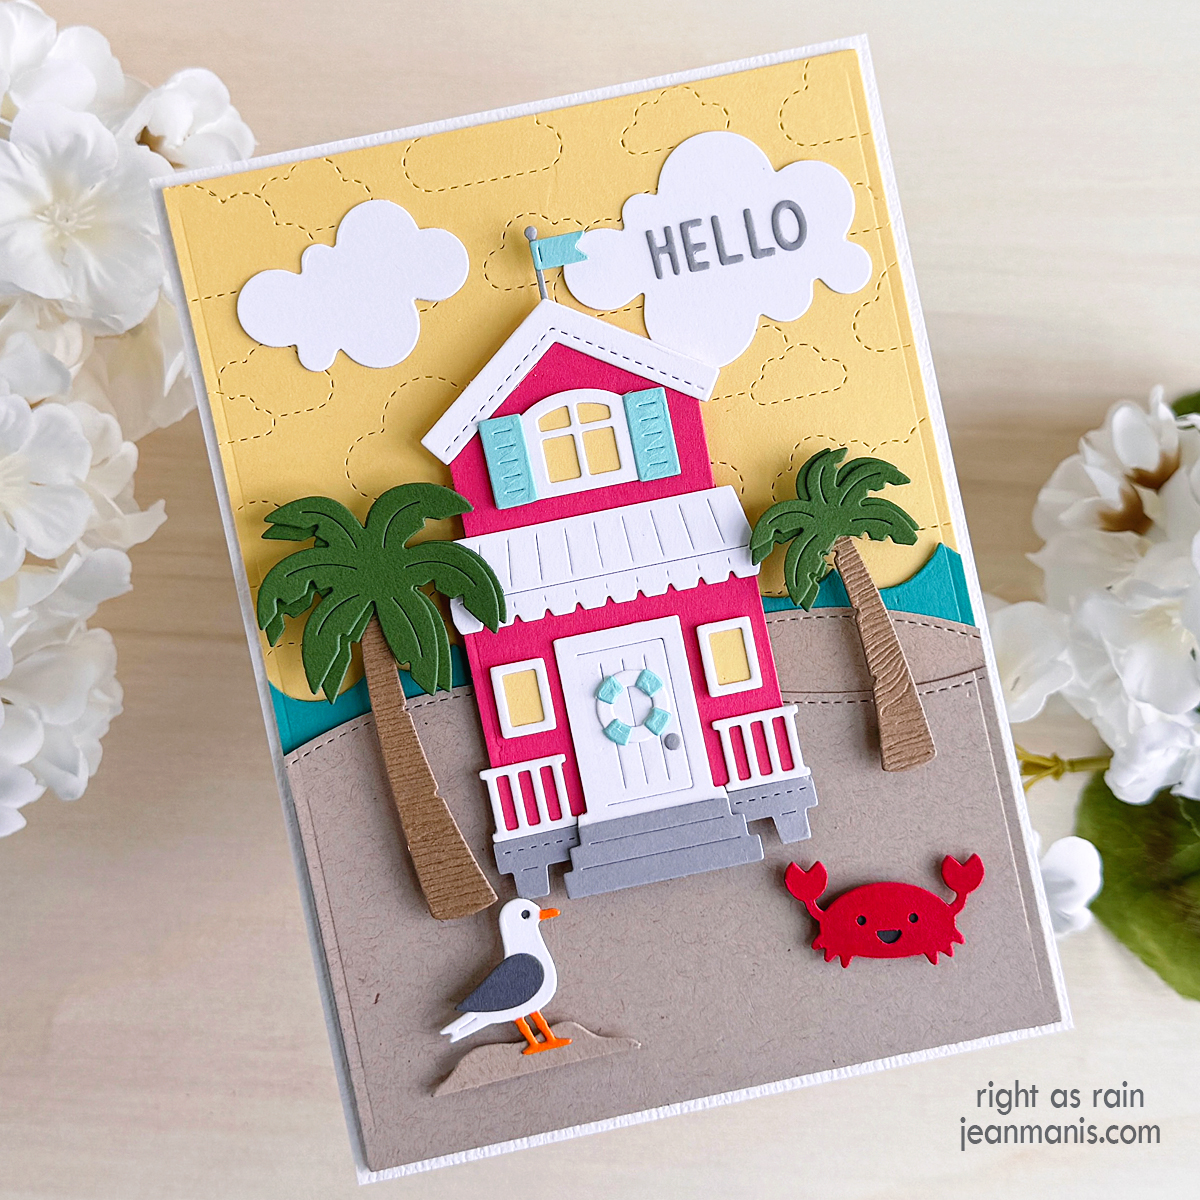
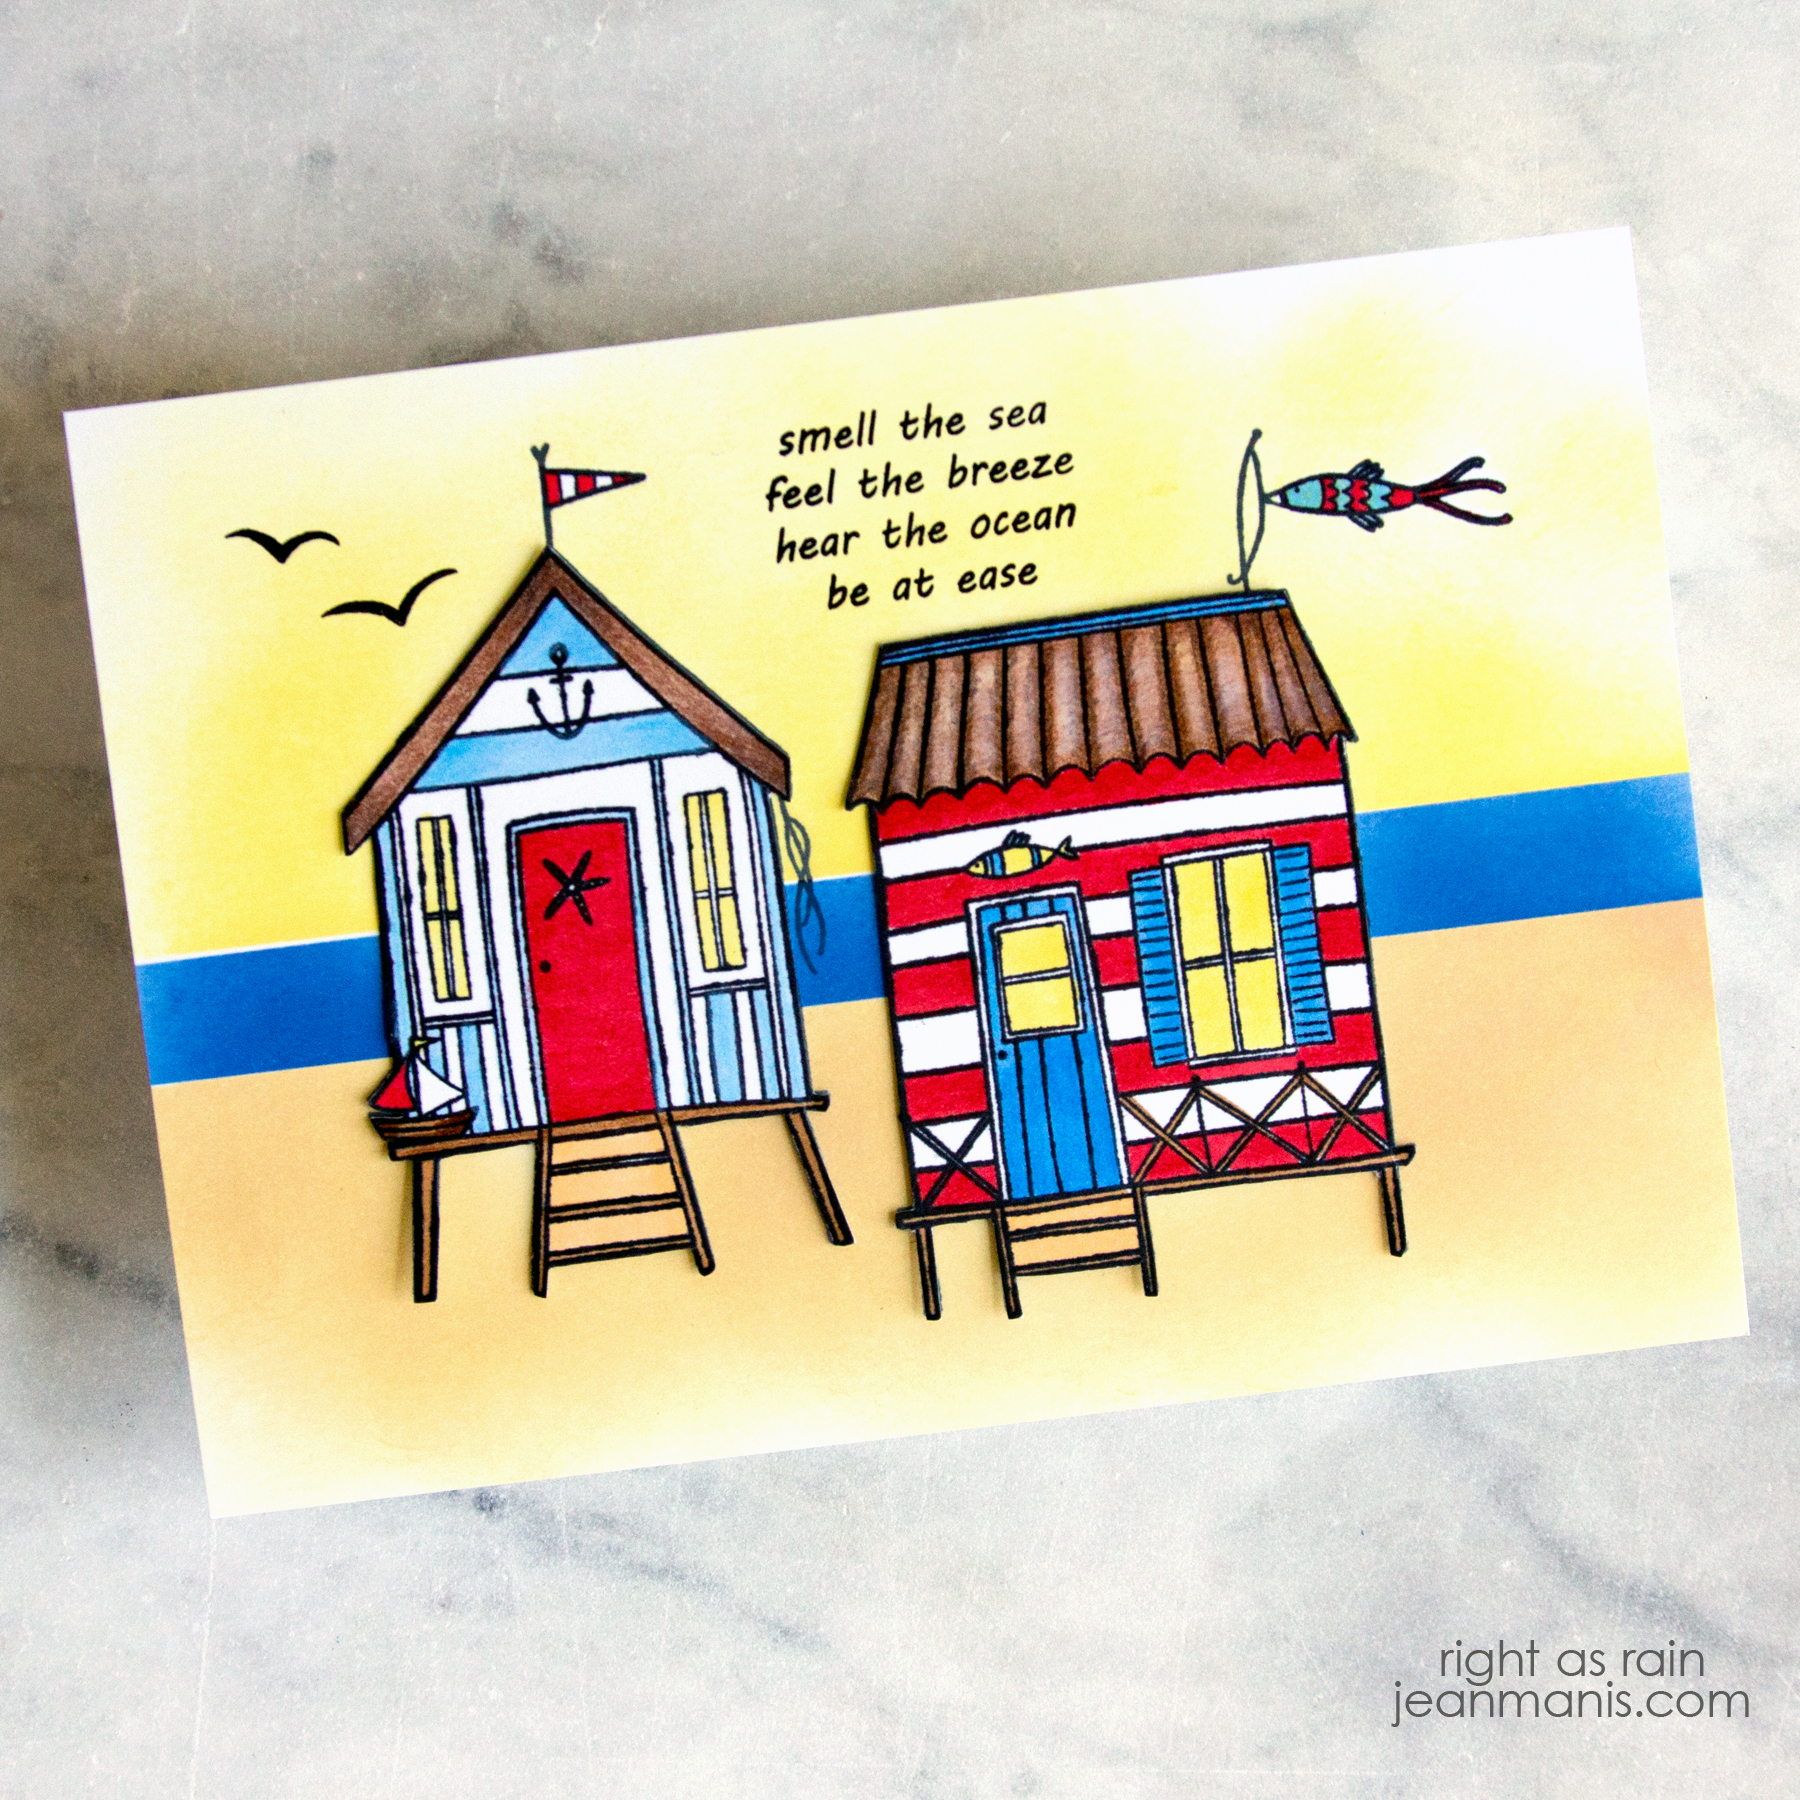
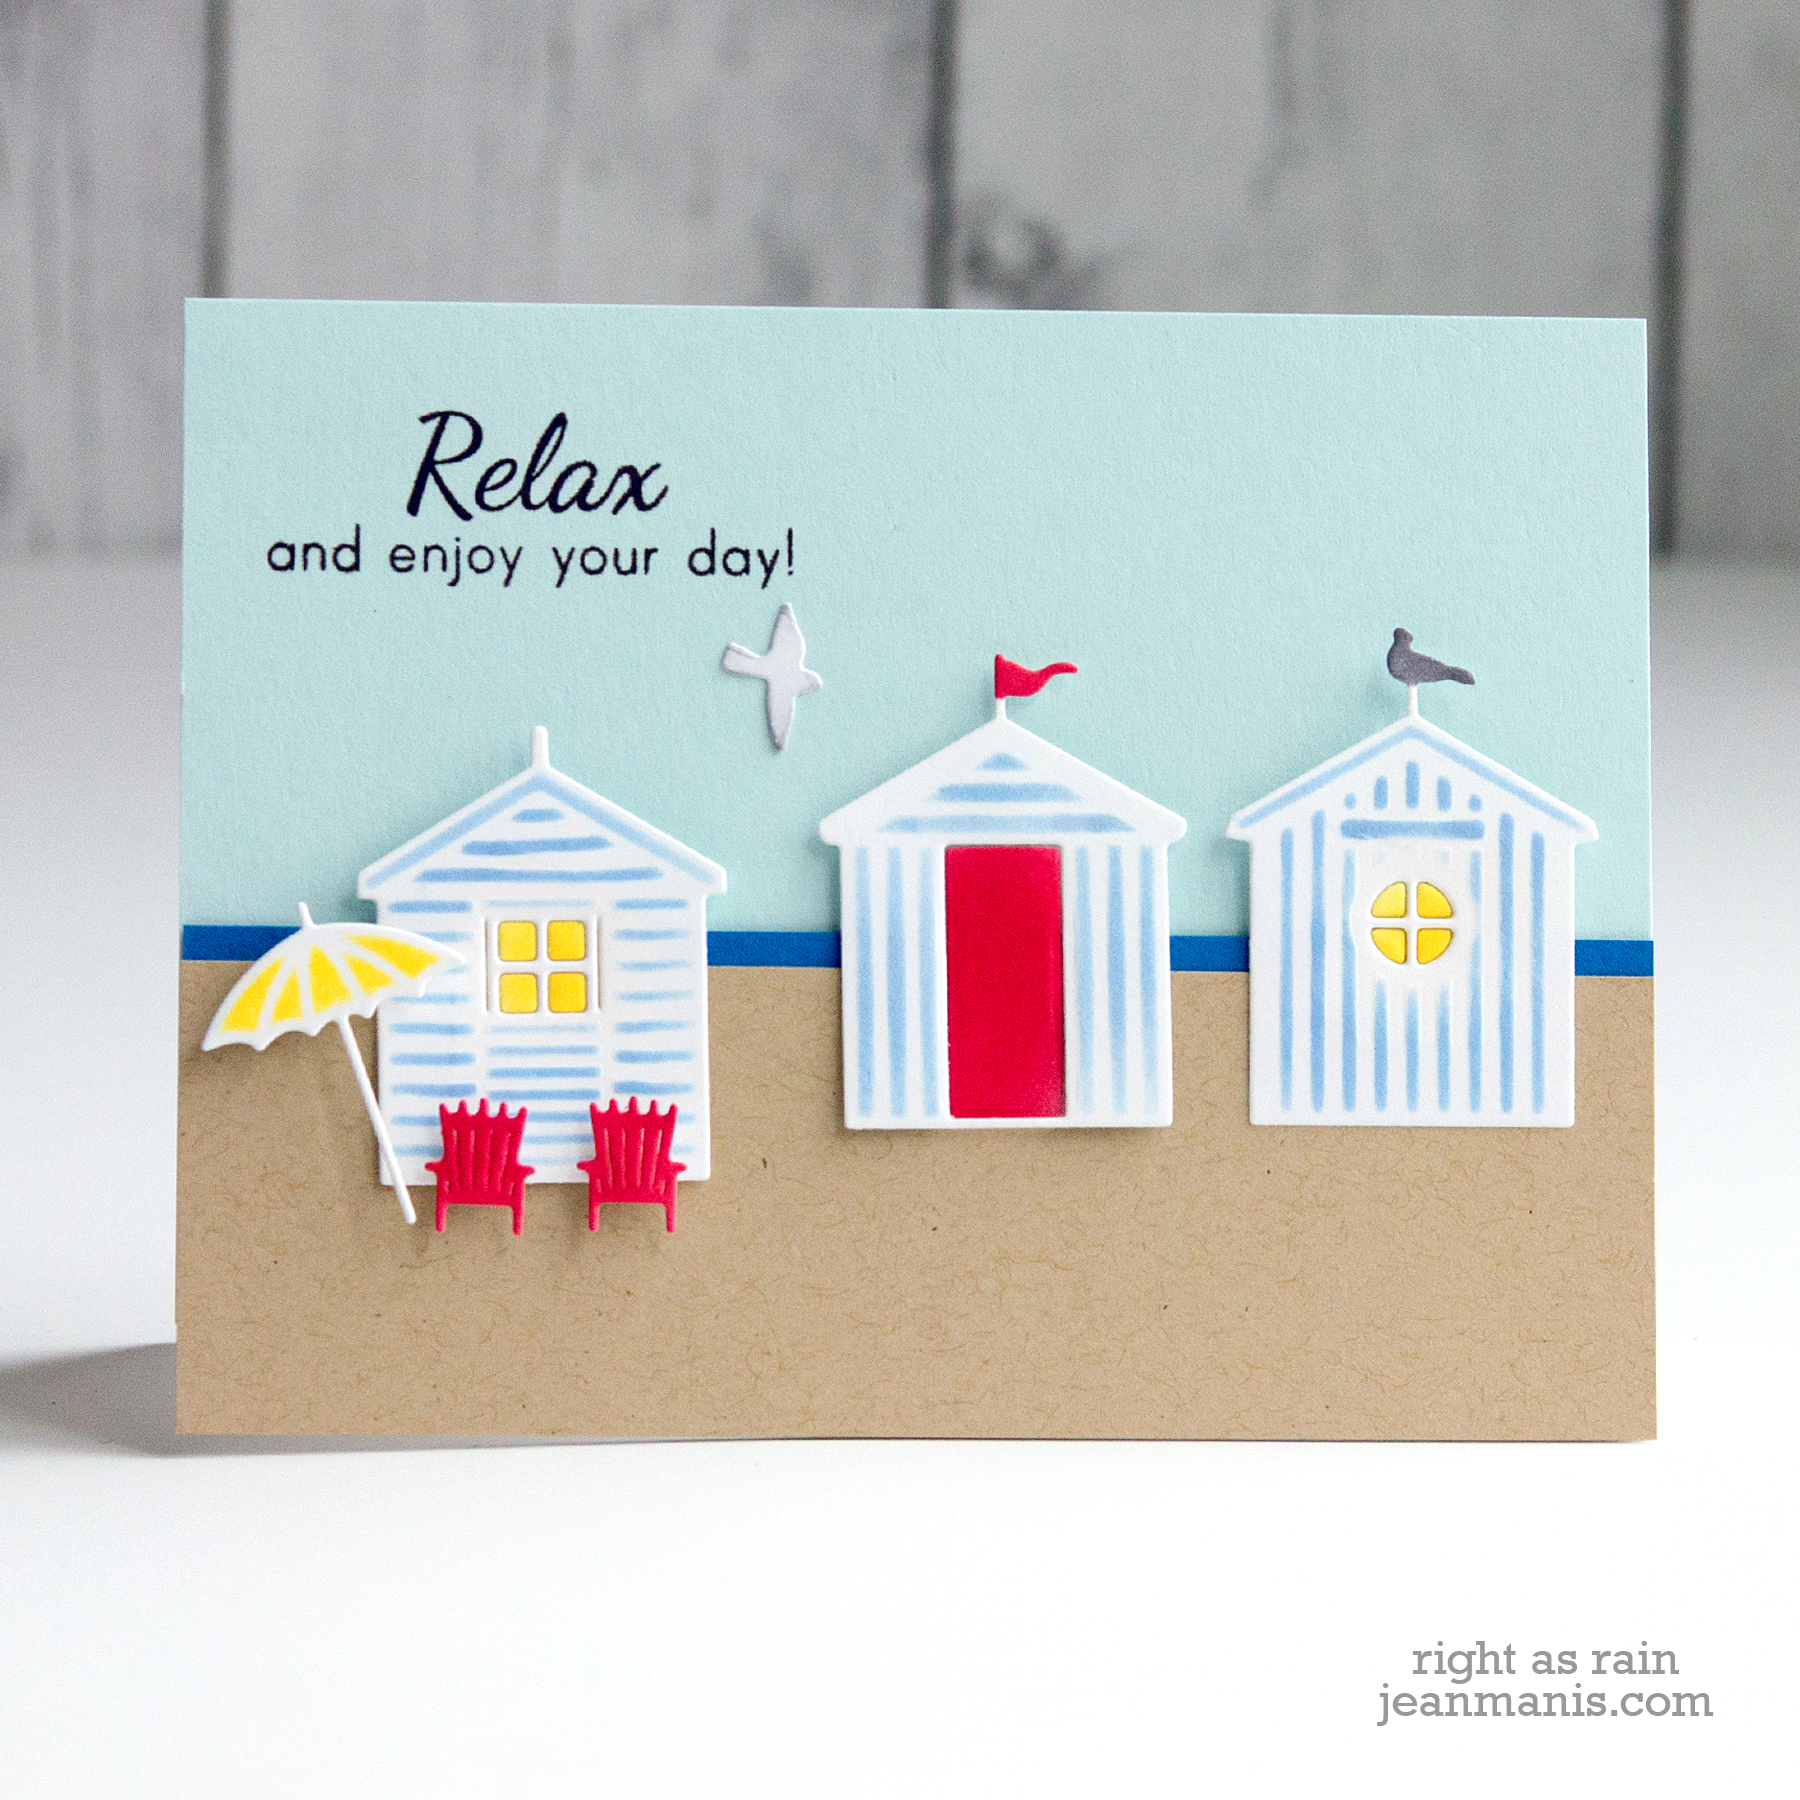
The cards below feature beach huts (day-use structures perfect for seaside relaxation). These designs are perfect for sending warm and sunny wishes, no matter the season.
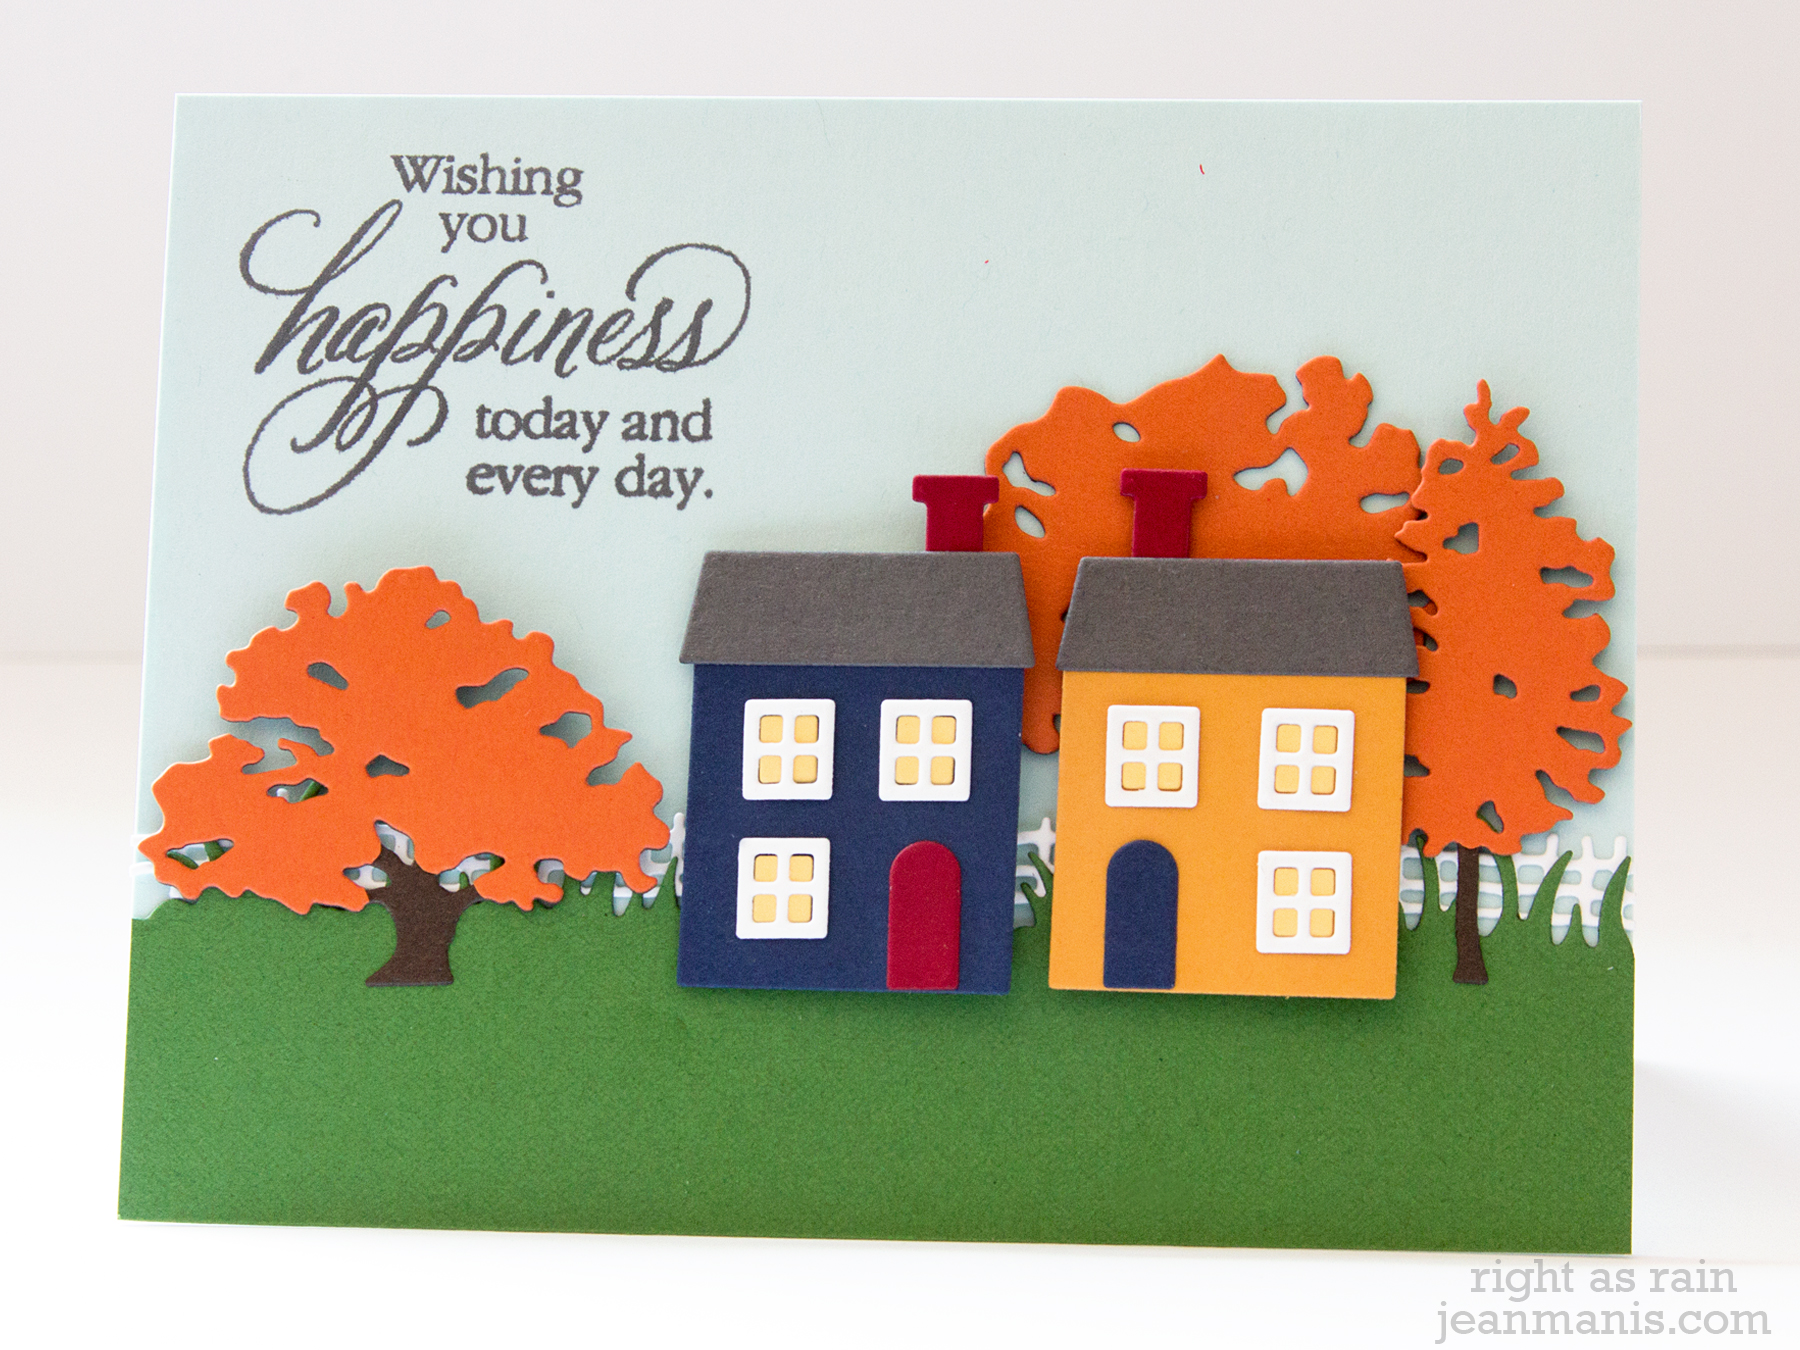
Smaller customizable house die sets offer possibilities for creating charming scenes. The card below shows two homes crafted from the same set, complete with trees and a picket fence for a picture-perfect neighborhood feel.
While I do have cards featuring birdhouses, lighthouses, dog houses, garden sheds, and garages, this roundup focuses on traditional and whimsical homes leaving the others for another time.
I hope you’ve enjoyed this roundup of house-themed cards! Revisiting these designs has inspired me to pull out my house-themed products and start creating more scenes! Do you use the house motif in your own cardmaking? What stamps and/or dies do you own that feature houses? Do you have any on your wishlist?